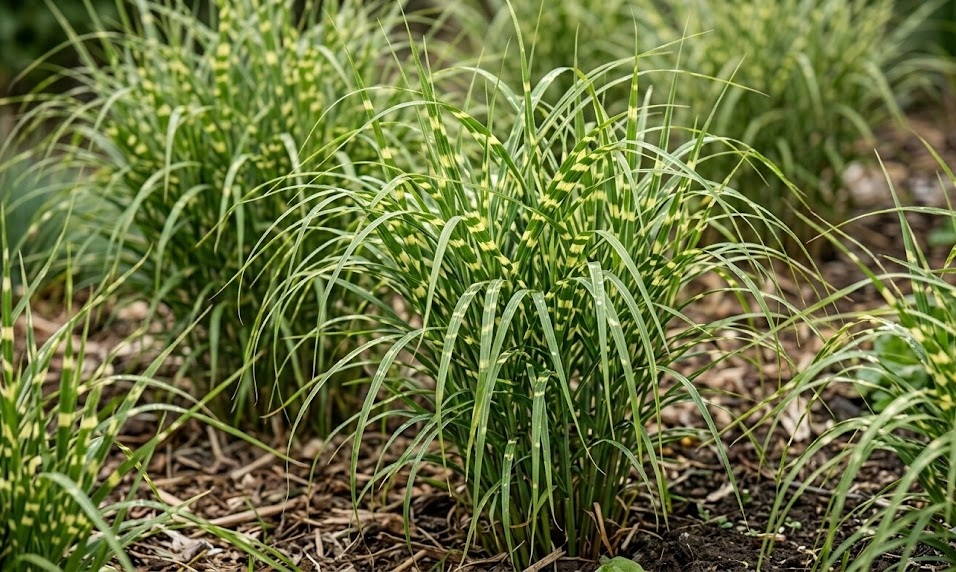
Successful planting is the first step toward enjoying the majestic presence of zebra grass in your outdoor space. This process requires more than just digging a hole; it involves understanding the plant’s biological needs from the very beginning. When you start with the right techniques, the grass establishes itself quickly and thrives. Proper propagation also allows you to expand your collection without purchasing new specimens every year.
The best time to plant zebra grass is during the mild temperatures of spring or early autumn. Planting in the spring gives the root system a full growing season to establish before the winter. If you choose to plant in the fall, make sure to do it at least six weeks before the first hard frost. This window of time is crucial for the roots to anchor themselves into the new soil.
Before you begin, you should thoroughly clear the planting site of any weeds or old roots. Competition for resources can slow down the initial growth of your new ornamental grass. Digging a hole that is twice as wide as the current root ball provides plenty of loose soil for new roots to explore. This extra effort during the preparation phase pays off with a much healthier plant.
When placing the grass into the hole, ensure that it sits at the same depth as it was in its original container. Planting it too deep can lead to crown rot, while planting it too shallow can cause the roots to dry out. Once the plant is in position, fill the space around it with a mix of native soil and compost. Gently firm the soil with your hands to remove any large air pockets.
Planting steps for optimal growth
After the plant is in the ground, immediate watering is the most important task to complete. This initial deep soak helps to settle the soil around the roots and eliminates any remaining air gaps. You should apply water slowly so that it penetrates deep into the earth rather than running off the surface. A well-hydrated plant recovers much faster from the stress of being moved.
More articles on this topic
Applying a layer of mulch around the base of the newly planted grass is highly recommended. This mulch helps to maintain a consistent moisture level in the soil during the critical first few weeks. It also acts as a barrier against extreme temperature fluctuations that can shock young root systems. Make sure the mulch does not directly touch the green stems to prevent moisture-related rot.
During the first growing season, you must monitor the moisture levels in the soil very closely. Young zebra grass does not yet have the deep root system required to survive long periods of drought. Depending on the weather, you might need to water it two or three times a week. Once the plant is established, it will become much more resilient and require less frequent attention.
If you are planting multiple grasses to create a hedge or screen, pay close attention to the distance between them. Spacing them about one and a half meters apart is generally ideal for a continuous look. This allows the plants to touch when fully grown without becoming overly crowded. A little planning now prevents the need for difficult transplanting tasks in the future.
Division techniques for propagation
Propagation of zebra grass is most effectively achieved through the process of division in the early spring. This involves digging up an established clump and cutting it into smaller, manageable sections. Spring is ideal because the plant is just waking up and has maximum energy for root growth. You should look for a plant that is at least three or four years old before attempting this.
More articles on this topic
To start the division, use a sharp spade to dig a circle around the perimeter of the grass. Gently lift the entire root mass out of the ground, taking care to preserve as many roots as possible. For very large clumps, you might need the help of another person or a sturdy garden fork. Once the plant is out, you can see the natural points where it can be separated.
Use a heavy-duty knife or a sharpened spade to cut the clump into three or four smaller pieces. Each new section must have a healthy portion of the root system and several active growth buds. If the center of the original plant is dead or woody, discard that part and only use the vigorous outer sections. This ensures that your new plants will be strong and productive.
After dividing the grass, replant the new sections immediately so that the roots do not dry out. Follow the same planting steps as you would for a new nursery-bought specimen. If you cannot plant them right away, keep the divisions in a shaded area and cover the roots with damp burlap. The quicker they get back into the ground, the higher the success rate will be.
Timing and environmental factors
The internal clock of the plant is heavily influenced by the temperature of the soil and the surrounding air. In the spring, wait until the soil has warmed up slightly before you begin the planting or division process. If the ground is still frozen or excessively muddy, the roots will struggle to start their new growth. Patience in the early spring often leads to better results than rushing the process.
Humidity also plays a subtle role in how well a newly planted grass survives the initial transition. On very dry or windy days, the plant loses moisture through its leaves faster than the roots can provide it. If possible, choose a cloudy or calm day for your planting activities to minimize this environmental stress. This simple choice can reduce the amount of transplant shock the plant experiences.
Local weather patterns should always guide your decision on when to move or plant your ornamental grasses. If a heatwave is forecasted, it is better to wait for a cooler period before disturbing the root system. Extreme heat can be very taxing on a plant that is trying to establish itself in a new location. Consistency in the environment is the friend of any newly propagated perennial.
Finally, consider the long-term sun exposure of the planting site throughout the entire year. A spot that seems sunny in the spring might be shaded by nearby trees once they fully leaf out. Zebra grass needs significant light to produce its characteristic patterns and strong stems. Always look up and around to ensure the site will remain suitable for the plant’s entire lifecycle.
Establishing the young plant
The first month after planting is the most critical time for the long-term health of the grass. You should check the plant daily to ensure it is not showing signs of wilt or severe leaf browning. While some minor yellowing of the outer leaves is normal, the center should remain firm and green. This period of observation allows you to catch any problems before they become fatal.
If you notice that the plant is sinking into the ground after watering, you may need to add more soil. Heavy watering can sometimes cause the loose soil in the planting hole to compress more than expected. Maintaining the correct crown height is essential for preventing rot and ensuring proper stem emergence. A level surface also makes future mulching and weeding much easier tasks.
Avoid the temptation to use heavy fertilizers on a newly planted or divided zebra grass. The plant needs to focus its energy on developing a strong root system rather than rapid top growth. A small amount of organic compost mixed into the planting hole is usually all the nutrition it needs initially. Wait until the following spring to begin a regular fertilization schedule if your soil is poor.
Once you see new green growth emerging from the center of the plant, you know it has successfully established. This is a very rewarding moment for any gardener who has put effort into the planting process. You can then gradually reduce the frequency of watering as the roots dive deeper into the earth. Your zebra grass is now ready to become a beautiful and permanent part of your landscape.