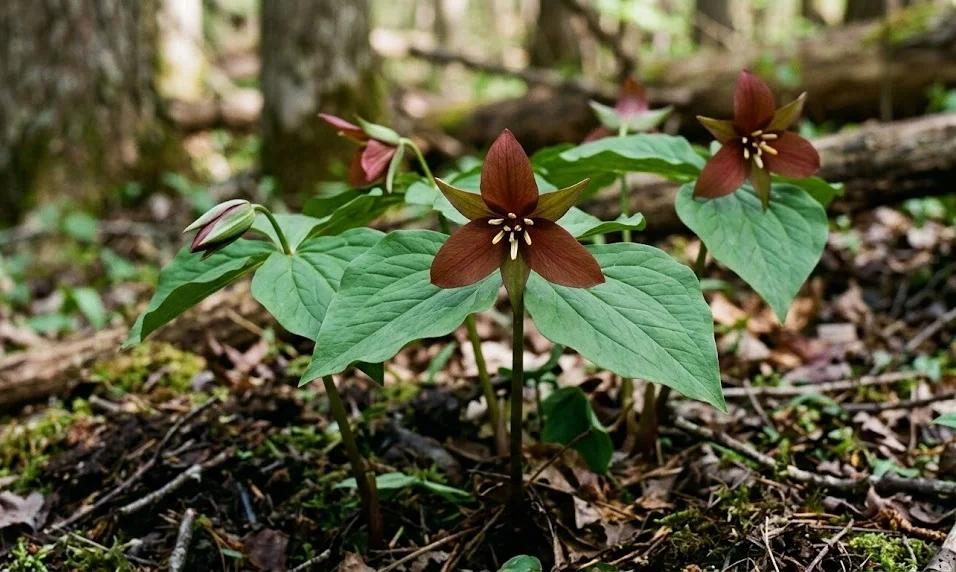

Planting red trillium requires careful handling because its underground rhizome and fleshy roots are sensitive to drying and disturbance. The plant should be placed in prepared woodland soil at the correct depth and then allowed to settle without repeated moving. Propagation is possible through division or seed, although neither method produces rapid results. Gardeners who respect the plant’s slow natural rhythm are far more likely to establish a permanent colony.
Selecting and handling planting material
Nursery-grown plants are the safest and most responsible choice for garden cultivation. Wild populations should never be dug up because removal can permanently damage slow-recovering woodland colonies. Purchase from a reputable specialist that propagates its own stock. Healthy plants should have firm rhizomes, living roots, and no signs of mould or decay.
Potted specimens are often easier to establish than bare rhizomes. Their roots remain protected by compost, reducing transplant shock. Check that the pot is not completely dry before planting. Water it thoroughly and allow excess moisture to drain before removing the plant.
Bare rhizomes must be planted promptly after purchase. They should feel firm rather than soft, hollow, or shrivelled. Until planting, keep them cool in slightly moist packing material. Never leave them exposed to sun or drying wind.
Dormant plants may appear unimpressive, but the condition of the roots is more important than visible shoots. Small buds on the rhizome indicate future growth. Handle these buds carefully because they can break under pressure. Support the root system rather than lifting the plant by its emerging stem.
More articles on this topic
Planting at the correct depth
Prepare the entire planting area before opening the pot or unwrapping the rhizome. Loosen the soil broadly and incorporate leaf mould or mature compost. Remove stones, perennial weeds, and compacted layers. The finished bed should drain freely while holding moisture.
For a potted plant, dig a hole slightly wider than the root ball. Set the plant at approximately the same depth at which it was growing in the container. Avoid burying the crown beneath a thick layer of soil. Firm gently with your hands rather than compressing the ground heavily.
Bare rhizomes are usually positioned horizontally or at a slight angle. Place the growth bud facing upward and spread the roots naturally. Cover according to the depth advised by the nursery, commonly with only a modest layer of soil above the rhizome. Planting too deeply can delay emergence, while planting too shallowly exposes the rhizome to drying and frost movement.
Water immediately after planting to settle soil around the roots. Add a light mulch of leaf mould without covering the crown heavily. Mark the location because dormant plants can be difficult to find later. Keep the area evenly moist during the first active season.
More articles on this topic
Propagating established plants by division
Division is generally reserved for large, mature clumps that have become well established. Young or weak plants should not be disturbed merely to increase numbers. The best divisions contain healthy roots and at least one strong growth bud. Very small fragments can take many years to regain flowering size.
Work while the plant is dormant, usually after the foliage has died back or before spring growth begins. Lift the clump with a wide fork, keeping well away from its centre. Preserve as much soil and root material as possible. Rough lifting can sever fleshy roots and increase the risk of rot.
Separate natural sections of the rhizome using a clean, sharp knife. Each piece should be firm and free from discoloured or soft tissue. Make the fewest cuts necessary to produce viable divisions. Allowing cut surfaces to dry briefly in shade can reduce excessive moisture around fresh wounds.
Replant the divisions immediately at their original depth. Water thoroughly and maintain steady moisture while new roots develop. Flowering may pause for one or more seasons after division. This temporary setback is normal and should not be treated with heavy feeding.
Raising new plants from seed
Seed propagation is slow but rewarding and preserves natural genetic variation. Collect ripe seed when the fruit softens and changes colour. Sow it while fresh because drying can reduce germination. Clean away excessive fruit pulp before placing the seed in the growing medium.
Use a deep pot or shaded nursery bed filled with humus-rich, free-draining compost. Sow the seeds shallowly and cover them with fine leaf mould or grit. Protect the container from rodents while allowing exposure to seasonal temperature changes. Keep the medium damp but never saturated.
Germination may require more than one cycle of warm and cold conditions. Root development can occur before any shoot becomes visible above the soil. Seedlings therefore should not be discarded simply because nothing appears during the first spring. Label every container clearly with the species and sowing date.
Young seedlings must remain shaded and consistently moist. Avoid pricking them out too early because their tiny underground structures are fragile. Transfer them only after they have developed a stronger root system. Several years may pass before seed-grown plants reach flowering maturity.