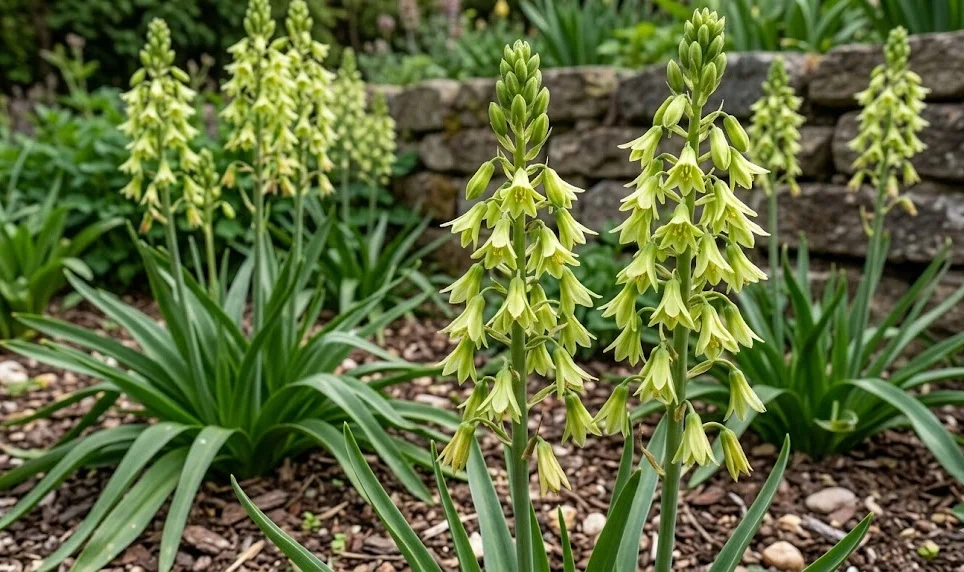

Watering green-flowered giant chincherinchee correctly requires close attention to its active and dormant phases. The plant needs consistent but moderate moisture while leaves and flowers are developing, yet the bulb can rot rapidly if the medium remains saturated. Feeding should support steady growth without producing soft, nitrogen-rich foliage. A restrained, seasonally adjusted routine is far more effective than frequent watering and heavy fertilisation throughout the year.
The bulb’s stored reserves allow it to survive temporary dryness better than prolonged waterlogging. This does not mean that actively growing plants should be neglected, because repeated severe drying can damage fine roots. The objective is to moisten the root zone and then allow partial drying. Constantly wet compost excludes oxygen and encourages destructive microorganisms.
Water quality can also influence long-term health. Very hard water may leave mineral deposits in containers and gradually alter the growing medium. Rainwater is useful where tap water is strongly alkaline or saline. Whatever the source, water should be close to ambient temperature rather than extremely cold.
The frequency of irrigation cannot be determined by a fixed weekly schedule. Pot material, root density, temperature, light, humidity, and compost composition all affect drying speed. The surface may appear dry while the lower root zone remains wet. Testing moisture below the surface gives a more reliable indication.
Watering during active growth
When new shoots first emerge, begin with small quantities of water. The bulb may not yet have produced a full network of functioning roots. Saturating the entire container at this stage creates moisture that the plant cannot use. Increase the volume gradually as leaf growth becomes stronger.
More articles on this topic
During established growth, water thoroughly enough to moisten the root zone evenly. Allow excess water to escape through the drainage holes. Empty saucers and decorative outer pots promptly so the container does not stand in runoff. Standing water can reverse drainage and keep the basal area dangerously wet.
Allow the upper portion of the compost to dry slightly before watering again. The exact depth of drying depends on pot size and environmental conditions. Leaves that remain firm and upright usually indicate that moisture is adequate. Persistent wilting, however, may signal either drought or root damage, so the compost should be checked before adding water.
Morning watering is generally preferable in cool growing conditions. Moisture on leaves and around the crown can then evaporate during the day. Avoid pouring water directly into the centre of emerging foliage. Applying it around the inner edge of the pot reduces the chance of crown rot.
Adjusting water around flowering
A developing flower spike increases the plant’s demand for moisture. Sudden drought during bud formation may result in a shorter stem, dried buds, or premature flower decline. Keep moisture levels stable without making the compost continuously wet. Small fluctuations are safer than alternating between severe dryness and saturation.
More articles on this topic
Tall flowering plants can lose water quickly through increased foliage and stem area. Containers exposed to wind may dry faster than expected. Check them more frequently during bright, breezy weather. A stable pot position also prevents roots from being disturbed by repeated movement.
Water should not be withheld merely to extend the flowering period. Moderate hydration supports firm tissues and helps the flowers open normally. Excessive watering, however, does not improve bloom size or duration. It simply increases pressure on the roots and bulb base.
After the flowers fade, continue watering while the foliage remains green. The leaves are still producing carbohydrates and transferring them to the bulb. Prematurely imposing drought weakens this replenishment process. Reduce irrigation only when natural yellowing begins.
Reducing water for dormancy
As the foliage starts to decline, lengthen the interval between waterings. The plant’s water consumption decreases as photosynthesis slows. Heavy irrigation at this stage leaves unused moisture around ageing roots. Gradual reduction allows the bulb and compost to dry safely.
Once the leaves have yellowed completely, stop routine watering. The dormant bulb should be kept dry, particularly in cool or humid conditions. Rainfall must be excluded from outdoor containers. A sheltered shelf, dry greenhouse, or ventilated storage area is appropriate.
Small offsets and seedlings may require slightly different treatment. Their bulbs contain fewer reserves and can shrivel more quickly than mature specimens. A trace of moisture may be needed during a very long, hot dormancy. This should be supplied sparingly and only when the medium is completely dry and the bulbs are visibly losing condition.
When new growth appears, do not immediately soak the pot. Begin with a light watering and observe whether the compost dries normally. Increase moisture as roots become active and foliage expands. This gradual transition is one of the most effective protections against seasonal rot.
Choosing and applying fertiliser
A balanced liquid fertiliser is suitable during active growth. Products with equal or moderately lower nitrogen compared with phosphorus and potassium are generally appropriate. Excess nitrogen encourages soft foliage and may reduce flower quality. A formulation intended for flowering houseplants or bulbs can be used at reduced strength.
Begin feeding only after active growth and root establishment are evident. Fertiliser applied to a dormant bulb cannot be absorbed effectively. Salts may accumulate in dry compost and injure new roots when growth resumes. Waiting for several healthy leaves is usually safer.
Apply fertiliser to already moist compost rather than to a completely dry root zone. This reduces the risk of localised salt damage. A half-strength solution used at intervals is often sufficient. More frequent feeding should be reserved for vigorous plants in highly mineral, low-nutrient media.
Stop feeding when foliage begins to yellow. At that point, the plant is entering dormancy and nutrient uptake is declining. Continued fertilisation can leave unused salts in the pot. These residues may damage roots during the next growth cycle.
Recognising watering and feeding problems
Overwatered plants may develop yellow leaves, soft bulb tissue, or a stagnant smell from the compost. Growth often slows even though moisture appears abundant. These symptoms result from oxygen-starved or rotting roots. Remove the plant from persistently wet compost and inspect the bulb before the damage spreads.
Underwatered plants usually show limp foliage, dry leaf tips, and rapid compost shrinkage from the pot edge. A severely dry medium may repel water, causing it to run straight through. Rehydrate such pots gradually rather than leaving them submerged for a long period. Repeated extreme drying can kill fine roots and reduce flowering.
Overfertilisation often produces brown leaf margins, white crusts on the compost, or unusually soft growth. Flush the medium carefully with clean water only if the bulb is actively growing and drainage is excellent. In serious cases, repotting into fresh compost may be safer. Reduce future concentrations and avoid combining several fertiliser products.
Nutrient deficiency is less common than root or drainage problems. Pale leaves can result from weak light, cold roots, damaged roots, or unsuitable pH. Fertilising more heavily without identifying the cause may worsen the condition. Correct cultivation should always be assessed before additional nutrients are supplied.