Pruning and cutting back green-flowered giant chincherinchee

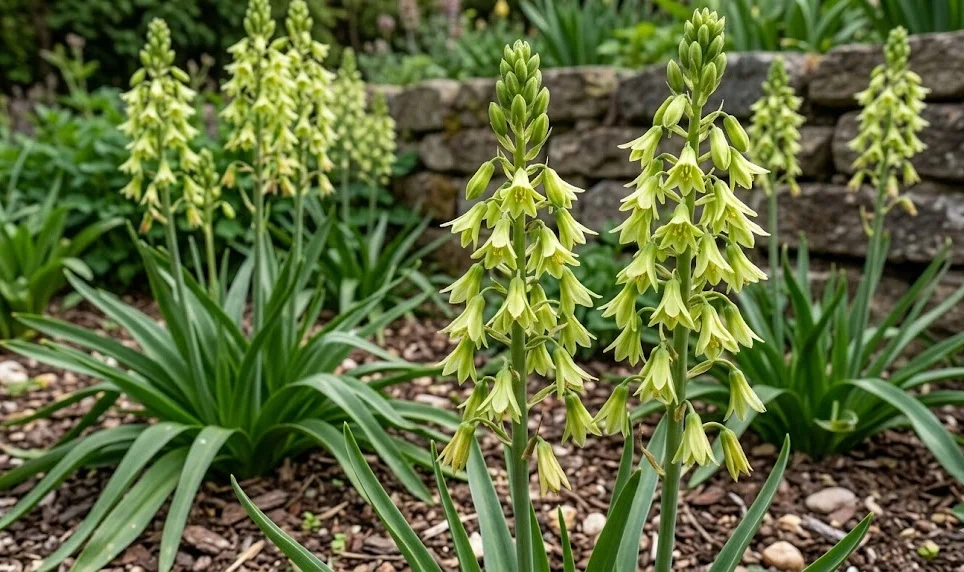
Green-flowered giant chincherinchee requires very little conventional pruning because it grows from a bulb and renews its foliage seasonally. Most cutting work involves removing spent flowers, damaged leaves, and naturally dried foliage at the correct time. Green leaves should never be cut back simply to improve appearance, because they are actively replenishing the bulb. Careful timing protects flowering potential and reduces the risk of infection entering through unnecessary wounds.
Use clean, sharp scissors or secateurs for all cutting tasks. Blunt tools crush tissue and create ragged wounds that dry slowly. Disinfect blades before working and between plants when disease is suspected. Clean cuts are especially important close to the bulb neck.
The plant’s natural yellowing process should guide major cutting decisions. Foliage may look untidy near the end of the season, but it continues transferring nutrients to the bulb. Removing it too early weakens future growth. Patience during this stage is an important part of professional bulb care.
Protective gloves are sensible when handling plant sap or decaying tissue. Keep cut material away from children and pets, as ornamental bulbs should not be eaten. Wash tools and hands after maintenance. Dispose of diseased material separately from healthy garden waste.
Removing spent flowers
Individual faded flowers can be removed if they become unsightly or begin to develop mould. Pinch or snip them carefully without damaging unopened buds nearby. This improves appearance and reduces decaying tissue around the flower spike. It is particularly useful in humid, protected environments.
More articles on this topic
If seed is not required, the entire flower stem can be removed after flowering finishes. Cut it near the base without injuring surrounding leaves or the bulb neck. Removing the stem prevents energy from being directed into seed production. The foliage should remain untouched and continue growing.
Gardeners wishing to collect seed should leave selected flower spikes in place. Seed capsules must be allowed to mature and dry naturally. This process uses some of the plant’s stored resources, so weak bulbs should not be permitted to set a large seed crop. Collect mature seed before capsules open fully and scatter their contents.
A cut flower stem may also be harvested for indoor display when some buds have opened. Use a clean blade and place the stem in fresh water immediately. Cutting the flower stem does not replace the need to preserve the leaves. The bulb still depends on green foliage for energy storage.
Managing damaged and diseased foliage
Leaves damaged by wind, handling, or sunburn should be assessed before removal. A partially damaged leaf can still photosynthesise through its healthy green tissue. Cut it only when the injury is extensive, soft, or beginning to decay. Cosmetic imperfections alone are not a reason for complete removal.
More articles on this topic
Diseased leaves should be removed promptly when lesions are spreading or producing fungal growth. Cut below the affected area into healthy tissue if only the tip is involved. Entire leaves may need removal when infection extends toward the base. Sterilise the tool after every diseased cut.
Avoid cutting leaves during wet, stagnant weather whenever possible. Dry conditions allow wounds to seal more quickly. Improve airflow around the plant after pruning. Keep irrigation water away from fresh cuts and the central crown.
Do not tear leaves from the bulb. Pulling can damage basal tissue and create an entry point for rot. Support the leaf and make a controlled cut with a sharp tool. Any accidental wound near the bulb should be kept dry and monitored carefully.
Cutting back at the end of the season
Wait until the foliage has turned fully yellow or brown before cutting it back. At this point, most mobile nutrients have returned to the bulb. The dry leaves often detach easily with gentle handling. If resistance remains, use scissors rather than pulling.
Cut dried foliage just above the bulb neck, taking care not to damage new growth hidden within. Remove loose debris from the compost surface. Dead material can harbour fungal spores, mealybugs, and other pests. A clean surface also makes bulb inspection easier during dormancy.
After cutting back, reduce or stop watering according to the bulb’s stage. A fully dormant plant should remain dry and protected from rain. Do not fertilise after foliage removal. Nutrients cannot be used efficiently until active growth resumes.
Mark the pot clearly before placing it in storage. Dormant bulb containers are easily mistaken for empty pots and may be watered or discarded accidentally. Inspect them periodically for rot or emerging shoots. When new growth appears, return the plant to bright conditions and restart watering gradually.