The journey of a tomato from a tiny seed to a productive vine is one of the most fascinating processes in the world of home gardening and agriculture. You must begin with high-quality seeds or healthy cuttings to ensure that your plants have the genetic potential for strong growth and disease resistance. Success in this phase requires patience and a controlled environment that provides the right balance of warmth, moisture, and light for young tissues. By mastering the art of propagation, you gain the freedom to grow unique varieties that are rarely found in commercial markets.
Starting your seeds indoors gives you a significant head start on the growing season and allows you to control the early development of the plants. You should use a sterile seed-starting mix that is light and well-draining to prevent damping-off, a common fungal disease that kills young seedlings. Sowing the seeds at a depth of about half a centimeter and keeping them in a warm location will encourage rapid and uniform germination within a week. Providing intense light immediately after they emerge is crucial to prevent the seedlings from becoming “leggy” or weak as they search for the sun.
As the seedlings grow their first true leaves, they will need more space and a slightly more nutrient-rich environment to continue their rapid development. You should transplant them into larger pots once they are a few centimeters tall, handling them gently by the leaves rather than the fragile stems. This process, often called “potting up,” encourages the growth of a robust root system that will eventually support the adult plant in the garden. Keeping the soil consistently moist but never waterlogged is the key to maintaining steady growth during this critical early life stage.
Monitoring the temperature of your indoor growing area is essential for the health of your young tomato plants before they move outside. They prefer temperatures between eighteen and twenty-four degrees Celsius during the day, with slightly cooler temperatures at night to promote sturdy stems. If your indoor space is too warm or lacks sufficient airflow, the plants may become stressed and more susceptible to pests like fungus gnats or aphids. Using a small fan to create a gentle breeze can help strengthen the stems by mimicking the natural movement of the wind they will face outdoors.
Hardening off for outdoor success
Moving young plants from a protected indoor environment to the unpredictable outdoors is a process that must be done gradually to avoid transplant shock. You should begin by placing your tomatoes outside in a shaded, sheltered spot for just an hour or two during the warmest part of the day. Over the course of a week, slowly increase their exposure to direct sunlight and gentle winds to toughen up their outer leaf surfaces. This transition period, known as hardening off, allows the plant to adjust its internal chemistry to survive the intensity of the natural sun.
More articles on this topic
If you rush this process, the tender leaves can easily become sunscalded, turning white and brittle as the intense UV rays damage the plant’s delicate tissues. You should also be mindful of nighttime temperatures, bringing the plants back inside if there is any risk of frost or extreme cold. Winds can also be a major stressor for young plants, so choosing a calm day for their first few outings is a professional strategy that pays off in the long run. Patience during this week of transition is the best way to ensure your tomatoes thrive once they are permanently planted.
During the hardening-off phase, you will notice the leaves becoming a darker shade of green and the stems becoming thicker and more resilient to physical movement. This physical transformation is the plant’s way of building its own internal defense mechanisms against the elements it will soon face daily. You should continue to water them carefully, as the outdoor air and sun will dry out small pots much faster than the humid indoor environment did. Watching your plants closely during this time will tell you when they are finally ready for their permanent home in the garden soil.
The final day of hardening off should ideally see the plants staying outside overnight, provided the weather remains mild and the forecast is favorable for the coming days. This complete immersion in the outdoor environment signifies that the plants have successfully adapted and are ready for the final step of transplantation. You should ensure they are well-hydrated before the move, as this provides a buffer against the stress of being disturbed during the planting process. A successful hardening-off period is the bridge between a fragile seedling and a productive, hardy garden plant.
Transplanting into the garden soil
Choosing the right moment to put your tomatoes in the ground is a decision that depends heavily on the local soil temperature and the long-term weather forecast. You should wait until the earth has warmed to at least fifteen degrees Celsius and all danger of frost has passed for your specific growing zone. Planting too early in cold soil can stunt the growth of the tomatoes for weeks, negating any advantage you gained by starting them early indoors. When the conditions are right, prepare a hole that is significantly larger than the current root ball to allow for easy expansion.
More articles on this topic
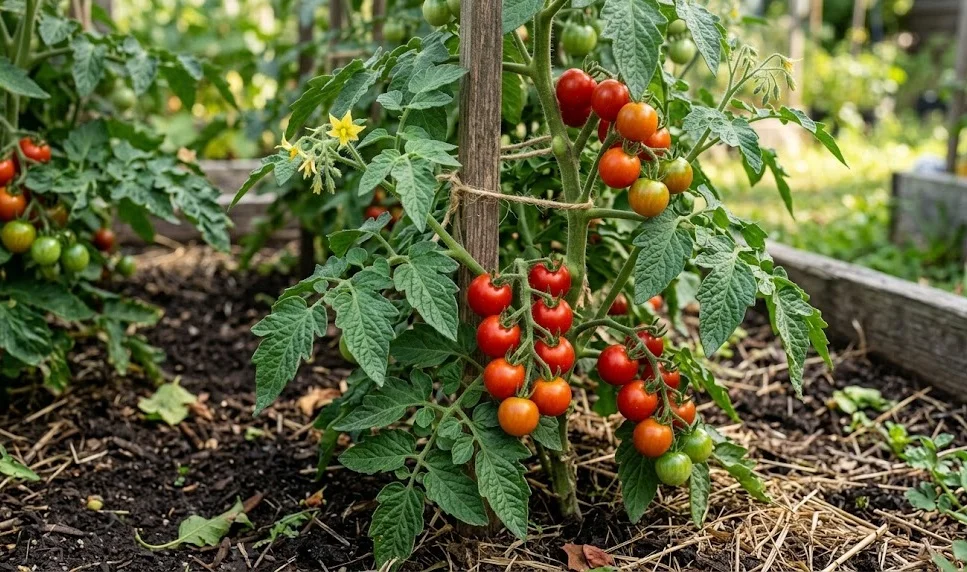
One unique professional tip for planting tomatoes is to bury the stem deeper than it was in the pot, even up to the first set of leaves. This encourages the plant to grow “adventitious roots” along the buried portion of the stem, resulting in a much larger and more powerful root system. A stronger root network allows the plant to access water and nutrients more effectively from the surrounding soil as it grows into a large vine. This simple technique is one of the most effective ways to increase the overall productivity and drought resistance of your tomato crop.
Before placing the plant in the hole, you might consider adding a handful of balanced organic fertilizer or high-quality compost to the bottom to give it a boost. Gently tease out any circling roots if the plant has become pot-bound, ensuring they can grow outward into the fresh garden soil immediately. Once the plant is in place, fill the hole with earth and press down firmly but gently to remove any large air pockets that could dry out the roots. Watering the new transplant immediately with a diluted seaweed solution can help settle the soil and reduce the initial stress of the move.
Spacing your plants correctly is vital for maintaining long-term health and preventing the rapid spread of diseases through the foliage later in the summer. You should leave at least sixty to ninety centimeters between each plant to allow for full growth and excellent air circulation throughout the rows. Crowding the plants might seem like a way to get more fruit, but it often leads to smaller harvests and more problems with fungal infections due to trapped moisture. Giving each tomato vine its own dedicated space ensures that they all have equal access to the sunlight and nutrients they need to succeed.
Vegetative propagation through cuttings
Propagating tomatoes from cuttings is a professional technique that allows you to create exact genetic clones of your favorite plants without waiting for seeds. You should look for healthy “suckers,” which are the small shoots that grow in the armpit between the main stem and a leaf branch. Using a clean, sharp blade, remove a sucker that is about ten to fifteen centimeters long, making the cut at a slight angle to increase the surface area. This method is particularly useful in the middle of the season if you want to expand your garden or replace a plant that has been damaged.
Once you have your cutting, you can either place it in a glass of clean water or directly into a moist, light potting medium to encourage root growth. If using water, change it every couple of days to keep it fresh and oxygenated, and you should see white root buds appearing along the stem within a week. If planting directly into soil, you might want to dip the end in a natural rooting hormone to speed up the process, though tomatoes root so easily it is often unnecessary. Keep the cutting in a bright but shaded spot until the new roots are well-established and the plant shows signs of new top growth.
Cuttings have the advantage of being developmentally mature, which means they will often begin flowering and fruiting much sooner than a plant started from a seed. This can be a great way to squeeze in an extra harvest of a specific variety before the end of the growing season in warmer climates. You should treat these new clones with the same care as your original plants, ensuring they get plenty of water and nutrients as they establish their own independent root systems. This professional skill allows you to maintain your best performing varieties year after year with minimal cost.
Taking cuttings at the end of the summer is also a popular way for some gardeners to keep their favorite varieties alive through the winter months. You can keep these small clones on a sunny windowsill or under grow lights indoors until the following spring arrives for planting. This cycle of propagation creates a continuous line of descent for your most successful and delicious tomato plants, preserving their unique characteristics for the future. Mastering this simple vegetative technique opens up new possibilities for your gardening practice and ensures you always have a backup of your prized plants.