The practice of pruning and cutting back the azure grape hyacinth is a vital part of maintaining both the plant’s health and the garden’s overall appearance. While these bulbs do not require the complex structural pruning of shrubs, the timing and method of removing spent tissue are crucial for future success. A professional gardener knows that every leaf removed too early is a loss of potential energy for the following year. By following these specific guidelines, you can ensure your plants remain tidy and vigorous throughout their entire lifecycle.
Deadheading for energy conservation
Deadheading, or the removal of faded flower spikes, is the first pruning task of the season. Once the azure bells begin to turn brown and shrivel, the plant naturally starts to shift its resources toward producing seeds. By cutting the flower stalk off near the base, you redirect that energy back into the bulb where it can be used for next year’s growth. This simple intervention can lead to larger and more numerous blooms in the following season.
When deadheading, it is important to use sharp, clean scissors or small garden snips to make a clean cut. Avoid pulling or tearing the stalks, as this can damage the crown of the bulb or even pull the bulb partially out of the ground. Cutting the stalk just above the point where it emerges from the leaves keeps the plant looking neat without disturbing its vital structures. This professional touch keeps the focus on the remaining green foliage.
It is worth noting that if you wish for the colony to spread through self-seeding, you should skip the deadheading on at least a few plants. Allowing the seed pods to mature and burst naturally is a slower but effective way to increase your display over time. However, most professionals prefer the energy conservation benefits of deadheading for the majority of the collection. The choice depends on your long-term goals for that specific area of the garden.
Always dispose of the removed flower stalks in the compost bin, provided they are free from pests and diseases. This returns the organic matter to the garden’s ecosystem in a controlled way. Keeping the garden clear of dead material also reduces the hiding places for slugs and other pests. Deadheading is as much about garden hygiene as it is about plant physiology.
More articles on this topic
Managing the ripening foliage
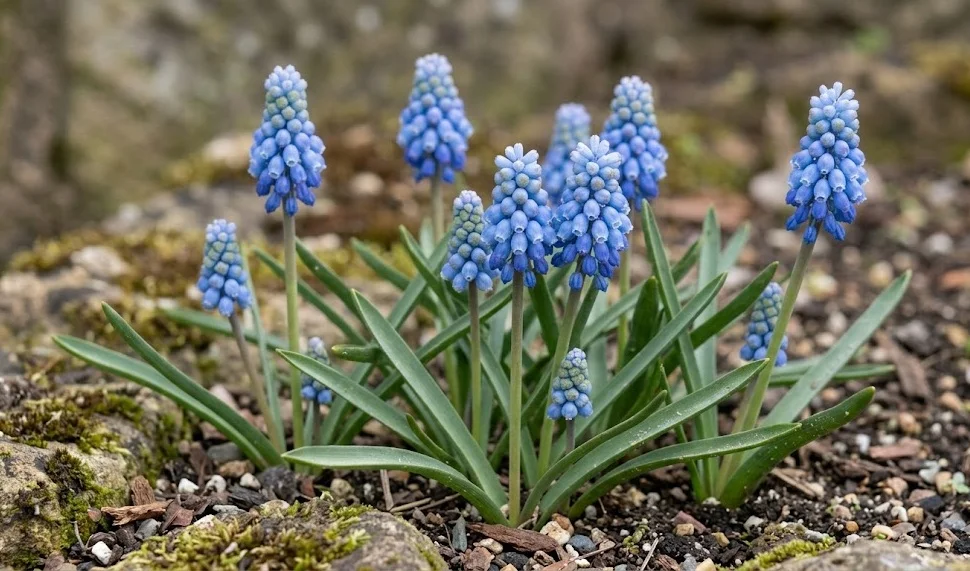
The most critical rule of grape hyacinth care is to never cut back the green leaves immediately after the flowers have faded. These leaves are the plant’s only way to manufacture the sugars and starches needed to survive the dormant period and bloom again. They must be allowed to remain on the plant until they have turned completely yellow and withered naturally. This phase of “ripening” is when the bulb is at its most active metabolically.
As the foliage begins to age, it can sometimes look a bit untidy or “floppy” in the garden landscape. Some gardeners are tempted to tie the leaves in knots or braid them to make them look neater, but this is not recommended by professionals. Constricting the leaves reduces their surface area exposure to the sun and can impede the flow of nutrients back to the bulb. It is better to allow them to lie naturally, even if they look a little messy for a few weeks.
A professional tip for managing the “untidy phase” is to plant the bulbs among later-emerging perennials like hostas, hardy geraniums, or daylilies. As these larger plants grow, their leaves will naturally cover and hide the yellowing foliage of the grape hyacinths. This “living mulch” solves the aesthetic problem without compromising the health of the bulbs. It is a sophisticated way to manage the transition between spring and summer in the garden.
Once the leaves have turned entirely brown and are dry to the touch, they can be removed with a gentle tug or a quick clip at the soil line. At this point, the connection between the leaf and the bulb has naturally withered, and the foliage is no longer providing any benefit. Removing this dry debris helps to prevent fungal issues and makes the garden bed ready for its summer occupants. This final cleanup marks the end of the plant’s active year.
More articles on this topic
Professional tools and techniques
The quality of your pruning tools directly impacts the health of your plants and the speed of your work. Always ensure that your snips or scissors are sharp enough to cut through the stalks with a single, clean motion. Dull tools can crush the plant tissue, creating ragged edges that are more susceptible to disease and rot. A well-maintained tool kit is a sign of a professional and dedicated gardener.
Disinfecting your tools between different clumps of plants is a best practice that prevents the accidental spread of viruses or fungi. A simple wipe with a bit of rubbing alcohol or a mild bleach solution is all that is needed to keep your equipment sterile. This is especially important if you notice any plants that seem less healthy than their neighbors. Prevention through cleanliness is far easier than trying to cure a diseased bulb collection.
When working in the bulb beds, try to avoid stepping directly on the soil where the hyacinths are planted. Compacting the soil can damage the shallow roots and make it harder for the leaves to emerge and die back properly. Using “stepping stones” or working from the edges of the bed is the professional way to manage maintenance. Respecting the physical environment of the bulbs ensures their long-term survival and vigor.
Record the dates of your pruning activities in your garden journal to help track the timing of the seasons. You may notice that in some years, the foliage stays green longer, or the flowers fade earlier due to weather conditions. This data helps you refine your maintenance schedule and anticipate the needs of your garden in the future. Professional gardening is a continuous cycle of action, observation, and improvement.