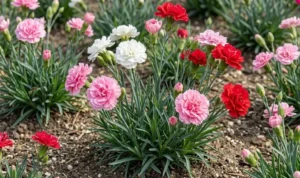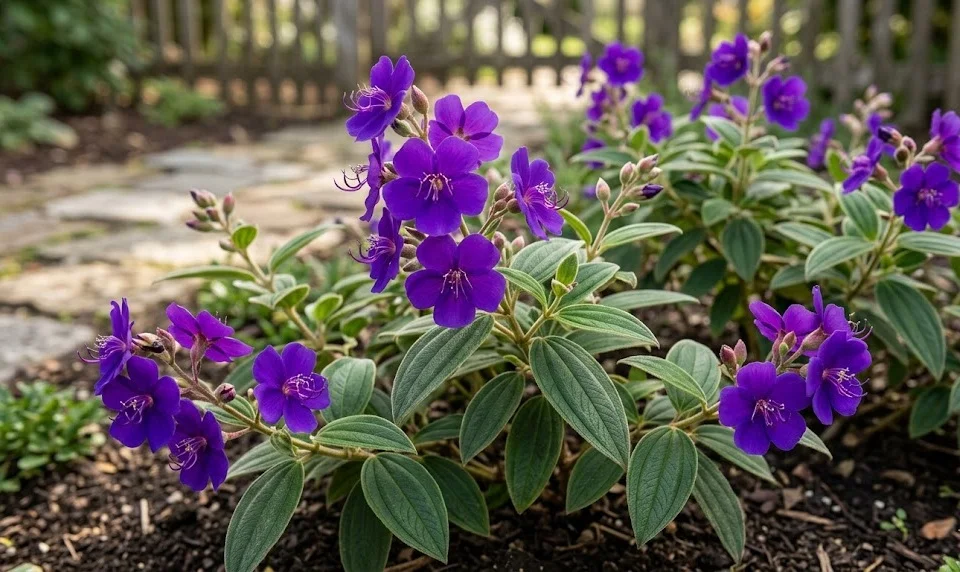
Starting your journey with a princess flower begins with the crucial step of planting it in the right location and at the right time. This plant is a true centerpiece, and its success in your garden depends heavily on the initial conditions you provide for its roots to take hold. Whether you are working with a young nursery specimen or starting from scratch, the planting process requires a gentle touch and careful preparation. You will find that taking the time to do it correctly will result in a much stronger and more resilient plant in the future.
The best time to plant your princess flower is during the early spring when the threat of frost has passed and the soil is beginning to warm up. This timing allows the root system to establish itself before the intense heat of the summer months arrives. If you are planting in a container, you have more flexibility, but the plant will still benefit from the natural growth cycle of the spring season. Many gardeners prefer to wait until the nighttime temperatures are consistently above twelve degrees Celsius before bringing new plants into the garden.
Choosing the right container or garden spot is a decision that will affect the plant for its entire life, so consider all factors carefully. The princess flower needs a location that is protected from strong winds that could break its relatively brittle stems or dry out its leaves. If you are planting in the ground, ensure the area has been cleared of any competing weeds or grass that might steal nutrients from the young plant. A well-chosen spot should provide a balance of morning sunlight and some protection from the harsh rays of the late afternoon sun.
Before you begin the actual planting, it is a good idea to gather all your tools and materials to ensure a smooth and efficient process. You will need a high-quality acidic potting mix, some organic compost, and a sturdy shovel or trowel for the work. If you are using a new pot, make sure it has been cleaned thoroughly to prevent the spread of any soil-borne diseases. Preparation is the key to reducing the stress on the plant during the transition from its nursery container to its new home.
The planting process step by step
To begin the planting process, dig a hole that is twice as wide as the current root ball but no deeper than the original container. This extra width allows you to fill the space with loose, nutrient-rich soil that the new roots can easily penetrate as they grow outward. You should check the depth carefully, as planting the princess flower too deep can lead to stem rot and other health problems. Once the hole is ready, you can mix some organic matter into the loose soil at the bottom to provide an immediate boost of nutrients.
More articles on this topic
Carefully remove the plant from its nursery pot by turning it sideways and gently squeezing the sides to loosen the root ball. Avoid pulling the plant by the stem, as this can damage the delicate vascular system and cause significant stress to the young specimen. If the roots are tightly coiled around the bottom, you can gently tease them outward with your fingers to encourage them to grow into the new soil. This simple step is vital for ensuring the plant establishes a strong and wide root system in its new environment.
Place the plant in the center of the hole and slowly fill in the space with your prepared soil mix, tamping it down lightly as you go. You want to remove any large air pockets without compacting the soil so tightly that the roots cannot breathe or water cannot drain. Ensure that the top of the root ball is level with the surrounding soil surface to maintain the correct planting depth. After the hole is filled, create a small basin of soil around the base of the plant to help direct water toward the roots during the initial weeks.
Immediately after planting, give the princess flower a thorough watering to settle the soil and provide the moisture needed for recovery. You should water until it starts to drain out of the bottom of the pot or until the ground is well-saturated around the planting site. Adding a thin layer of organic mulch around the base will help to retain this moisture and keep the roots cool during the coming days. Watch the plant closely for the first two weeks, as this is the most critical time for the specimen to adapt to its new home.
Propagation through seeds
Growing a princess flower from seeds is a fascinating process that allows you to observe the entire life cycle of this beautiful plant. You should start with fresh seeds, which can be harvested from the dried seed pods of an established plant after the flowering season. These seeds are quite small and require a light-handed approach when you are sowing them into your starting containers. Many gardeners use a sterile seed-starting mix to provide a clean and disease-free environment for the delicate young seedlings.
More articles on this topic
Sow the seeds on the surface of the moist starting mix and press them in very lightly, but do not cover them with a thick layer of soil. The seeds of the princess flower often need some light to trigger the germination process, so a very thin dusting of fine vermiculite is usually sufficient. Place the seed tray in a warm location with bright, indirect light and maintain a consistent level of moisture without making the soil soggy. Using a plastic dome or a simple plastic wrap over the tray can help to maintain the high humidity levels that promote successful sprouting.
Germination can be somewhat irregular, and it may take several weeks before you see the first tiny green shoots emerging from the soil. Once the seedlings have developed their first set of true leaves, you should begin to provide them with a very weak solution of liquid fertilizer. Be very careful with the watering at this stage, as young seedlings are particularly susceptible to a fungal condition known as damping off. Gradually increase the amount of light they receive as they grow stronger and prepare for their first transplanting into individual pots.
When the young plants are about ten centimeters tall and have several sets of leaves, they are ready to be moved into larger containers. This transition should be done carefully to avoid damaging the small and sensitive root systems that are still developing. Continue to provide warm temperatures and high humidity as the young plants grow into sturdy specimens that will eventually bloom. While starting from seed takes longer than other methods, it is a rewarding way to increase your collection and share plants with other enthusiasts.
Successful propagation from cuttings
Using softwood cuttings is perhaps the most popular and effective way to propagate the princess flower among home gardeners and professionals alike. You should take your cuttings in the late spring or early summer when the plant is in an active state of growth and the stems are flexible. Select a healthy, non-flowering shoot and cut a piece that is about ten to fifteen centimeters long, making the cut just below a leaf node. Removing the flowers or buds from the cutting is essential, as you want the plant to focus all its energy on developing roots rather than blooming.
Prepare your cuttings by removing the lower leaves, leaving only the top two or three pairs to carry out photosynthesis during the rooting period. Many experts recommend dipping the cut end into a rooting hormone powder or gel to speed up the process and increase the success rate. Insert the cutting into a moist, well-draining rooting medium such as a mix of perlite and peat moss or a specialized propagation soil. Ensure that at least one or two nodes are buried beneath the surface, as this is where the new roots will most likely emerge.
To create the humid environment necessary for the cutting to survive without roots, you can place it inside a small propagation chamber or cover it with a clear plastic bag. Keep the cuttings in a warm spot with bright but indirect light, avoiding direct sunlight which could overheat the chamber and kill the tender stems. You should check the moisture levels regularly and mist the leaves occasionally to keep them hydrated while the roots are forming. After about four to six weeks, you can gently tug on the cutting to see if there is any resistance, which indicates that roots have begun to develop.
Once a strong root system has established, you can gradually acclimate the new plant to lower humidity levels by opening the cover for a few hours each day. After another week or two, the young princess flower will be ready to be moved into its own pot with a standard acidic soil mix. This method allows you to create exact clones of your favorite plants, ensuring that you maintain the specific flower color and growth habits you admire. It is an excellent way to grow your garden quickly and efficiently without the long wait associated with starting from seeds.