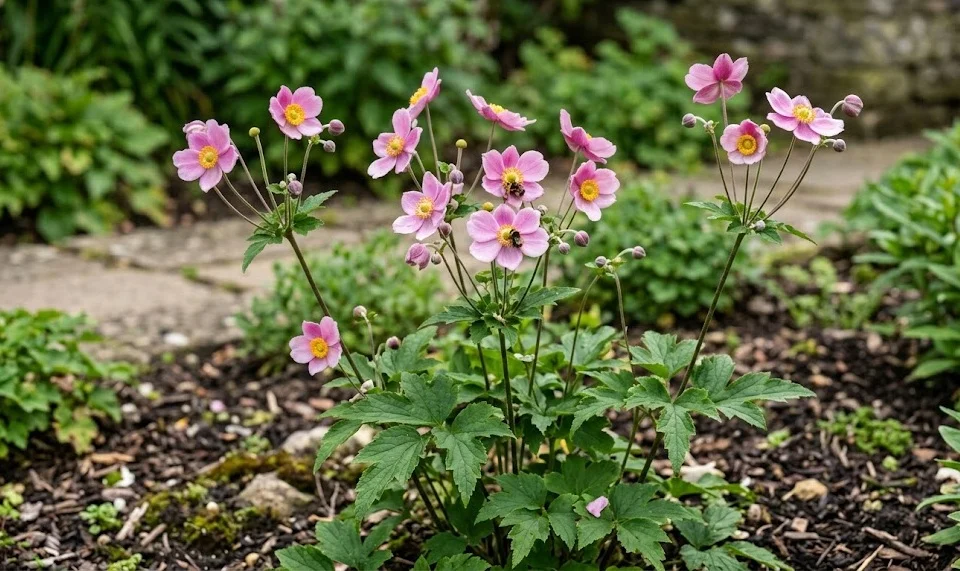
Successful establishment of the Japanese anemone begins with a well-planned planting strategy that respects the plant’s unique biological requirements. Choosing the right moment to introduce these perennials into your garden is the first step toward ensuring they thrive for many years. Unlike many other garden plants, these anemones are quite sensitive to being moved once they have settled into their environment. Therefore, taking the time to prepare the site and execute the planting process correctly is an essential task for any serious gardener.
The ideal window for planting is usually in the early spring, just as the soil begins to warm up but before the intense heat of summer arrives. Planting at this time allows the root system to establish itself while moisture levels are naturally higher and temperatures are mild. Some gardeners also find success with early autumn planting, provided there is enough time for the roots to take hold before the first hard frost. Regardless of the season, the primary goal is to minimize transplant shock and encourage rapid root development in the new location.
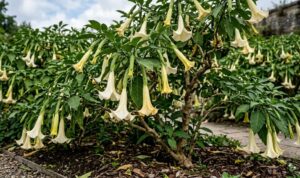
Site selection is perhaps the most important decision you will make when adding these flowers to your landscape. They perform best in a spot that offers dappled shade or protection from the scorching midday sun, which can easily wilt their delicate leaves. The soil should be consistently moist but well-draining, as standing water will quickly lead to root rot and the eventual death of the plant. Look for a location that provides a stable microclimate, perhaps near a fence or under the canopy of larger, deep-rooted trees.
Preparing the soil before the plant ever touches the ground is a hallmark of professional gardening. Dig a hole that is significantly wider than the current root ball to allow the roots to spread easily into the surrounding earth. Mix in a generous amount of organic matter, such as compost or well-rotted manure, to provide a nutrient-rich foundation. This preparation ensures that the young plant has immediate access to the resources it needs to overcome the stress of being moved from a container to the open ground.
Executing the planting process with precision
When you are ready to place the anemone in the ground, handle the root ball with extreme care to avoid breaking the brittle roots. Remove the plant from its nursery container gently, and if the roots are circling the bottom, lightly tease them outward to encourage outward growth. Place the plant in the hole at the same depth it was growing in the pot, as planting too deep can suffocate the crown. Filling the space around the roots with the prepared soil should be done carefully to avoid creating large air pockets.
More articles on this topic
Once the plant is in place, firm the soil gently with your hands rather than stepping on it with your full weight. This provides enough contact between the roots and the soil without compacting the earth so much that water and air cannot penetrate. Immediate watering is essential to help settle the soil and provide the hydration necessary for the recovery process. A slow, deep soak is much more effective than a quick sprinkle, as it ensures the moisture reaches the bottom of the planting hole.
Applying a layer of mulch immediately after planting provides an extra layer of protection for the newly installed perennial. This mulch helps to maintain a consistent soil temperature and prevents the surface from drying out too quickly in the wind. Use natural materials like shredded bark or leaf mold, keeping the mulch a few inches away from the actual stems to prevent rot. This small step significantly increases the survival rate of new plantings by creating a more hospitable environment for early root growth.
In the weeks following the planting, you must monitor the moisture levels closely, as the young plant does not yet have an extensive root system to find water. If the weather is particularly dry or windy, you may need to water every few days to keep the soil consistently damp. Avoid the temptation to apply heavy fertilizers during this initial period, as the plant needs to focus on root establishment rather than top growth. Once you see new leaves beginning to emerge, you can be confident that the planting process was a success.
Propagation through the division of mature clumps
Division is the most common and effective method for propagating established Japanese anemones, and it also helps rejuvenate older plants. This process is best performed in the early spring when the first signs of new growth are just starting to appear above the soil. By breaking a large, overcrowded clump into smaller sections, you can create multiple new plants for other areas of your garden. It is a cost-effective way to expand your collection while maintaining the health and vigor of your original specimens.
More articles on this topic
To begin the division, use a sharp spade to lift the entire clump out of the ground, taking as much of the root system as possible. Once the plant is out, you can see where the natural divisions are located within the root mass and the crown. Use a clean, sharp knife or the edge of your spade to separate the clump into smaller pieces, ensuring each section has several healthy shoots and a good portion of roots. Discard the older, woody center of the original plant, as it is often less productive and more prone to disease.
Replanting the new divisions should happen as quickly as possible to prevent the delicate roots from drying out in the air. Treat each new section as a new plant, following the same soil preparation and planting steps described for container-grown specimens. It is often helpful to trim back any long or damaged roots to encourage the growth of new, fibrous root hairs. Regular watering is even more critical for divisions, as they have lost a significant portion of their original root structure during the separation.
One of the benefits of division is that it allows you to control the spread of the plant in your garden borders. If you notice that an anemone is beginning to crowd out its neighbors, a quick division can restore the intended balance of the landscape. Many gardeners find that dividing their anemones every three to four years keeps the plants at their peak performance level. It is a satisfying task that connects you more deeply with the lifecycle of your garden and ensures a continuous supply of these beautiful flowers.
Propagation via root cuttings for mass production
If you need a large number of new plants and do not want to disturb your existing clumps too much, root cuttings are an excellent alternative. This method takes advantage of the plant’s natural ability to regenerate from small pieces of its thick, fleshy roots. Late autumn or early winter is the ideal time for this technique, as the plant is entering dormancy and the roots are full of stored energy. It requires a bit more patience and equipment than simple division, but the results can be very rewarding for an ambitious gardener.
Start by carefully digging around the edge of a healthy plant to expose some of the larger roots without lifting the entire specimen. Select a few roots that are about the thickness of a pencil and cut them away from the main plant with a sharp tool. Once you have your roots, cut them into sections about two to three inches long, making sure to keep track of which end was closest to the plant’s crown. A common trick is to cut the top end straight and the bottom end at an angle so you don’t plant them upside down.
Place the root cuttings in a tray filled with a light, well-draining potting mix, either horizontally or vertically depending on your preference. If planting vertically, ensure the straight-cut end is just below the surface of the soil and the angled end is pointing downward. Keep the tray in a cool but frost-free environment, such as a cold frame or an unheated greenhouse, throughout the winter months. The soil should be kept barely moist—just enough to prevent the cuttings from shriveling but not so wet that they rot.
By the time spring arrives, small shoots should begin to emerge from the top of the root cuttings, signaling that they have successfully regenerated. Once these new plants have developed a few sets of leaves and a healthy root system of their own, they can be potted up into individual containers. They will need another season of growth in a protected environment before they are strong enough to be planted out into the garden. This method is a fantastic way to produce dozens of identical plants from a single parent, perfect for creating a large-scale drifts or sharing with friends.