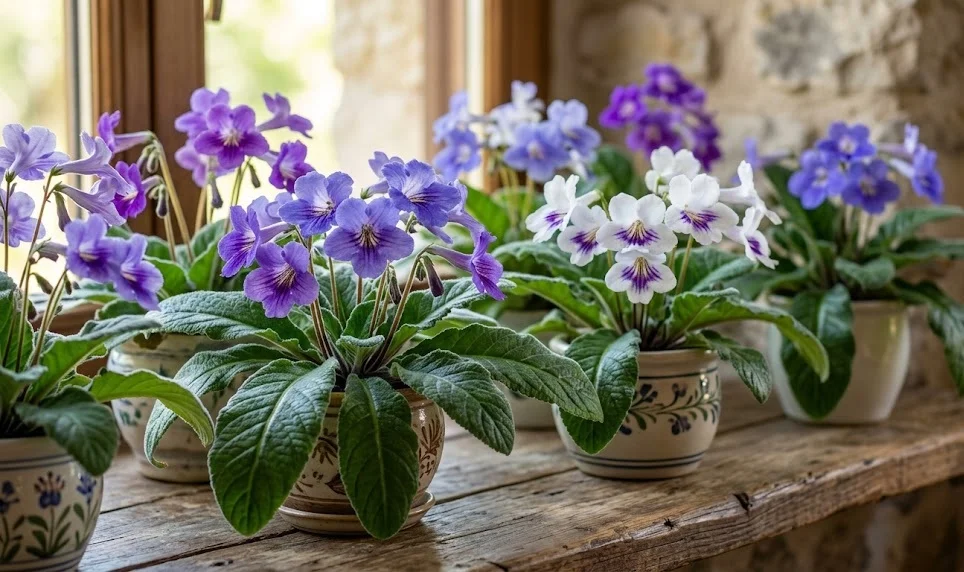
Potting your plant correctly is the foundational step that determines its future health and blooming potential. You should always begin with a clean, sterilized container to avoid introducing any soil-borne pathogens. A shallow pot is usually better than a deep one because these plants have a fibrous root system that prefers to spread laterally. Make sure the drainage holes are clear so that excess water can escape freely after every watering session.
The potting mix should be light and porous to allow for maximum oxygen exchange around the roots. You can create your own blend by mixing equal parts of peat moss, perlite, and vermiculite for an ideal texture. Avoid using standard potting soil that contains heavy forest products or large chunks of bark, as these can retain too much moisture. Moisten the mix slightly before you begin the planting process so that it holds its shape.
When placing the plant into its new home, be careful not to bury the crown too deeply. The point where the leaves meet the roots should sit just at or slightly above the soil surface. If you bury the crown, you run a very high risk of rot, which can kill the plant quickly. Firm the soil around the edges gently, but do not compress it directly over the central root ball.
After planting, give the specimen a light drink to help settle the soil around the roots. Place it in a bright spot away from direct sunlight while it recovers from the stress of the move. You may notice a slight wilt for a day or two, but the plant should bounce back quickly as the roots establish themselves. Avoid fertilizing for at least a month to allow the delicate new root hairs to grow without being burned.
Propagation through leaf cuttings
One of the most fascinating aspects of these plants is their ability to grow entirely new specimens from just a piece of a leaf. To start this process, select a healthy, mature leaf that is free from any signs of disease or pest damage. You can use a sharp, sterile blade to cut the leaf away from the main plant. Many growers prefer the “vein-cutting” method, where you remove the central midrib and place the two leaf halves into the soil.
More articles on this topic
Prepare a tray of moist propagation mix, which should be even lighter than your standard potting soil. Insert the cut edges of the leaf into the medium, ensuring they make good contact with the soil. You only need to bury the edge about half a centimeter deep to encourage root formation. Firm the soil gently around the leaf to keep it upright and stable during the several weeks it takes to develop.
To maintain high humidity, you can place the entire tray inside a clear plastic bag or under a humidity dome. This creates a miniature greenhouse effect that prevents the leaf from drying out before it can grow roots. Keep the tray in a warm, bright area but never in direct sun, which would cook the delicate leaf tissue. Within four to six weeks, you should start to see tiny plantlets emerging from the base of the leaf.
Once the plantlets have developed several leaves of their own, they are ready to be separated from the mother leaf. Carefully lift the entire cluster and gently pull the babies away, trying to keep as many roots attached as possible. Pot these individuals into small, two-inch pots using a fine-textured starter mix. They will grow rapidly and often produce their first flowers within a few months of being separated.
Dividing established clumps
As your plant matures, it will naturally produce multiple “crowns” or growth points within the same pot. This is a great opportunity to increase your collection by simply dividing the plant into several smaller ones. You should ideally perform this task in the early spring when the plant is just beginning its active growth cycle. Remove the plant from its pot and gently shake away the excess soil to reveal the structure of the roots.
More articles on this topic
Look for natural separation points where the individual crowns seem to pull away from the main center. You can often tease these apart with your fingers, but sometimes a clean knife is needed to slice through the connecting rhizome. Ensure that each division has a healthy set of roots and at least two or three healthy leaves. If a division has no roots, you may need to treat it like a cutting until it establishes itself.
Pot each new division into its own small container, following the same planting guidelines as for adult plants. It is better to use a pot that feels slightly too small rather than one that is too large for the new division. This helps the plant establish a strong root system more quickly without the risk of overwatering. Water them lightly and keep them in a humid, shaded spot for the first week.
Dividing your plants not only gives you more specimens but also rejuvenates the original plant. Overcrowded pots often lead to smaller leaves and fewer flowers because the individual crowns are competing for nutrients. By giving each crown its own space, you are ensuring a more vigorous display of blossoms in the coming season. It is a simple and effective way to keep your collection healthy and productive.
Growing from seeds
Starting from seeds is the most challenging but also the most rewarding way to propagate these beautiful flowers. Because the seeds are incredibly tiny, almost like dust, you must handle them with extreme care to avoid losing them. Prepare a seed tray with a very fine, sterilized seed-starting mix and moisten it thoroughly before sowing. Do not cover the seeds with soil, as they require light to trigger the germination process.
Sprinkle the seeds as evenly as possible over the surface of the soil, perhaps using a piece of folded paper to guide them. You should cover the tray with plastic wrap or a glass pane to maintain a constant level of high humidity. Place the tray in a warm spot with bright light, or ideally under grow lights for twelve to fourteen hours a day. Germination typically occurs within two to three weeks, depending on the temperature and freshness of the seeds.
When the tiny seedlings appear, they will look like microscopic green specks on the soil surface. At this stage, you must be very careful with watering; a heavy stream will wash the tiny plants away instantly. Use a fine mist or water from the bottom to keep the soil consistently moist but never soggy. As they grow their first true leaves, you can gradually begin to provide more fresh air by cracking open the cover.
Pricking out the seedlings is a delicate task that requires a steady hand and a small tool like a toothpick or a widened paperclip. Move them into individual cells once they are large enough to handle without crushing the stems. Growing from seed allows you to see a wide variety of flower colors and patterns, especially if you are using hybrid seeds. It takes patience, but the sight of a plant you raised from a tiny speck finally blooming is incomparable.