As the seasons change and the outdoor temperatures begin to drop, you must prepare your plants for the shift in indoor conditions. While these are typically grown as indoor plants year-round, the winter environment in a home is very different from the summer. The primary challenges are the decrease in natural light and the drop in humidity caused by heating systems. Understanding these shifts is essential for helping your plant survive the darkest months of the year.
The transition should begin in late autumn as you notice the days getting noticeably shorter and the nights cooler. You will see the plant’s growth naturally start to slow down as it enters a semi-dormant state. This is not a cause for alarm, but rather a survival mechanism designed to conserve energy. During this time, the plant will require less of everything—less water, less food, and less interference.
You should inspect your windows for drafts that could cause sudden temperature fluctuations near your plants. A cold draft can shock the roots and cause leaf drop, while a nearby radiator can dry out the foliage too quickly. Ideally, you want to find a spot that remains consistently between 15 and 18 degrees Celsius throughout the winter nights. This cooler temperature range helps the plant rest without causing it to freeze or dehydrate.
Finally, make sure the leaves are not touching the cold glass of a windowpane, as this can cause localized freezing of the tissue. Even a few millimeters of space can provide enough of a buffer to keep the leaf temperature stable. If you live in an extremely cold climate, you might need to move your plants a bit further away from the window at night. Taking these small precautions in late autumn sets the stage for a successful overwintering period.
Adjusting moisture levels for dormancy
The most common mistake gardeners make during the winter is overwatering their plants while they are resting. Because the metabolic rate is lower and there is less light, the plant uses water much more slowly than in the summer. You must allow the soil to dry out significantly more than you would during the peak growing season. Often, a plant that needed water twice a week in July might only need it once every ten days in January.
More articles on this topic
You can use the weight of the pot as a reliable guide for when it is time to provide a drink. A pot that feels light and airy when lifted is usually a sign that the moisture has been depleted. Avoid the temptation to water on a set schedule; instead, always check the soil condition first. Your goal is to keep the roots alive and the leaves turgid without making the soil soggy.
Humidity becomes a major concern when the central heating is turned on, as it can strip moisture from the air. You might find that your plants benefit from being placed on a larger humidity tray than they used during the summer. Alternatively, grouping all your indoor plants together can help create a more stable, humid environment for everyone. If you have a humidifier, keeping it set to around forty or fifty percent will help prevent the leaf tips from browning.
When you do water, continue to use room-temperature or slightly lukewarm water to avoid shocking the plant. It is best to water in the morning so that any accidental splashes on the foliage have time to evaporate before the temperature drops at night. If you notice the plant looking particularly dusty, you can give the leaves a gentle wipe with a damp cloth, but be careful not to leave them wet. Managing these moisture levels carefully is the key to preventing winter rot.
Light and temperature management
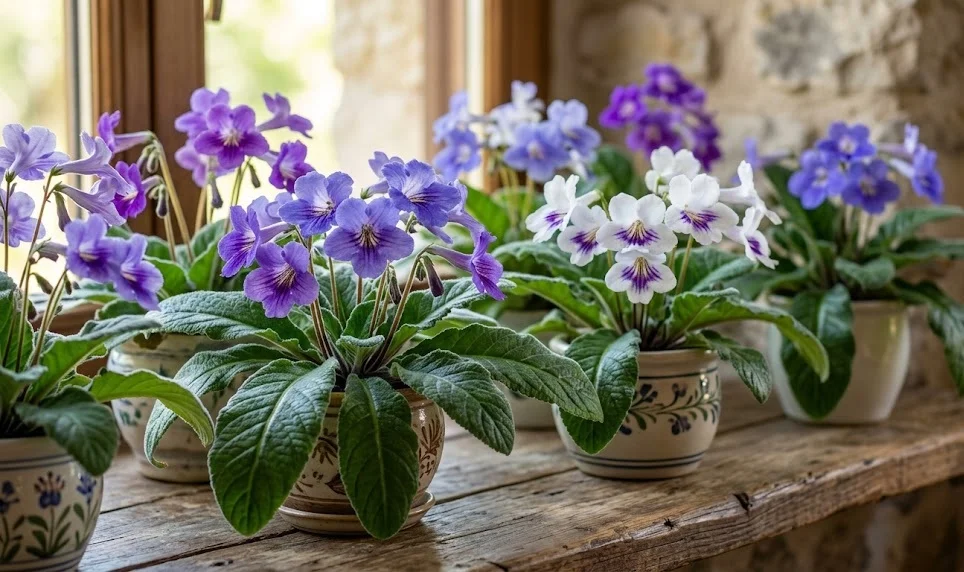
Natural light is often in short supply during the winter, which can lead to “leggy” growth as the plant stretches for the sun. You might need to move your Cape primrose to your brightest southern-facing window to compensate for the shorter days. Even if this spot was too bright in the summer, the winter sun is much weaker and usually won’t cause any burning. If you still find the light insufficient, consider adding a small LED grow light to supplement the natural day.
More articles on this topic
Temperature stability is just as important as the total amount of light the plant receives. Avoid placing your plants near doors that are frequently opened to the outside or near heat vents. Large swings in temperature can confuse the plant’s internal clock and lead to poor blooming in the following spring. Aim for a consistent environment that mimics a cool, bright woodland in the early spring.
If you have a basement or a cool spare room, this can sometimes be an ideal place for overwintering if you provide artificial light. The consistent, cooler temperatures in these spaces often suit the plant’s dormancy needs perfectly. Just be sure to monitor the humidity, as these areas can sometimes become too damp or too dry depending on the home’s construction. A simple thermometer-hygrometer combo is a worthwhile investment for any serious plant collector.
Keep an eye out for any “winter pests” that thrive in the dry air of a heated home, such as spider mites. Because the plant is in a weakened state, it can be more susceptible to infestations during this time. A quick weekly inspection of the leaf undersides will help you catch any problems before they become serious. Maintaining a healthy balance of light and temperature is your plant’s best defense against winter stress.
Preparing for the spring awakening
As the days begin to lengthen in late February or early March, you will notice the first signs of renewed life. Tiny green shoots will start to appear at the base of the plant, and the overall color of the leaves may become more vibrant. This is your signal to gradually begin increasing the frequency of your watering. Do not rush the process; let the plant dictate the pace of its transition back to active growth.
This is also the perfect time to perform some light maintenance and cleanup on your specimen. Remove any leaves that became yellow or withered during the winter to make room for new growth. If the plant has become very dusty, a gentle cleaning will help it maximize the increasing light levels. You can also start to rotate the pot again to ensure the new growth develops evenly on all sides.
Wait until you see significant new leaf development before you reintroduce fertilizer to the routine. Start with a very weak, balanced solution to “wake up” the root system without causing any chemical burns. Once the plant is growing vigorously and the first flower buds appear, you can return to your regular high-phosphorus feeding schedule. This slow and steady approach ensures a smooth transition and a spectacular show of spring blossoms.
If the plant has outgrown its pot or the soil seems particularly exhausted, spring is the best time for repotting. Refreshing the growing medium now provides the plant with the nutrients and space it needs for the upcoming blooming season. After a successful overwintering, your Cape primrose will be ready to reward your patience with a stunning display of color. The cycle of rest and renewal is what makes gardening such a deeply satisfying pursuit.