Establishing a successful colony of Australian daisies begins with a well-timed planting strategy that considers the local climate and soil conditions. This phase is perhaps the most critical part of the plant’s life cycle, as it determines how well the root system will develop. Gardeners must wait until the threat of frost has completely passed before introducing young plants to their outdoor home. A professional approach involves monitoring the soil temperature to ensure it is warm enough to support rapid root growth.
The location chosen for planting will dictate the future health and flowering potential of the daisies for the rest of the year. Ideally, a spot that receives full sun for the majority of the day will yield the most impressive results in terms of bloom density. However, in regions with particularly intense afternoon heat, a location with light dappled shade can be beneficial. Understanding the path of the sun across the garden throughout the day is a fundamental skill for any serious horticulturist.
Before any digging begins, the soil should be prepared to provide the best possible start for the delicate new roots. Clearing the area of weeds and large stones prevents future competition and physical barriers to growth. Incorporating a light amount of organic compost can help to improve the soil structure and provide a gentle source of initial nutrients. This preparation work may seem tedious, but it pays dividends when the plants begin to take off and fill the space.
When moving plants from their nursery pots to the ground, care must be taken not to damage the sensitive root ball. Gently loosening any roots that have started to circle the inside of the pot will encourage them to grow outward into the new soil. The plant should be set at the same depth as it was in its original container to avoid burying the stem too deeply. Firming the soil gently around the base eliminates air pockets and provides necessary stability for the young daisy.
Techniques for sowing seeds
Propagating Australian daisies from seed is a cost-effective and rewarding way to produce a large number of plants for the garden. The seeds are quite small and require a light touch when being handled during the sowing process. Many professionals prefer to start seeds indoors several weeks before the last frost to get a head start on the season. This allows the seedlings to become robust enough to handle the transition to the outdoors when the weather finally warms up.
More articles on this topic
A high-quality seed-starting mix is essential to provide the right balance of moisture and aeration for the emerging sprouts. The seeds should be sown on the surface and only lightly covered with a fine layer of vermiculite or sieved compost. They require a certain amount of light to trigger the germination process, so they should not be buried deeply in the soil. Maintaining a consistent temperature and moisture level in the seed trays will ensure a high success rate.
As the seedlings grow, they will need to be thinned out to prevent overcrowding and ensure that each plant has enough space. Overcrowded seedlings are more prone to diseases such as damping-off, which can quickly ruin an entire batch. Once they have developed their first set of true leaves, they can be carefully transplanted into larger individual pots. This intermediate step allows them to build a stronger root system before the final move to the garden beds.
Hardening off the young plants is a vital step that many beginners often skip, leading to significant transplant shock. This process involves gradually exposing the indoor-grown seedlings to outdoor conditions over the course of a week or two. Starting with a few hours in a sheltered, shady spot and slowly increasing the time and intensity of exposure prepares them for the real world. A professional gardener knows that patience during this transition is the key to long-term plant survival.
Vegetative propagation through cuttings
For those who want to replicate a specific cultivar with exact precision, taking cuttings is the preferred method of propagation. This technique allows the gardener to create new plants that are genetically identical to the parent, ensuring the same flower color and growth habit. Softwood cuttings taken in late spring or early summer usually yield the best results because the tissue is still actively growing. Selecting healthy, non-flowering shoots will give the cuttings the best chance of successful rooting.
More articles on this topic
The process involves removing a three to four-inch section of the stem and stripping the leaves from the bottom half. Dipping the cut end into a rooting hormone can help to stimulate the production of new roots, although it is not always strictly necessary for this species. The cuttings should then be placed into a moist, well-draining rooting medium such as a mix of peat and perlite. Keeping the environment humid by covering the container with a plastic dome can help to prevent the foliage from wilting.
Rooting typically occurs within a few weeks, after which the new plants can be slowly acclimated to lower humidity levels. One can check for root development by gently tugging on the cutting; if there is resistance, it means roots have begun to form. Once the root system is well-established, the individual plants can be moved into their own pots with standard potting soil. This method is an excellent way to expand a garden collection without the uncertainty of seed variability.
Cuttings also offer a way to save favorite plants that might not survive the winter in colder climates. By taking cuttings in late summer, a gardener can keep a small, manageable population of plants indoors over the winter months. These “mother plants” then provide a source for more cuttings in the following spring, creating a continuous cycle of growth. This proactive approach ensures that the most beautiful varieties remain a part of the garden year after year.
Spacing and density for visual impact
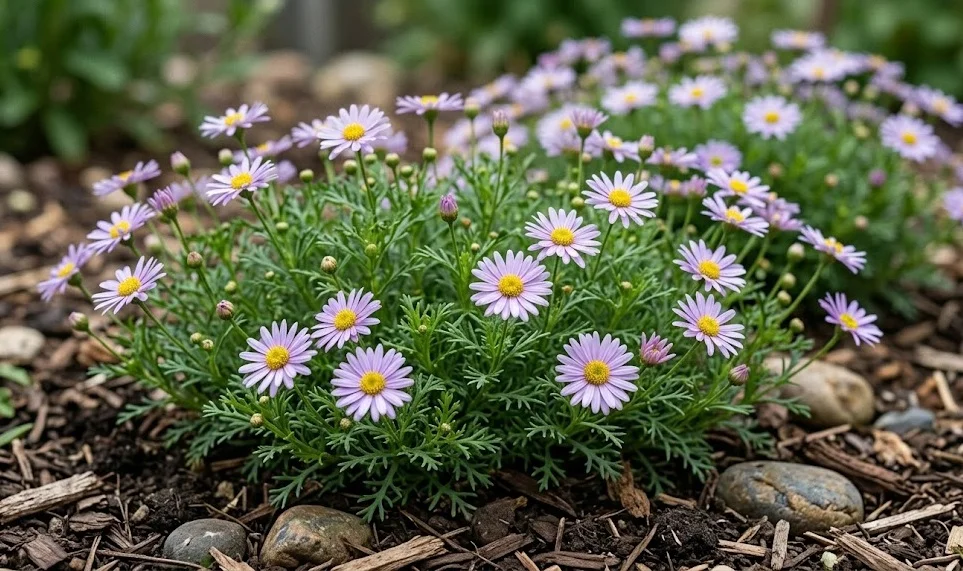
Deciding how many plants to use in a given area is a crucial design choice that affects both the aesthetic and the health of the garden. Australian daisies look their best when they are allowed to grow together and form a continuous carpet of flowers. However, planting them too closely can lead to poor air circulation and increased competition for essential resources. A professional recommendation is usually to space individual plants about eight to twelve inches apart, depending on the variety’s mature width.
This spacing allows the plants enough room to develop their natural mounded shape without becoming tangled too early in the season. As they grow, the edges of the plants will eventually meet, creating a lush and full appearance that is highly sought after in landscaping. If the goal is a more formal look, keeping the plants slightly more separated can highlight their individual forms. The flexibility of the Australian daisy makes it suitable for many different styles of garden design.
In container arrangements, the spacing can be a bit tighter to create an immediate “full” effect for a specific event or season. Because container plants are typically more intensely managed, the risks of overcrowding can be mitigated through careful watering and feeding. However, even in pots, it is important to ensure that each plant has enough root volume to sustain its growth. A professional-looking container should look abundant but not stressed or choked by too many residents.
Finally, considering the height and spread of neighboring plants is essential for a cohesive garden layout. The Australian daisy is generally a low-growing species, so it should be placed toward the front of borders or as a groundcover. Placing it behind taller plants would hide its charming blooms and limit its access to the sunlight it needs to thrive. Careful planning of the spatial arrangement ensures that every plant in the garden has the opportunity to shine.