The successful establishment of Japanese spirea in a landscape begins with a professional approach to planting and the strategic use of propagation techniques. These shrubs are known for their resilience and ease of growth, yet the initial steps taken during the planting phase determine their long-term health. Whether you are adding a single specimen or creating a mass planting, understanding the biological needs of the root system is essential. Proper planning and execution during this phase will ensure that the plants settle in quickly and begin to thrive without unnecessary stress.
Site selection and soil preparation
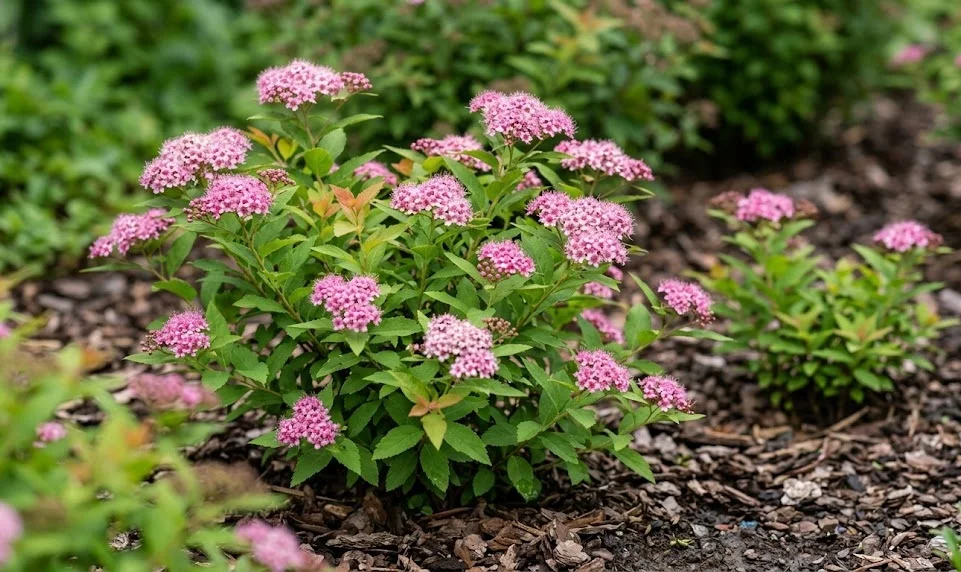
Choosing the right location is the most important decision you will make when planting Japanese spirea in your garden. These shrubs prefer a sunny spot where they can receive at least six hours of direct light each day to produce the best flowers. You should also consider the adult size of the cultivar to ensure it has enough space to expand without being crowded. Avoid low-lying areas where water tends to collect, as the roots do not tolerate standing water for long periods.
Preparing the soil before the plant arrives is a professional practice that yields superior results in the long run. You should dig a hole that is at least twice as wide as the root ball but no deeper than the container it came in. Loosening the soil in a wide circle around the planting hole allows the new roots to spread out easily into the surrounding earth. Mixing in some high-quality compost or aged organic matter will provide the necessary nutrients for early development.
Soil texture and drainage must be evaluated and corrected if they do not meet the requirements of the spirea. If your soil is primarily heavy clay, adding grit or organic material can help to improve the internal drainage and aeration. For very sandy soils, the addition of peat moss or compost can increase the moisture retention capacity and nutrient levels. Taking the time to build a healthy soil structure creates a stable foundation for the plant to grow for many years.
Before placing the plant in the hole, it is wise to check the moisture level of the root ball and the surrounding soil. If the plant is dry, it should be watered thoroughly while still in its container to prevent transplant shock. You should also ensure that the site is free from aggressive weeds that might compete with the young shrub for water and light. A clean and well-prepared site allows the spirea to focus all its energy on root establishment and new growth.
More articles on this topic
The planting process and initial care
Once the site is ready, carefully remove the Japanese spirea from its container, taking care not to damage the delicate root system. If the roots are circling the ball tightly, you should gently loosen them with your fingers to encourage outward growth. Place the shrub in the center of the hole and ensure that the top of the root ball is level with the surrounding soil surface. Planting too deep can lead to stem rot, while planting too shallow can cause the roots to dry out.
Filling the hole with the amended soil should be done in stages to eliminate air pockets around the roots. You can use your hands to gently firm the soil as you go, but avoid tamping it down too hard with your feet. After the hole is filled, create a small basin of soil around the base of the plant to help hold water during the initial irrigation. This ensures that the water goes directly to the root zone where it is needed most.
Immediate watering after planting is critical for settling the soil and providing the hydration necessary for recovery. You should apply water slowly and deeply until the entire root zone is thoroughly saturated. This initial watering also helps to establish a good connection between the root ball and the native soil of your garden. Monitor the plant closely for the first few weeks, as young shrubs are more vulnerable to drying out than established ones.
Applying a layer of mulch around the base of the new planting provides several benefits for the young spirea. Mulch helps to keep the soil cool and moist, which is ideal for the rapid development of new roots. It also serves as a barrier against weeds and helps to prevent soil erosion during heavy rain. Be sure to keep the mulch a few inches away from the main stems to prevent moisture-related bark issues.
More articles on this topic
Propagation through softwood cuttings
Propagating Japanese spirea from softwood cuttings is an effective way to create new plants that are identical to the parent. This process is best performed in the late spring or early summer when the new growth is still flexible but starting to mature. You should select healthy, disease-free stems that do not have flowers or large buds at the tip. Using sharp, sterilized pruning shears ensures a clean cut that will heal quickly and resist infection.
A typical cutting should be about four to six inches long and include several sets of leaves. You must remove the lower leaves to expose the nodes, which are the points where new roots will eventually emerge. Dipping the cut end into a rooting hormone powder can significantly increase the success rate and speed of root development. This hormone provides the chemical signal the plant needs to transition from stem growth to root production.
The cuttings should be placed into a well-draining rooting medium, such as a mix of perlite and peat moss. You must keep the environment humid by covering the container with a plastic dome or placing it in a shaded, protected area. Regular misting prevents the leaves from wilting while the cutting is unable to draw water through roots. Within a few weeks, you should notice resistance when gently tugging on the cutting, indicating that roots have formed.
Once the roots are well-established, the new spirea plants can be transitioned into individual pots with standard potting soil. It is important to gradually acclimate them to outdoor conditions before planting them in their permanent locations in the garden. This process, known as hardening off, prevents the young plants from being shocked by sudden changes in temperature or light. With proper care, these new shrubs will grow quickly and reach flowering size within a season or two.
Propagation by division and layering
Division is another professional method for propagating established Japanese spirea shrubs, particularly those that have grown quite large. This is best done in the early spring before new growth starts or in the autumn after the plant has gone dormant. You must dig up the entire root ball and use a sharp spade or saw to divide the crown into several smaller sections. Each new division must have a healthy portion of roots and at least a few stems to survive.
Layering is a more natural propagation technique that takes advantage of the spirea’s flexible branches. You can bend a low-growing branch down to the ground and bury a small section of it under the soil, leaving the tip exposed. To encourage rooting, you might slightly wound the underside of the buried section or apply a small amount of rooting hormone. Using a heavy stone or a landscape staple will keep the branch in contact with the moist soil.
Over the course of a growing season, the buried section of the branch will develop its own independent root system. Once the roots are strong enough, you can sever the new plant from the parent shrub and move it to a new location. This method is very reliable because the young plant continues to receive nutrients and water from the parent until it is self-sufficient. It is an excellent way to expand your collection of shrubs without needing specialized equipment.
Choosing the right propagation method depends on your goals and the time of year you are working in the garden. While cuttings allow for the mass production of many small plants, division provides larger plants that fill in the landscape much faster. Layering is a great “set it and forget it” method that works well for home gardeners who are not in a rush. Regardless of the method, propagating your own Japanese spirea is a rewarding way to enhance your garden’s beauty.