The successful establishment of these magnificent shade-loving perennials begins with a meticulous approach to the planting process and a strategic plan for propagation. These plants are known for their slow-growing nature and their preference for undisturbed roots, making the initial decisions about location and technique extremely important. Professional gardeners understand that the first few months in the ground will determine the plant’s trajectory for years to come. By following established horticultural standards, you can ensure a smooth transition from the nursery pot to the permanent garden landscape.
Choosing the right time of year for planting is the first step toward long-term success in the garden. Ideally, the yellow wax bells should be planted in the early spring, just as the soil begins to warm but before the plant’s energy is fully committed to leaf production. This timing allows the root system to begin exploring the new soil profile without the added stress of supporting a large canopy of foliage. Alternatively, early autumn can be a viable window, provided the plant has several weeks to settle in before the ground freezes.
Site preparation should be thorough, as these plants will likely remain in the same spot for a decade or more. The planting hole should be dug significantly wider than the root ball to allow for the incorporation of organic amendments like leaf mold or compost. It is vital to ensure that the soil is loose and friable to a good depth, which encourages deep rooting and better drought resistance. A well-prepared site is the best insurance against the common issues of poor drainage or nutrient deficiency.
Depth of planting is a critical factor that is often overlooked by novice gardeners, yet it can mean the difference between life and death for this species. The crown of the plant—the point where the stems meet the roots—should be level with or slightly below the surrounding soil surface. Planting too deep can lead to crown rot, while planting too shallow can expose the sensitive roots to desiccation and temperature extremes. Achieving the perfect depth requires a careful eye and a bit of patience during the backfilling process.
The planting process
Once the hole is prepared, the plant should be carefully removed from its container, taking great care not to damage the succulent roots. If the plant is root-bound, gently tease the outer roots outward to encourage them to grow into the surrounding garden soil. Place the plant in the center of the hole and begin backfilling with a mixture of native soil and organic matter. This gradual integration of materials helps create a transition zone that the roots can easily navigate as they expand.
More articles on this topic
Watering in the new plant is a step that should be done immediately to settle the soil and remove any large air pockets around the roots. Use a gentle stream of water to saturate the entire planting area, ensuring that the moisture reaches the full depth of the root system. This initial hydration is essential for reducing transplant shock and helping the plant establish its hydraulic connection with the soil. Monitor the moisture levels closely for the first few weeks, as the plant will be particularly vulnerable during this time.
Applying a layer of mulch immediately after planting provides a protective barrier that helps maintain consistent soil moisture and temperature. Use natural materials like shredded bark or decomposed leaves, keeping the mulch a few inches away from the stems to prevent moisture buildup against the crown. This mulch layer also suppresses weed competition, allowing the young plant to focus its resources on its own development. A well-mulched plant is far more likely to survive its first summer than one left with bare soil.
In the first growing season, the primary goal is root development rather than impressive top growth or flowering. If the plant produces flower buds in its first year, some professionals recommend removing them to redirect energy back into the roots. While it may be difficult to sacrifice the first season’s blooms, the long-term benefits of a stronger root system are well worth the initial disappointment. Patience is a virtue when working with slow-growing perennials like the yellow wax bells.
Propagation by division
Division is the most reliable method for increasing your stock of these plants while maintaining the characteristics of the parent specimen. This process is best undertaken in early spring when the new shoots are just beginning to show their tips above the soil. At this stage, the plant is in an active state of growth, which helps it recover quickly from the trauma of being lifted and split. A healthy, mature clump can usually be divided every five to seven years if needed.
More articles on this topic
To begin the division, carefully dig a wide circle around the entire clump to lift the root mass with as much soil as possible. Use a sharp, clean spade or a specialized garden knife to cut the rhizomatous roots into smaller sections. Each new division must have at least two or three healthy buds and a substantial portion of the root system to ensure survival. Avoid making the divisions too small, as tiny sections will take much longer to reach flowering size and may be more susceptible to stress.
Replanting the divisions should be done immediately to prevent the roots from drying out in the air. Treat each new division with the same care as a new nursery purchase, ensuring the planting depth and soil quality are optimal. Space the new plants at least three feet apart to give them room to grow into large, independent specimens over the next few seasons. Watering the divisions thoroughly after planting is non-negotiable for successful re-establishment.
One of the benefits of division is that it rejuvenates older plants that may have become less productive in the center. By removing the older, woodier parts of the rhizome and replanting the vigorous outer sections, you can give the plant a new lease on life. This technique is a standard practice in professional estate gardens where maintaining the quality of long-term plantings is a priority. It ensures a continuous supply of healthy, vibrant plants for the landscape.
Propagation from seed
Growing these plants from seed is a rewarding but slow process that requires a great deal of patience and attention to detail. The seeds should be collected in late autumn when the capsules have turned brown and are just beginning to split open. It is important to sow the seeds as soon as possible, as they lose viability quickly if allowed to dry out completely. Fresh seed has a much higher germination rate than store-bought packets that may have been stored improperly.
The seeds require a period of cold stratification to break their natural dormancy and trigger the germination process. This can be achieved by sowing them in pots and leaving them in a cold frame or unheated greenhouse over the winter. Nature will provide the necessary temperature fluctuations that signal to the seed that spring is approaching. Alternatively, you can use a refrigerator to mimic winter conditions if you live in a climate where natural winters are too mild or unpredictable.
Germination usually occurs in the spring as temperatures begin to rise, but it can be erratic and take several weeks. Once the seedlings emerge, they should be kept in a shaded, moist environment and protected from slugs and snails which find the young leaves irresistible. The seedlings are quite delicate and should be grown in containers for at least two years before being moved to their final positions in the garden. This extra time allows them to develop a sturdy root system that can withstand the challenges of the open landscape.
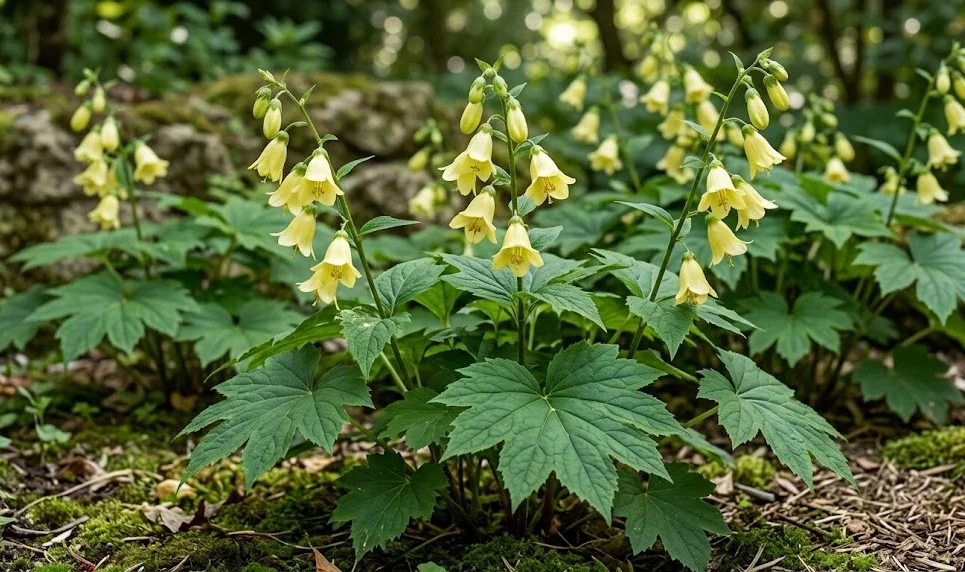
The first few years of a seedling’s life are focused on building architectural strength rather than flowering. It can take four to six years for a seed-grown plant to reach maturity and produce its first set of yellow bells. While this may seem like a long wait, the resulting plants are often very robust and well-adapted to the specific conditions of your garden. Seed propagation also allows for the possibility of slight variations in form or flower color, adding a bit of excitement to the process.