The process of establishing a new yesterday-today-and-tomorrow shrub begins with careful planning and an understanding of its reproductive biology. Whether you are starting with a young nursery plant or attempting to create new life from cuttings, the initial stages are the most critical for future success. This shrub requires a specific set of conditions to transition from a vulnerable sprout or cutting into a hardy, flowering member of your garden. By following professional propagation techniques, you can expand your collection of these enchanting tropical beauties with high rates of success.
When you first bring a new plant home, the temptation is to immediately put it into a large, decorative pot or a permanent spot in the garden. However, giving the shrub a week or two to acclimate to your local light and humidity levels is a much safer approach. Keep it in its original nursery container while you observe how it reacts to the specific microclimate of your patio or living room. This waiting period reduces the risk of transplant shock, which can often be fatal for young and sensitive tropical species.
Preparing the planting site or the new container involves more than just dumping in some soil and making a hole. You must ensure that the environment is chemically and physically ready to support rapid root development from the very first day. If planting in the ground, dig a hole that is twice as wide as the root ball but no deeper than the current soil level. This allows the roots to spread horizontally through loosened soil, which is where they will find the most oxygen and nutrients.
Propagation is a rewarding way to share the beauty of this plant with friends or to fill more corners of your own garden space. While it can be done from seeds, most professionals prefer using semi-hardwood cuttings because they produce a mature, blooming plant much faster. This method also ensures that the new plant will be an exact genetic clone of the parent, carrying over the same flower size and fragrance. With a bit of patience and the right tools, you can master the art of replicating these shrubs at home.
Selecting the ideal planting location
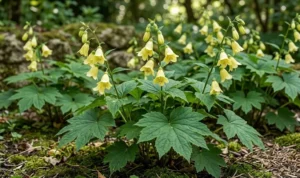
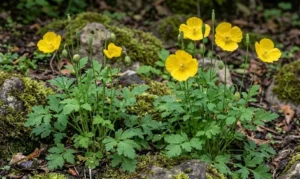
Choosing the right spot for your shrub is a decision that will impact its health and flowering potential for many years to come. In outdoor settings, you should look for a location that receives bright, filtered light rather than the harsh, direct rays of the afternoon sun. Under the canopy of a tall tree or on the eastern side of a building are often the best choices for these plants. The goal is to provide enough light to trigger blooming without overheating the foliage or drying out the soil too quickly.
More articles on this topic
Soil drainage at the planting site must be tested before you commit the shrub to the ground to avoid future root rot. You can do this by digging a small hole, filling it with water, and timing how long it takes to drain away completely. If the water sits for more than an hour, the soil is likely too heavy in clay and will need significant amendment with sand or compost. Alternatively, you can build a raised bed to provide the excellent drainage that this species requires for its survival.
Space is another important consideration, as this shrub can grow quite wide and tall if left to its own devices in a favorable climate. You should check the specific variety you have to see its expected mature dimensions and plan your garden layout accordingly. Crowding the plant too close to walls or other large shrubs can restrict air circulation and lead to fungal problems in the future. Give it enough room to breathe and display its naturally elegant, spreading form without needing constant heavy pruning.
For container planting, the choice of the pot itself can affect the success of the initial planting phase significantly. Terracotta pots are excellent for drainage but can dry out very quickly in hot weather, requiring more frequent watering from the gardener. Plastic or glazed ceramic pots retain moisture longer, which might be better if you live in a particularly dry or windy area. Regardless of the material, the presence of multiple drainage holes is a non-negotiable requirement for the long-term health of the root system.
Mastering the art of propagation from cuttings
Taking cuttings is the most effective way to propagate this shrub, but timing and technique are essential for a high success rate. The best time to take cuttings is in the late spring or early summer when the plant is in a state of active and vigorous growth. Look for stems that are firm and “semi-hardwood,” meaning they are not the soft new tips but are not yet fully woody and brown. A cutting that is about four to six inches long with several sets of leaves is usually the ideal size.
More articles on this topic
Using a clean, sharp pair of pruning shears is vital to prevent crushing the delicate tissues of the stem during the cutting process. You should make a clean diagonal cut just below a leaf node, as this is where the highest concentration of natural rooting hormones is located. Remove the lower leaves to expose the nodes, leaving only two or three leaves at the top to provide energy through photosynthesis. If the remaining leaves are very large, you can cut them in half to reduce the amount of moisture the cutting loses.
While some gardeners have success rooting these cuttings in water, a professional propagation mix is generally more reliable for long-term health. A mixture of perlite and peat moss provides a sterile, well-aerated environment that encourages the development of strong, fibrous roots. Dipping the end of the cutting into a rooting hormone powder or gel can significantly speed up the process and protect against fungal infections. Insert the cutting into the mix and firm it down gently to ensure there are no air pockets around the stem.
Maintaining high humidity around the cuttings is the final secret to successful propagation of the yesterday-today-and-tomorrow shrub. You can create a mini-greenhouse by placing a clear plastic bag or a plastic dome over the propagation tray to trap the moisture. Place the tray in a warm spot with bright but indirect light, and avoid any direct sunlight that could overheat the air inside the dome. Within six to eight weeks, you should notice new growth, indicating that the cutting has successfully established its own root system.
Planting from seeds and alternative methods
Growing this shrub from seeds is a slower process that requires a significant amount of patience and attention to detail from the gardener. The seeds must be harvested from the mature fruit of the plant, which are small berries that turn dark when they are ready. You should clean the pulp off the seeds immediately, as it contains natural inhibitors that can prevent or delay the germination process. Sowing the seeds while they are fresh is much more effective than using old, dried-out seeds from a packet.
Use a light, sterile seed-starting mix and press the seeds gently into the surface without covering them too deeply with soil. They need a warm environment, ideally around 21 degrees Celsius, to germinate, so using a heat mat can be very beneficial in cooler climates. Keep the soil consistently moist but never soggy, using a spray bottle to avoid washing the tiny seeds away during watering. Germination can be erratic, sometimes taking several weeks or even months for the first green shoots to appear.
Layering is another propagation technique that works well for shrubs with low-hanging branches that can be pinned to the ground. You can gently nick the underside of a healthy branch and bury that section in the soil while it is still attached to the parent plant. Using a small wire stake to hold it in place will ensure constant contact with the earth, encouraging roots to form at the wound site. After a few months, once a strong root system has developed, you can sever the new plant from the parent and move it.
Whichever method you choose, the transition phase from a propagated unit to a standalone plant is a time for extra care. Gradually introduce the young plants to less humid conditions and more light over a period of several days to toughen them up. This process, known as hardening off, is essential for preventing the shock that occurs when moving from a protected environment to the real world. Once the plant shows vigorous new growth and a sturdy stem, it is ready to be moved into its permanent home.
Final steps for successful establishment
The first few months after planting are a defining period for the future health and structural integrity of your new shrub. You must monitor the water levels closely, as the root system is not yet deep enough to find moisture during dry spells. Avoid the temptation to over-fertilize during this time, as the plant needs to focus on root development rather than explosive top growth. A light application of a high-phosphorus “starter” fertilizer can be used to encourage those roots to anchor themselves firmly.
Mulching around the base of the newly planted shrub is a professional trick that pays dividends in both growth and protection. A two-inch layer of organic mulch helps keep the soil moist and prevents weeds from competing for the same nutrients. Be careful not to let the mulch touch the actual stem of the plant, as this can trap moisture against the bark and lead to decay. As the mulch breaks down over time, it will continue to improve the soil quality around the young root system.
Check the stability of the plant after heavy rains or strong winds to ensure that it has not been loosened in the soil. If necessary, you can use a small stake to provide extra support during the first year of growth, but be sure to tie it loosely to allow for natural movement. This movement actually helps the stem grow stronger and more resilient as the plant matures into its full size. Once the shrub has survived its first full cycle of seasons, you can consider it well-established and shift toward a regular maintenance routine.
Patience is a virtue when waiting for a newly planted yesterday-today-and-tomorrow shrub to produce its first set of multi-colored flowers. It may take a year or two for the plant to feel settled enough to put energy into a full floral display. Do not be discouraged if the first year only brings lush green foliage and very few purple buds. By providing a solid foundation through correct planting and propagation, you have set the stage for a lifetime of beautiful garden performances.