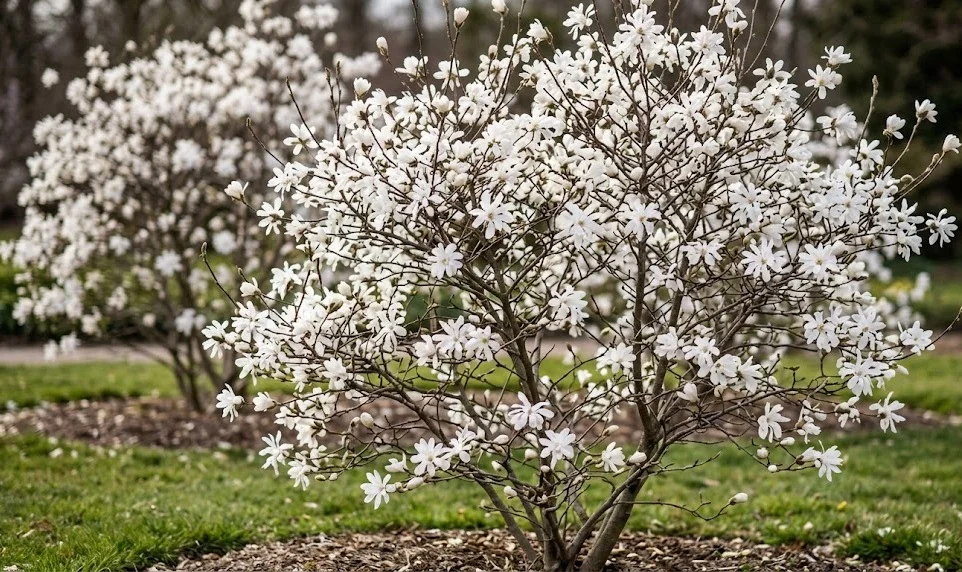
Planting star magnolia well is the foundation for decades of healthy growth, abundant flowering, and balanced form. This shrub may look delicate when young, but it can become a long-lived garden specimen if its roots are treated carefully from the beginning. Propagation is possible by several methods, though patience and attention to detail are essential. Whether starting with a nursery plant, a cutting, or seed, success depends on moisture, hygiene, timing, and a stable growing environment.
Planning the planting site
The first step is choosing a place where star magnolia can remain permanently. This plant dislikes being moved once established because its roots are shallow, spreading, and easily disturbed. A carefully selected site prevents later transplant shock and structural problems. The location should offer light, shelter, and enough space for the mature crown.
Star magnolia is especially effective where its early flowers can be seen from the house or a frequently used path. Since it blooms before many other plants are active, it can become a key feature in the spring garden. It also pairs well with low spring bulbs and shade-tolerant groundcovers. These companions should not compete aggressively with the magnolia roots.
Avoid planting in frost pockets where cold air settles on still nights. Low areas at the bottom of slopes can increase the risk of flower damage. A slightly raised or gently sheltered position is often more reliable. Protection from strong north or east winds can also improve flower quality.
The soil should be tested informally before planting. If water remains in the planting hole for many hours after heavy rain, drainage may be inadequate. If the soil crumbles easily and contains organic matter, the plant will establish more readily. Poor soil should be improved across a wide area, not just directly under the root ball.
More articles on this topic
Planting technique and early establishment
The planting hole should be wide rather than excessively deep. A broad hole encourages roots to spread outward into loosened soil. The root collar must remain at the same level it had in the container or nursery field. Planting too deeply is a common mistake and can lead to poor growth or stem decay.
Before planting, the root ball should be inspected. Circling roots from container-grown plants can be gently teased outward if they are not too woody. Damaged or dead roots may be trimmed with clean tools. The goal is to encourage outward root growth without breaking the root system apart unnecessarily.
Backfill should consist mostly of the native soil improved with mature compost where needed. Filling the hole with overly rich, loose material can create a basin that holds water or discourages roots from entering the surrounding soil. Firm the soil gently by hand to remove large air pockets. Avoid stamping heavily, because compaction harms the young root system.
After planting, water slowly and thoroughly. This settles soil around the roots and reduces transplant stress. A mulch layer should then be applied over the planting area. During the first growing season, consistent watering is more important than fertilizer.
More articles on this topic
Propagation from cuttings and layering
Semi-ripe cuttings are one of the more practical propagation methods for gardeners with some experience. These are usually taken in summer when new shoots have begun to firm but are not fully woody. Each cutting should include healthy tissue, several nodes, and no flower buds. Clean tools and fresh propagation material greatly improve success.
The lower leaves are removed, and the base may be treated with rooting hormone. Cuttings are placed in a free-draining propagation mix that stays moist but not saturated. High humidity helps prevent wilting while roots form. A covered propagator, mist system, or clear enclosure can be useful if ventilation is carefully managed.
Rooting can be slow and uneven. Some cuttings may fail even when the technique is correct. Gentle bottom heat can improve rooting consistency, especially in cooler climates. Once roots develop, the young plants should be hardened gradually rather than moved abruptly into outdoor conditions.
Layering is often easier for home gardeners because the shoot remains attached to the parent plant while roots develop. A low flexible branch can be slightly wounded, pegged into the soil, and covered with a moist rooting medium. Over time, roots may form at the buried section. The new plant should only be separated once it has a strong root system.
Growing from seed and caring for young plants
Seed propagation is possible, but it does not produce plants identical to the parent. Seedlings may vary in flower color, size, vigor, and blooming age. This method is valuable for patient growers and breeding work but less predictable for ornamental planting. Named cultivars are usually propagated vegetatively to preserve their characteristics.
Fresh seed often requires cleaning and a period of cold stratification. The fleshy outer coating should be removed because it can inhibit germination. Seeds are then kept in a moist medium under cool conditions for several weeks or months. This imitates natural winter conditions and helps break dormancy.
Germination may be irregular. Some seeds sprout in the first season, while others take longer. The growing medium should remain slightly moist and well aerated. Seed trays or pots should be protected from rodents, drying winds, and harsh sun.
Young star magnolias grow slowly at first and should not be rushed. They need bright light, even moisture, and protection from extreme temperatures. Potting on should be done before roots become tightly congested. When large enough for the garden, they should be planted with the same care given to nursery-grown shrubs.