Direct sowing into the garden bed is the most common and easiest method for growing these beautiful flowers. Waiting until all danger of frost has passed ensures the delicate seeds do not rot in cold soil. The soil temperature should ideally reach comfortable spring levels before you begin planting. This direct approach eliminates the risk of transplant shock entirely for the young seedlings.
Preparing the seedbed involves raking the soil surface until it is smooth and free of debris. Place the large, dark seeds about half an inch deep into the prepared earth. Spacing them several inches apart initially allows you to select the strongest plants later on. Press the soil down firmly over the seeds to ensure good contact with the earth.
Watering the area gently with a fine mist nozzle keeps the seeds in place while providing necessary moisture. The soil must remain consistently damp but never soggy during the entire germination period. Under ideal conditions, you can expect to see green sprouts emerging within one to two weeks. Once they appear, their rapid growth pattern becomes noticeable almost daily.
Thinning the young seedlings is an important step that should not be skipped or delayed. Space the remaining plants about two feet apart to allow for their expansive bushy mature size. The discarded seedlings can sometimes be replanted carefully in another area if they have intact roots. Proper spacing from the beginning guarantees adequate air circulation and sunlight for every individual.
Starting seeds early indoors
Starting your seeds indoors gives you a significant head start on the summer growing season. This method is highly recommended for gardeners living in regions with short summers. You should begin the sowing process about six to eight weeks before the average last frost date. Using biodegradable peat pots prevents damage to the sensitive roots during later transplanting.
More articles on this topic
Fill the planting pots with a high-quality, lightweight seed starting mix for best results. Soaking the hard seeds in warm water overnight softens the outer shell and accelerates germination. Plant one or two seeds per pot and cover them lightly with the moist starting medium. Placing the trays in a warm location encourages quick and even sprouting.
Providing adequate light is critical once the green shoots emerge from the soil. A bright south-facing window or artificial grow lights kept close to the plants prevents legginess. Keep the soil evenly moist using a gentle spray bottle to avoid disturbing the tiny roots. Rotate the trays regularly to ensure the seedlings grow straight and strong toward the light source.
Hardening off the indoor seedlings is essential before moving them permanently into the outdoor garden. Gradually expose the young plants to outdoor elements over a period of a week or ten days. Start with a few hours of sheltered shade and slowly increase their time in direct sun. This careful transition period builds resilience and ensures survival in the open garden.
Root division techniques
Propagating through root division is an excellent way to multiply your favorite plant specimens exactly. This process involves working with the large, tuberous roots that develop beneath mature plants over time. The best time to perform this delicate task is early spring just as new growth begins. Dividing the roots allows you to maintain the exact color variations of the parent plant.
More articles on this topic
Carefully dig around the base of an established clump using a sharp garden spade. Lift the heavy tuberous mass out of the ground while trying to minimize damage to the roots. Clean away the excess soil to clearly see the individual eyes or growth buds on the tubers. Each section you plan to separate must contain at least one healthy growth eye.
Use a clean, sterilized knife to slice the large root mass into distinct, viable sections. Allow the cut surfaces to dry and callus over for a few hours before replanting them. This resting period helps prevent fungal infections from entering the open wounds when buried. Treat the divided pieces gently to avoid breaking the delicate new shoots that may be forming.
Replant the divided sections immediately into prepared garden beds or temporary holding containers. Set them at the same depth they were growing previously to ensure natural development. Water the newly planted tubers thoroughly to settle the soil around the disturbed root pieces. With proper care, these divisions will quickly establish themselves and bloom during the same season.
Selecting the perfect location
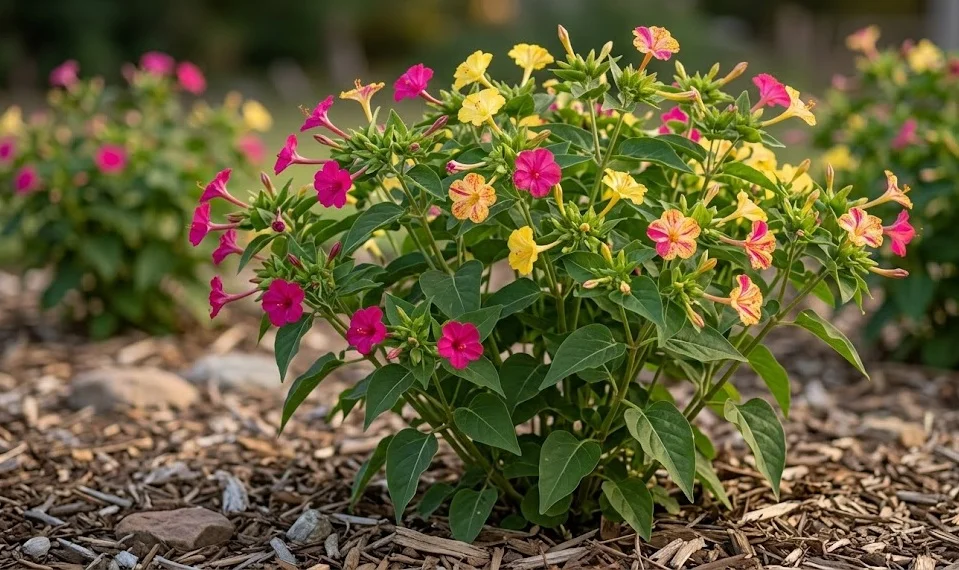
Choosing the right location is paramount when planting these beautiful and expansive evening bloomers. They require a spot that receives plenty of bright sunlight to support their heavy flower production. A location near windows or walkways allows you to fully appreciate their delightful evening fragrance. Consider how their mature size will interact with existing permanent landscape elements.
The chosen area must feature soil that drains efficiently to protect the fleshy tuberous roots. Low-lying spots where water collects after rainstorms should be avoided at all costs. If your ideal visual spot has poor drainage, consider installing a raised garden bed. Creating the right foundation ensures the plants remain healthy and vibrant for years.
Think about wind exposure when selecting where to place these tall, bushy plants. Strong gusts can easily snap the brittle stems of mature, top-heavy specimens. Planting them against a fence or wall provides excellent natural protection from severe weather elements. This structural support keeps the garden display looking neat and upright all season long.
Finally, consider the proximity to other plants to avoid overcrowding issues in the future. Give them plenty of room to expand without smothering delicate perennials nearby. A well-chosen location makes subsequent maintenance tasks much easier and more enjoyable for you. Taking time to plan your placement rewards you with a spectacular and trouble-free display.