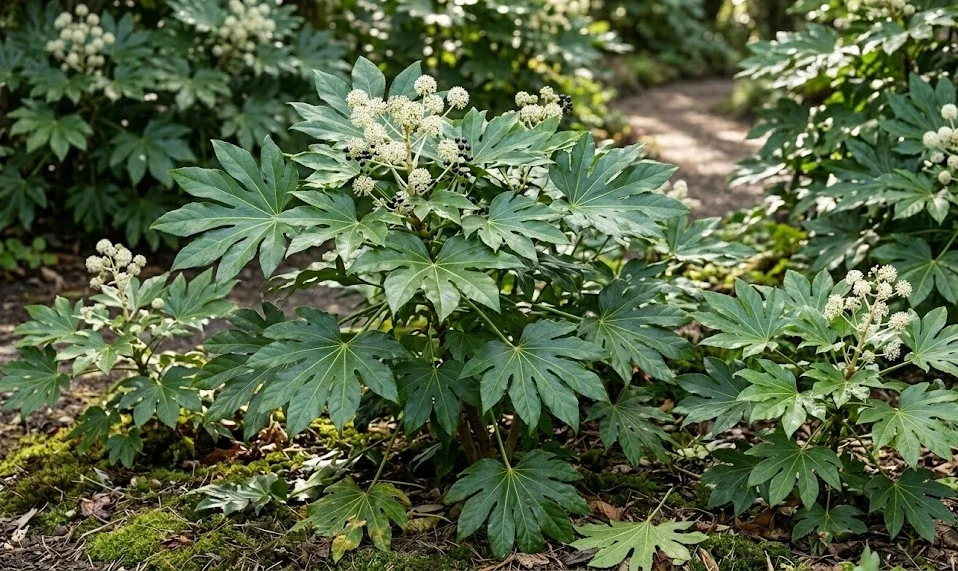
Cultivating a healthy environment for your plant requires a blend of patience and specific horticultural knowledge. This evergreen shrub is highly valued for its dramatic, palmate leaves that bring a tropical feel to temperate gardens and indoor spaces alike. To ensure the plant thrives over several decades, one must understand its native forest floor origins where dappled sunlight and consistent moisture prevail. By replicating these conditions, you can enjoy a robust specimen that serves as a stunning focal point in any botanical collection.
Maintaining the aesthetic appeal of the foliage involves regular attention to the cleanliness of the large leaf surfaces. Dust tends to accumulate quickly on the broad lobes, which can hinder the plant’s ability to photosynthesize efficiently and invite unwanted pests. A gentle wipe with a damp cloth every few weeks will keep the stomata clear and maintain the characteristic glossy sheen that gardeners admire. This simple act of maintenance also allows you to inspect the plant closely for any early signs of distress or emerging growth.
The growth rate of this species is relatively moderate, but it can eventually reach impressive heights if the root system is given enough space. When grown in containers, the plant may become root-bound every few years, which signals the need for a larger pot or a refreshment of the topsoil. Observation of the drainage holes is crucial, as roots protruding from the bottom indicate that the plant has outgrown its current home. Providing a stable environment without frequent dramatic shifts in position will help the shrub maintain its structural integrity.
Temperature stability is another pillar of successful care, as extreme fluctuations can lead to leaf drop or stunted development. While the plant is surprisingly resilient to cool air, it generally prefers a consistent range that mimics a mild climate without the harshness of direct heat vents. Avoid placing your specimen near air conditioning units or radiators, as the dry air produced by these machines is detrimental to leaf health. Keeping the environment balanced ensures that the aralia remains a vibrant and healthy addition to your living space or garden bed.
Establishing the ideal soil composition
Selecting the right growing medium is the foundation for any long-term gardening success with this specific variety. A rich, loamy soil that retains moisture while allowing excess water to escape is absolutely essential for root health. Many experts recommend a mixture that includes organic compost and a bit of perlite to improve aeration within the pot or garden hole. This combination ensures that the roots have access to oxygen while still being surrounded by the nutrients they need for foliage production.
More articles on this topic
Soil acidity also plays a subtle yet important role in how the plant absorbs essential minerals from the earth. A slightly acidic to neutral pH level is generally considered the sweet spot for these shrubs to flourish without developing nutrient deficiencies. If the soil becomes too alkaline, you might notice a yellowing of the leaves, which is often a sign of chlorosis. Regular testing of the soil can help you stay ahead of these issues before they impact the overall vigor of the plant.
Organic matter should be replenished periodically to maintain the structure and fertility of the medium. Incorporating leaf mold or well-rotted manure into the top layers of the soil can provide a slow-release source of energy for the plant. This practice mimics the natural decomposition process found on a forest floor, which is the plant’s ancestral home. Such a nutrient-dense environment supports the development of those large, iconic leaves that define the species’ appearance.
Compaction is a common enemy of healthy root systems, especially in older potted specimens that haven’t been disturbed in years. Over time, the soil particles settle and press together, reducing the available air pockets that roots need to breathe. Gently poking the soil with a wooden dowel or refreshing the top few inches can help mitigate this issue effectively. Ensuring the medium remains fluffy and well-drained will prevent many of the common pitfalls associated with stagnant growth.
Managing humidity for lush foliage
Because this plant originates from humid coastal regions, it naturally craves a certain level of moisture in the surrounding air. In modern homes, especially during the winter months, the air can become excessively dry, leading to crispy brown leaf edges. To counter this, many gardeners utilize pebble trays filled with water to create a localized microclimate of higher humidity around the foliage. This method is much more effective than occasional misting, which only provides a very temporary boost in moisture.
More articles on this topic
Grouping plants together is another clever way to increase the ambient humidity through a process known as communal transpiration. As the plants release water vapor through their leaves, they create a collective zone of moist air that benefits every individual in the group. This ecological strategy not only helps the aralia stay hydrated but also creates a more aesthetically pleasing indoor jungle arrangement. It is a natural solution that reduces the need for mechanical humidifiers in smaller spaces.
In larger rooms or hallways, a dedicated humidifier might be necessary if the levels drop significantly below fifty percent. Monitoring the air with a hygrometer can take the guesswork out of maintenance and provide clear data on environmental conditions. When the air is kept consistently moist, the leaves retain their flexibility and vibrant green color throughout the year. This attention to detail prevents the plant from looking stressed or tired during the drier seasons of the year.
Bathrooms and kitchens often provide naturally higher humidity levels, making them excellent locations for younger specimens. However, you must ensure that these rooms also provide enough natural light, as high humidity cannot compensate for total darkness. If the air remains too dry for too long, the plant becomes more susceptible to pests like spider mites that thrive in arid conditions. Keeping the atmosphere damp is therefore a vital part of your integrated pest management strategy.
Indoor placement and spatial requirements
Finding the perfect spot inside a house requires a balance between architectural beauty and the physiological needs of the plant. Since these shrubs can grow quite wide, it is important to place them where the large leaves won’t be constantly brushed by passing people. Physical damage to the foliage can lead to permanent scarring, which detracts from the plant’s overall majestic appearance. A corner that receives bright, filtered light is often the best choice for a permanent indoor home.
Airflow is another critical consideration that is often overlooked when deciding where to place a large indoor plant. While the aralia dislikes cold drafts, it still requires some air movement to prevent the buildup of fungal spores on its broad leaves. Placing the plant in a stagnant, unventilated corner can lead to issues with powdery mildew or other foliar diseases. Ensure there is enough space between the plant and the wall to allow for natural air circulation around the entire canopy.
As the plant matures, its heavy foliage may cause it to become top-heavy, necessitating a sturdy and heavy base. Selecting a ceramic or stone pot can provide the necessary weight to prevent the plant from tipping over as it grows taller. This is particularly important if you have pets or small children who might accidentally bump into the greenery. A stable base ensures the safety of both the plant and the residents of the home.
The height of the ceiling should also be considered, as a healthy specimen can eventually reach over two meters in height. If you notice the plant is outgrowing its space, you may need to consider pruning or moving it to a room with more vertical clearance. Planning for this eventual size from the beginning will save you the trouble of relocating a heavy, mature plant later on. Keeping the plant’s ultimate scale in mind helps maintain harmony within your interior design.
Transitioning to outdoor environments
Moving a plant from the controlled environment of a home to the unpredictable nature of a garden requires a careful transition period. Sudden exposure to direct sunlight or harsh winds can shock the system and cause the foliage to burn or wilt rapidly. Start by placing the pot in a sheltered, fully shaded area for a few hours each day, gradually increasing the exposure over two weeks. This process, known as hardening off, allows the plant to strengthen its cellular structure against the elements.
Once established outdoors, these shrubs are remarkably hardy and can withstand temperatures that would kill more delicate tropical plants. They are particularly well-suited for north-facing walls or under the canopy of larger trees where other plants might struggle with the shade. The architectural form of the aralia provides excellent contrast against finer-textured plants like ferns or hostas. This versatility makes it a favorite among landscape designers looking for year-round structural interest.
In the garden, the plant’s roots will have much more freedom to expand, which often leads to a surge in growth during the spring months. It is important to ensure the chosen garden spot has excellent drainage to prevent the roots from sitting in water during heavy rains. If your garden soil is heavy clay, consider planting in a raised bed or incorporating significant amounts of grit to improve the structure. Proper drainage is the single most important factor for outdoor success with this species.
Wind protection is also a factor that should not be ignored when planting in an open landscape. The large leaves act like sails, and strong gusts can easily snap branches or cause the entire plant to lean at an unsightly angle. Planting near a fence or a sturdy hedge can provide the necessary windbreak to keep the foliage intact and beautiful. A well-protected plant will always look more pristine than one exposed to the full force of the weather.
Monitoring seasonal growth cycles
Understanding the natural rhythm of the seasons will help you provide the right care at the right time throughout the year. During the spring and summer, the plant enters its most active phase, producing new leaves that are initially a lighter, brighter green. This is the period when the plant requires the most water and nutrients to fuel its rapid expansion. Observing the emergence of these new shoots is one of the most rewarding aspects of caring for this species.
As autumn approaches, the growth rate naturally slows down as the plant prepares for a period of relative dormancy. You will notice that no new leaves appear, and the plant becomes much less demanding in terms of hydration and feeding. This is a natural response to the shorter days and cooler temperatures, and it is important not to force growth during this time. Respecting this rest period is essential for the long-term health and longevity of the shrub.
In late autumn or early winter, mature plants may produce clusters of small, white, globe-like flowers that have a distinctively exotic look. While these flowers are not as showy as those of some other garden plants, they provide valuable interest during the darker months of the year. Following the flowers, small black berries may develop, though these are typically not the main reason gardeners choose to grow this plant. These reproductive cycles are a sign that the plant is well-established and happy in its environment.
Spring is the time to assess the plant for any winter damage and to prepare for the upcoming growing season. This is the ideal window for any necessary pruning or repotting before the new growth begins in earnest. By aligning your maintenance tasks with the plant’s internal clock, you minimize stress and maximize the potential for a spectacular display. Being in tune with these seasonal shifts is what separates a casual grower from a true gardening expert.
Troubleshooting common foliage issues
Even with the best care, you may occasionally encounter problems that manifest in the appearance of the leaves. Yellowing of the lower leaves is often a natural part of the aging process, but if it happens rapidly, it could indicate overwatering. Check the moisture level of the soil deep down to ensure that the roots are not suffocated by excess water. Adjusting your watering routine is usually the first step in resolving most common physiological stresses.
Drooping or wilting leaves, on the other hand, are usually a clear cry for more water or a response to extreme heat. If the plant doesn’t perk up shortly after watering, it might be suffering from root damage that prevents it from taking up moisture effectively. In such cases, you may need to inspect the root ball for signs of rot or disease. Taking quick action when you notice a change in leaf posture can prevent a minor issue from becoming a fatal one.
Brown, crispy spots on the leaves can be caused by several factors, including low humidity or chemical burns from tap water. If you live in an area with very hard water, the accumulation of salts in the soil can eventually damage the delicate root hairs. Using filtered water or allowing tap water to sit out overnight can help mitigate some of these chemical sensitivities. Ensuring that the air remains moist will also prevent the edges of the leaves from drying out and turning brown.
Small, pale spots or stippling on the leaf surface are often the first sign of a pest infestation, such as spider mites. These tiny creatures are difficult to see with the naked eye, but their damage is very distinctive once you know what to look for. Regularly checking the undersides of the leaves will help you catch these intruders before they can cause widespread damage. Maintaining a clean plant and a humid environment is your best defense against most common foliage problems.