Establishing a new colony of common bistort requires a thoughtful approach to both timing and location selection. You should aim to plant during the cooler months of spring or autumn to reduce the stress on the young root systems. This allows the plant to focus on developing a strong base before the extreme temperatures of summer or winter arrive. Success in the long run depends heavily on the initial steps you take during the planting phase.
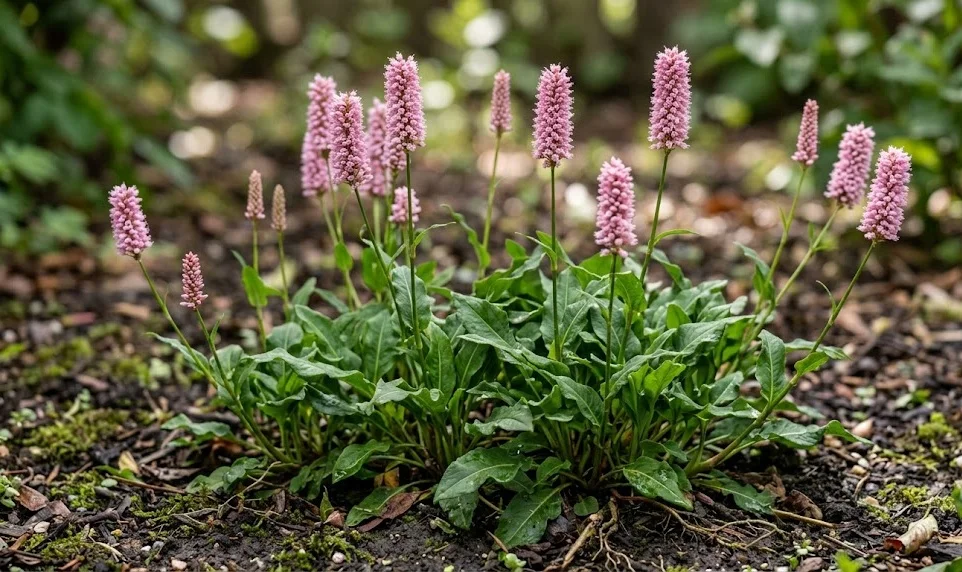
The location you choose should reflect the natural preferences of this moisture-loving perennial species. You should look for a spot that offers consistently damp soil, such as a low-lying area or near a pond. While it can tolerate some shade, a sunny position will result in a much more prolific display of flowers. Ensuring that the soil is rich in organic matter will provide the best start for your new additions.
Soil preparation is a task that should never be rushed if you want professional results in your garden. You should begin by clearing the area of all weeds and large stones that might hinder root growth. Incorporating a generous amount of well-rotted manure or compost will improve the soil structure significantly. This preparation creates a nutrient-rich environment that encourages the rhizomes to spread quickly and healthily.
Digging the planting hole is a simple but important part of the overall process for any gardener. The hole should be twice as wide as the root ball but no deeper than the container the plant came in. You want the crown of the plant to sit level with or slightly above the surrounding soil surface. This prevents water from pooling around the base, which could lead to crown rot in heavy soils.
Techniques for successful planting and establishment
When you are ready to place the plant in the ground, handle the root system with great care. You should gently tease out any roots that have become circled or pot-bound in their previous container. This encourages them to grow outwards into the new soil rather than continuing to circle. Proper root orientation is essential for the long-term stability and nutrient uptake of the plant.
More articles on this topic
After placing the plant in the hole, you should backfill with the amended soil you prepared earlier. Press down firmly with your hands to remove any large air pockets around the roots of the plant. You should avoid using your feet to stomp the soil, as this can cause excessive compaction. The goal is to have firm contact between the roots and the earth without crushing the delicate structures.
Immediate watering is the final and most important step of the actual planting process for you. You should soak the area thoroughly to help the soil settle and provide immediate hydration to the roots. This initial watering helps eliminate any remaining air gaps and ensures the plant doesn’t dry out. Continue to monitor the moisture levels daily for the first few weeks after the initial planting.
Spacing is a factor that many amateur gardeners often get wrong when they are starting out. You should leave about forty to fifty centimeters between each plant to allow for their eventual spread. While the garden might look a bit sparse at first, these perennials grow quite rapidly once established. Giving them enough room from the start prevents overcrowding and reduces the risk of fungal diseases.
Division as a primary method of propagation
Division is the most common and effective way to multiply your stock of these beautiful plants. You should perform this task every three to four years to keep the original clumps healthy and vigorous. The best time for division is either in early spring or immediately after the flowering has finished. This gives the new sections enough time to establish themselves before the arrival of extreme weather.
More articles on this topic
To begin the process, you should carefully lift the entire parent clump out of the ground. Use a sharp spade or a garden fork to dig around the perimeter without damaging the central rhizomes. Once the plant is out of the earth, shake off the excess soil to reveal the root structure. You will see thick, woody rhizomes that can be separated into several smaller, independent sections.
Using a sharp, clean knife is the best way to cut through the tough rhizomes during division. You should ensure that each new section has at least two or three healthy buds and a good amount of roots. Any old or woody centers of the original plant should be discarded to make room for younger growth. These fresh divisions will have much more energy and will grow more vigorously in their new spots.
Replanting the divisions should be done as quickly as possible to prevent the roots from drying out. You should follow the same planting steps as you would for a brand-new nursery-bought plant. Water the new sections immediately and keep them well-shaded if the weather is particularly warm or sunny. Within a few weeks, you should see new leaves emerging as the divisions take hold in the soil.
Growing from seed and early stage care
Growing common bistort from seed is a rewarding but much slower process than using the division method. You should collect the seeds in late summer once the flower spikes have turned brown and dry. The seeds require a period of cold stratification to break their natural dormancy before they can germinate. You can achieve this by sowing them in a cold frame over the winter months.
If you choose to sow indoors, you should place the seeds in a tray of moist compost. Cover them with a very thin layer of fine grit or vermiculite to protect them from drying out. You should then place the tray in a refrigerator for about six weeks to simulate winter conditions. After this period, move the tray to a warm, bright spot to encourage the seeds to sprout.
Once the seedlings have developed their first set of true leaves, they are ready for their first transplant. You should carefully move them into individual pots filled with a high-quality potting mix for young plants. Be very gentle with the delicate roots, as they are easily damaged at this early stage of development. Keep the pots in a sheltered spot with consistent moisture and indirect sunlight.
Hardening off is a crucial step before you move your young plants into their permanent garden home. You should gradually expose them to outdoor conditions over a period of seven to ten days. Start by leaving them outside for a few hours in the shade and slowly increase their exposure. This prevents transplant shock and ensures that the young plants are tough enough to survive on their own.