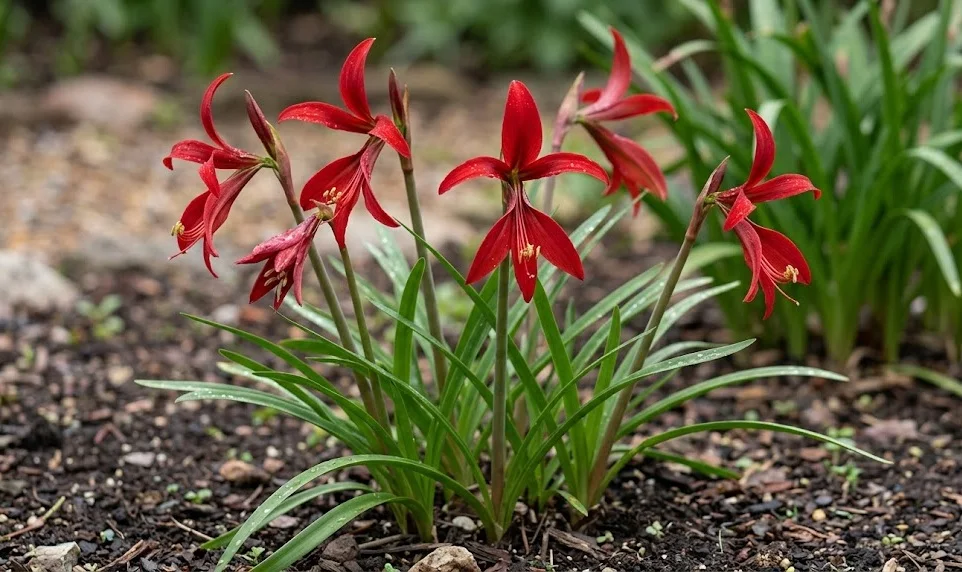
Proper hydration and nutrition are the twin pillars of a successful cultivation strategy for any exotic bulbous species. For the aztec lily, the balance between providing enough resources and avoiding excess is particularly delicate and changes with the seasons. A professional approach to watering involves understanding the specific moisture needs of the plant at different stages of its physiological development. Likewise, a well-timed fertilization schedule can make the difference between a mediocre display and a truly spectacular one.
Fundamental principles of professional irrigation
The primary rule for watering these exotic bulbs is to ensure that the soil remains moist but never saturated during the active growth phase. You should wait until the top centimeter of the soil has dried out before applying more water to the container or garden bed. This “soak and dry” method encourages the roots to grow deeper into the substrate in search of moisture, which creates a more resilient plant. Overwatering is the most common cause of failure, as it quickly leads to the decay of the bulb’s basal plate.
When you apply water, try to do so early in the morning to allow any moisture on the foliage to evaporate before nightfall. Wet leaves in a cool, dark environment are a primary invitation for fungal diseases that can compromise the health of the plant. Always direct the flow of water toward the soil surface rather than pouring it over the top of the bulb or the leaves. This targeted approach ensures the moisture goes exactly where it is needed while keeping the sensitive crown of the plant dry.
The quality of the water you use can also have an impact on the long-term health of the soil and the plant’s root system. Rainwater or filtered water is often preferred over tap water, which may contain high levels of chlorine or dissolved minerals. If you must use tap water, letting it sit in an open container for twenty-four hours can help some of the chemicals dissipate. Cold water should be avoided; it is best to use water that is at room temperature to prevent shocking the plant’s metabolic system.
As the plant transitions into the peak of summer, you may find that the irrigation frequency needs to increase due to higher evaporation rates. During very hot spells, check the soil moisture levels daily to ensure the plant does not experience significant drought stress. A plant that is consistently underwatered will struggle to maintain its foliage and may fail to store enough energy for the following year. Professional irrigation is about consistency and responsiveness to the changing environmental conditions of the garden.
More articles on this topic
Adjusting moisture levels to the seasonal cycle
The watering needs of the plant fluctuate significantly as it moves through its natural cycle of growth, flowering, and dormancy. In early spring, when the first green tips appear, you should start with very light watering to wake the bulb up gently. As the foliage expands and the weather warms, you can gradually increase the volume and frequency of the irrigation. This careful ramping up of moisture mirrors the natural conditions the plant would experience in its native habitat during the onset of the rainy season.
During the flowering stage, consistent moisture is vital to support the high energy demands of the developing blooms. If the plant becomes too dry at this point, the flower buds may blast or the petals may wilt prematurely, cutting the display short. However, you must still be cautious not to overcompensate and create a swampy environment that could rot the bulb. The goal is a steady, reliable supply of hydration that supports the dramatic physical changes occurring within the plant.
Once the flowers have faded and the plant enters its vegetative summer phase, the watering routine should remain stable to support the leaves. This is the period when the bulb is actively building its reserves, and any moisture stress can reduce the efficiency of photosynthesis. You will notice that as the temperatures cool in late summer, the soil stays moist for longer periods. You must be observant and reduce the frequency of watering accordingly to prevent the soil from becoming too wet as the growth rate slows.
The most dramatic shift occurs in the autumn when the leaves start to turn yellow and the plant prepares for its mandatory rest. At this stage, you should significantly reduce and eventually stop all watering to allow the soil to dry out completely. A dry environment is a critical signal to the bulb that it is time to shut down its systems and enter dormancy. Attempting to keep the plant green by continuing to water through the autumn will only disrupt its natural rhythm and potentially lead to bulb loss.
More articles on this topic
Selecting the right nutrients for exotic bulbs
Choosing the correct fertilizer is an essential part of providing professional-grade care for your lilies. A balanced, water-soluble fertilizer with a slightly higher middle number, representing phosphorus, is often the best choice for bulbous plants. Phosphorus is the key element that supports strong root development and the production of healthy, vibrant flowers. You should avoid fertilizers that are too high in nitrogen, as this can promote excessive leaf growth at the expense of the blossoms.
Organic options, such as seaweed extract or well-rotted compost tea, are excellent choices for providing a broad spectrum of micronutrients. These natural fertilizers feed not just the plant but also the beneficial microbial life within the soil, creating a healthier overall ecosystem. Many experts prefer to use a combination of a slow-release granular fertilizer in the spring and occasional liquid feeds during the growing season. This dual approach ensures both long-term nutrient availability and immediate support during periods of rapid development.
It is important to read the labels carefully and understand the concentration of the product you are using to avoid over-fertilizing. Too much fertilizer can lead to a buildup of salts in the soil, which can burn the sensitive root tips and damage the bulb. If you notice a white crust forming on the surface of the soil or the edges of the pot, it is a sign that you should flush the substrate with clear water. Moderation is the key to successful nutrient management, as a little bit of help goes a long way for these efficient plants.
In addition to the primary macronutrients, trace elements like iron, magnesium, and calcium also play a role in maintaining the plant’s health. Most high-quality commercial fertilizers include these minerals, but it is worth checking to be certain. A deficiency in these minor elements can lead to subtle issues like leaf chlorosis or weak stems that are hard to diagnose. By providing a complete and balanced diet, you ensure that the plant has every chemical tool it needs to perform at its best.
Establishing a professional feeding schedule
The timing of nutrient application is just as important as the type of fertilizer you choose to use. You should begin your feeding program in the early spring as soon as you see the first signs of active growth. Applying nutrients too early, while the bulb is still dormant, is a waste of resources and can potentially harm the inactive root system. A professional schedule typically involves feeding every two to four weeks throughout the spring and early summer months.
Once the flower buds begin to show color, you can provide a slightly more concentrated dose of a bloom-boosting fertilizer to support the final push. This targeted application helps the plant produce the most impressive and long-lasting flowers possible. After the flowering display is over, do not stop feeding the plant immediately, as the leaves still need support for energy production. Continue a regular but perhaps slightly lighter feeding routine through the mid-summer months to keep the foliage healthy and productive.
The most important rule regarding the feeding schedule is to stop all fertilization by late summer. You want to avoid encouraging new, tender growth that won’t have time to mature before the onset of the dormant period. Any residual fertilizer in the soil during the winter can also lead to problems if the bulb starts to sprout prematurely during a warm spell. Ending the feeding cycle in August or early September allows the plant to naturally transition into its rest phase with a full storage of energy.
Always make sure to water the soil thoroughly before applying any liquid fertilizer to avoid concentrated chemicals coming into direct contact with dry roots. This simple step prevents root burn and ensures that the nutrients are distributed evenly throughout the growing medium. If you are using granular fertilizers, scratch them gently into the top layer of the soil and then water them in well. A disciplined and thoughtful feeding schedule is one of the hallmarks of a truly skilled and successful gardener.
Recognizing and correcting nutritional issues
An observant gardener can often tell if their plant is suffering from a nutritional imbalance by looking closely at the leaves and flowers. Yellowing between the veins of the leaves, while the veins themselves remain green, is a classic sign of iron deficiency. If the overall growth is stunted and the leaves appear a pale, sickly green, the plant may be lacking in nitrogen. Recognizing these symptoms early allows you to adjust your fertilization strategy before the problem becomes severe.
Conversely, if the leaves are exceptionally dark green and lush but the plant refuses to produce any flowers, you may be providing too much nitrogen. This common issue often occurs when gardeners use general-purpose lawn fertilizers near their ornamental bulbs. To correct this, you should switch to a fertilizer with a higher phosphorus and potassium content to encourage reproductive growth. Achieving the right balance is a matter of fine-tuning your approach based on the specific visual feedback from the plant.
If you suspect a nutrient lockout caused by improper soil pH or salt buildup, the best course of action is to flush the soil. This involves pouring a large volume of clean, fresh water through the pot or around the garden bed to wash away excess minerals. After flushing, wait for a week or two before resuming a lighter and more balanced feeding routine. This reset can often save a struggling plant and give it a fresh start for the remainder of the growing season.
Regularly testing your soil can take the guesswork out of nutrient management and help you avoid many common problems. Inexpensive soil test kits are widely available and can provide a snapshot of the current levels of major minerals and the pH balance. For a more detailed analysis, you can send a sample to a professional laboratory, which is particularly helpful for large garden beds. Armed with accurate data, you can provide the exact nutrients your lilies need to thrive and produce their breathtaking floral displays.