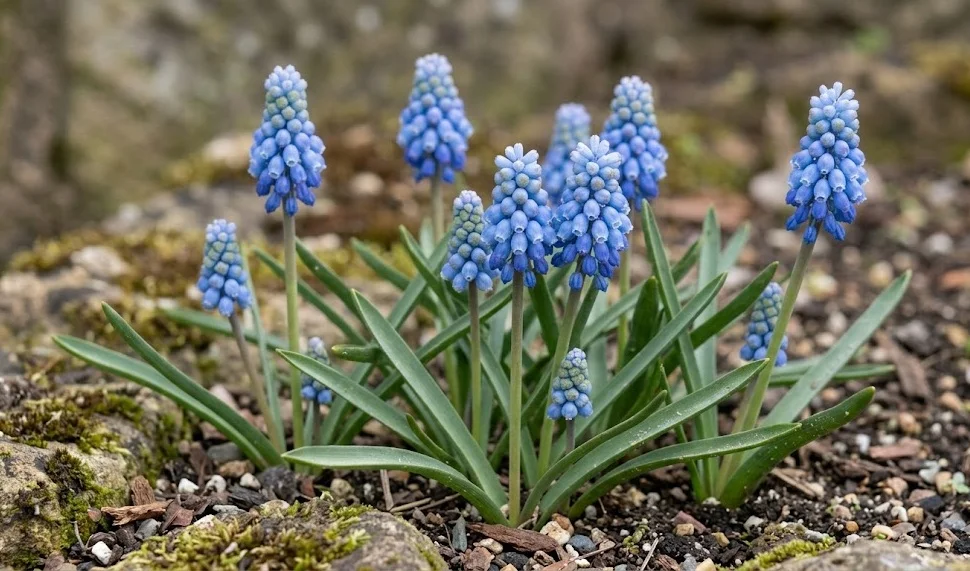
Establishing a vibrant colony of azure grape hyacinth requires a thoughtful approach to both the initial planting and the methods of reproduction. These bulbs are remarkably resilient, yet they respond best when their specific depth and soil requirements are met with precision. Whether you are starting with a few purchased bulbs or expanding an existing collection, the process is a fundamental skill for any ornamental gardener. By mastering these techniques, you ensure a spectacular spring display that grows in beauty and density every year.
Timing and site selection
The ideal window for planting these bulbs is in the autumn, typically between late September and November. This timing allows the bulbs to establish a strong root system before the ground freezes hard in winter. Planting too early during a warm spell can trigger premature leaf growth, which may be damaged by frost. Conversely, planting too late might not give the roots enough time to anchor the plant effectively.
Selecting the right location is the most important decision in the entire planting process. These plants prefer a spot that receives plenty of sunlight in the spring, though they can tolerate partial shade. Since they bloom before many trees fully leaf out, they can often be planted in areas that become quite shady later in the summer. A location with a slight slope or naturally loose soil will help prevent the common issue of bulb rot.
Soil preparation should begin several weeks before the bulbs actually go into the ground. Clearing the area of deep-rooted weeds and loosening the soil to a depth of twenty centimeters creates an inviting environment. If the soil is heavy, incorporating organic matter or horticultural grit will improve the structure significantly. A well-prepared site is the best insurance policy for the long-term survival of the hyacinth colony.
Visualizing the final result helps in determining the exact placement of each bulb. Grouping them in clusters of ten to fifteen creates a much stronger visual impact than spacing them out individually. Professionals often “toss” the bulbs gently over the prepared area and plant them where they land to create a naturalistic look. This method avoids the rigid, artificial rows that can detract from the plant’s delicate charm.
More articles on this topic
The mechanics of planting
The depth at which a bulb is planted is critical for its thermal protection and mechanical stability. A general rule of thumb is to plant the bulb at a depth three times its own height. For the azure grape hyacinth, this usually means about eight to ten centimeters deep from the base of the bulb. Planting too shallow leaves the bulb vulnerable to temperature swings and physical disturbance.
Orientation of the bulb in the planting hole is another detail that matters for a quick start. The pointed end, where the leaves will emerge, should always face upward toward the sky. The flatter base, where the root plate is located, must be in firm contact with the soil at the bottom of the hole. If a bulb is accidentally planted sideways, it will still grow, but it will waste valuable energy finding its way to the surface.
Once the bulbs are placed, the soil should be returned to the hole and firmed down gently by hand. It is important to avoid stomping on the soil with heavy boots, as this can crush the bulbs or overly compact the earth. Filling the gaps around the bulb ensures there are no air pockets that could cause the roots to dry out. A smooth, level surface prevents water from pooling in depressions over the planting site.
Initial watering immediately after planting helps to settle the soil and initiates the root development process. Even if the soil is somewhat moist, a light soaking ensures that the bulb makes good contact with the surrounding earth. In very dry autumns, supplemental watering may be needed every few weeks until the first hard frost. This initial hydration is the spark that brings the dormant bulb back to life.
More articles on this topic
Propagation through bulb offsets
The most common and easiest way to multiply azure grape hyacinths is through the natural process of division. Over time, a single “mother” bulb will produce several smaller “daughter” bulbs around its base. If left alone, these will eventually form a dense clump that may become overcrowded. Lifting and separating these offsets every three to four years keeps the plants healthy and provides free stock for the garden.
The best time to perform this division is in late summer or early autumn, while the bulbs are dormant. Carefully digging up the entire clump allows the gardener to see the natural attachment points of the offsets. Most offsets will pull away easily with gentle finger pressure, though some might require a clean cut. Each new bulb should have its own intact base plate to ensure successful root growth.
Replanting the offsets should happen as soon as possible to prevent them from drying out excessively. The smaller bulbs may not flower in their first year, as they need time to reach a critical size. However, they will produce foliage and continue to grow until they are mature enough to bloom. This patient approach eventually leads to a vast, shimmering carpet of azure blue throughout the landscape.
Maintaining a record of where various offsets have been moved helps in managing the garden’s overall design. It is also a great opportunity to share the bounty of the garden with friends and neighbors. Since these plants are so reliable, they are excellent gifts for beginning gardeners. Propagation by division is a cycle of renewal that benefits both the plants and the people who care for them.
Growing from seed
For those who enjoy a more challenging and long-term project, raising azure grape hyacinths from seed is a rewarding option. This process starts with allowing the flower heads to remain on the plant until the seed pods turn brown and papery. Inside, you will find small, black, spherical seeds that are ready for collection. Growing from seed allows for the possibility of slight natural variations in color or form.
The seeds should be sown as soon as they are ripe, typically in mid-summer, in a cold frame or a dedicated nursery bed. They require a period of cold temperatures, known as stratification, to break their dormancy and trigger germination. Sowing them in a gritty, well-drained compost mix ensures that the tiny emerging seedlings do not rot. Patience is essential here, as it can take three to five years for a seedling to produce its first flower.
During their first few years, the seedlings will look like thin blades of grass and should be protected from aggressive weeds. They need consistent moisture during their short growing season but should be kept relatively dry during their summer rest. Providing a weak liquid fertilizer can help speed up the development of the tiny bulbs. This method is the primary way that new varieties are developed by professional breeders.
Once the seed-grown bulbs have reached a size similar to a large marble, they can be moved to their permanent home. While more time-consuming than using offsets, this method produces a large number of plants at very little cost. It also provides a deeper understanding of the plant’s entire life cycle. For many dedicated enthusiasts, the sight of the first bloom from a hand-sown seed is a moment of great professional pride.