Planting gooseneck loosestrife is a rewarding project for any gardener who desires a reliable and visually striking perennial. This plant is known for its ability to adapt to various soil types and environmental conditions with great ease. The success of your planting effort depends largely on selecting the right location and following proper techniques during the initial phases. Understanding the mechanics of its growth will help you achieve a lush and beautiful display in a short amount of time.
The best time to plant this perennial is in either the early spring or the early autumn. During these periods, the temperatures are moderate, which reduces the stress on the young root systems. Spring planting allows the plant an entire growing season to establish itself before the cold winter arrives. Autumn planting, on the other hand, takes advantage of the warm soil and natural rainfall of the season.
Before you begin, it is essential to prepare the site by removing any existing weeds or grass. Digging a hole that is twice as wide as the root ball will provide plenty of loose soil for the new roots to explore. Mixing some organic compost into the bottom of the hole will give the plant a nutritious head start. Ensure that the planting site has enough room for the plant to expand as it matures over the years.
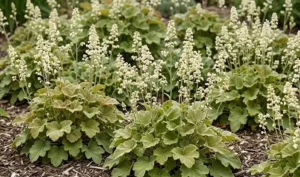
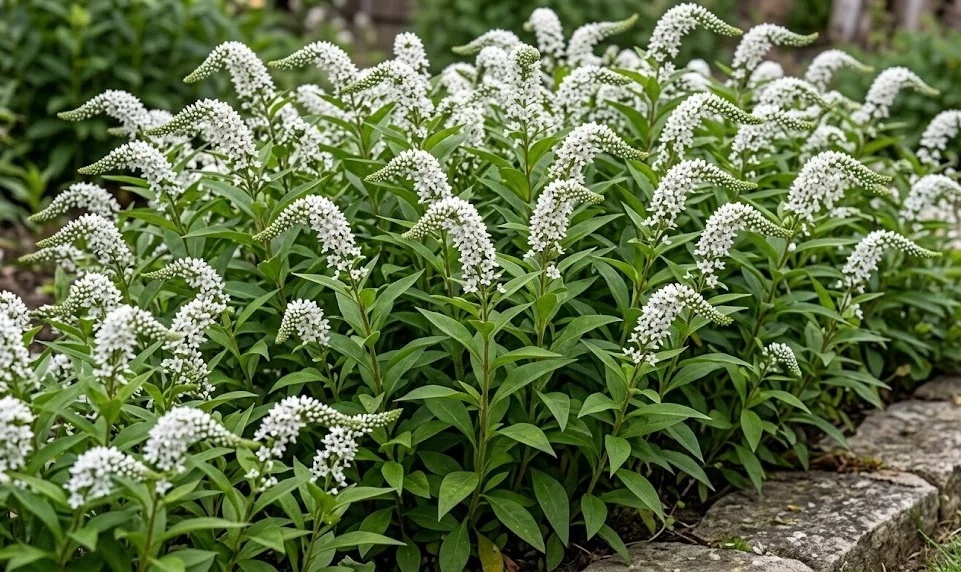
Gooseneck loosestrife is famous for its arching white flower spikes that appear in the middle of summer. Because of its spreading nature, it is often used to fill large gaps in the landscape or as a transition plant. Proper planting ensures that these features are maximized while keeping the maintenance requirements manageable for the owner. Taking the time to do it right at the beginning pays off with years of beautiful blooms.
Choosing the right time and location
Selecting the perfect spot for your gooseneck loosestrife is the foundation of a successful garden. This plant thrives in areas that receive full sun to partial shade throughout the daylight hours. In regions with very hot summers, a location with some afternoon shade is often preferred to keep the foliage lush. The plant is quite resilient, but it will flower most profusely when it receives at least six hours of direct sunlight.
More articles on this topic
The soil condition at the chosen site is the next most important factor to consider before planting. While it is adaptable, this species prefers soil that is rich in organic matter and stays consistently moist. Low-lying areas of the garden where water tends to collect are often ideal for this moisture-loving perennial. Avoid planting it in extremely dry or sandy locations unless you are prepared to water it very frequently.
When planning your garden layout, keep in mind the aggressive spreading habit of the rhizomes. It is wise to place it in a location where it can expand without interfering with more delicate species. Many gardeners choose to plant it near a natural boundary like a pond edge or a stone walkway. These physical barriers can help slow down the spread of the plant into unwanted areas of the yard.
Proper spacing between plants is crucial to ensure good air circulation and room for expansion. If you are planting multiple specimens, space them about eighteen to twenty-four inches apart from each other. This may seem like a lot of space initially, but the gaps will fill in very quickly during the first growing season. Giving each plant its own space prevents immediate competition for nutrients and water.
Planting techniques and initial care
Once you have selected the site and prepared the soil, you can proceed with the actual planting process. Remove the plant from its nursery container carefully to avoid damaging the delicate root system. If the roots are tightly bound, gently tease them outward with your fingers to encourage outward growth. Place the plant in the center of the prepared hole at the same depth it was in the pot.
More articles on this topic
Backfilling the hole with a mixture of native soil and compost is the next essential step. Firm the soil down gently with your hands to remove any large air pockets around the roots. You should be careful not to pack the soil too tightly, as this can hinder water penetration and root development. The goal is to create a stable environment that still allows for easy movement of air and moisture.
Immediately after planting, give the gooseneck loosestrife a thorough watering to settle the soil and hydrate the roots. This initial watering is critical for reducing transplant shock and helping the plant transition to its new home. You may need to water the area every day for the first week, especially if the weather is warm. Keeping the soil consistently moist during the first month is the secret to a high survival rate.
Applying a thin layer of mulch around the base of the plant will help retain moisture and suppress weeds. Use organic materials like shredded leaves or straw, but keep the mulch a few inches away from the stems. This prevents moisture from being trapped against the plant’s crown, which could lead to rot. As the plant grows, it will eventually create its own living mulch with its dense foliage.
Propagation through division techniques
The most common and effective way to propagate gooseneck loosestrife is through the method of division. Because the plant spreads via underground rhizomes, it naturally creates new clumps that can be easily separated. The best time to perform this task is in the early spring before the new growth has reached six inches in height. At this stage, the plant’s energy is focused on root development, making it very resilient to the process.
To begin the division, use a sharp spade to lift the entire clump out of the ground. You may need to dig a wide circle around the plant to ensure you capture as many roots as possible. Once the clump is out of the ground, shake off any excess soil so you can clearly see the root structure. Look for natural points where the rhizomes can be separated into smaller, healthy sections.
Use your spade or a garden knife to cut the clump into smaller pieces, ensuring each section has at least three or four healthy shoots. It is important to work quickly so that the exposed roots do not dry out in the sun and wind. Keep a bucket of water or a damp cloth nearby to protect the divisions while you prepare the new planting holes. Discard any old or woody parts of the center that do not show signs of vigorous growth.
Replant the new divisions immediately into their designated spots in the garden or into temporary nursery pots. Treat these new plants exactly as you would a newly purchased specimen from a local garden center. They will likely wilt slightly at first, but with consistent moisture, they will recover within a few days. Division not only gives you more plants but also helps maintain the health of the original colony.
Rooting and nursery care for young plants
While division is the most popular method, gooseneck loosestrife can also be propagated using stem cuttings. This technique is useful if you want to create a large number of plants without disturbing an established clump. Take cuttings from healthy, non-flowering stems in the late spring or early summer for the best results. Each cutting should be about four to six inches long and contain at least two sets of leaves.
Remove the lower leaves from the cutting and dip the cut end into a rooting hormone powder. Place the cutting into a pot filled with a sterile, moist potting mix or a combination of peat and perlite. Keep the pots in a shaded area and cover them with a plastic dome to maintain high humidity levels. Mist the cuttings regularly to prevent them from drying out before they have a chance to form roots.
Roots should begin to develop within three to four weeks if the conditions are kept warm and moist. You can check for root growth by giving the cutting a very gentle tug to see if there is any resistance. Once the roots are well-established, you can slowly acclimate the young plants to outdoor conditions over a period of a week. This process of hardening off is essential for ensuring the survival of the tender new growth.
Newly rooted plants should be grown in a protected nursery area or a container for their first season. This allows them to develop a stronger root system before they have to compete with established plants in the garden. By the following spring, these young specimens will be robust enough to be moved to their permanent locations. Monitoring their growth closely during this early stage ensures that they will become successful additions to your landscape.