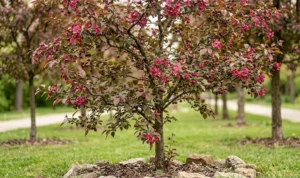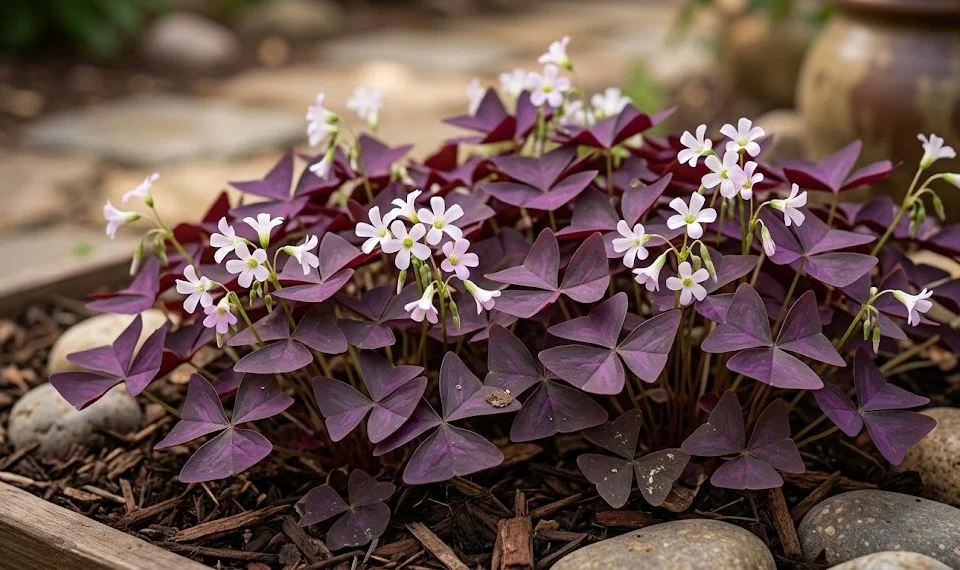
The false shamrock is a mesmerizing addition to any indoor garden because of its deep purple foliage and photophilic nature. Its unique ability to open and close its leaves in response to light levels adds a sense of dynamic life to any living space. Cultivating this plant successfully requires a deep understanding of its natural rhythms and its specific environmental needs. When you provide the right balance of care, this perennial will reward you with delicate blossoms and vibrant color year after year.
Understanding the plant’s unique biology
This plant is primarily known for its trifoliate leaves that look remarkably like butterfly wings at rest. The movement they exhibit is called nyctinasty, which is a circadian rhythm response to light and darkness. In the wild, this adaptation helps the plant conserve moisture and protect its delicate reproductive parts. Watching your plant “wake up” in the morning is one of the most rewarding aspects of keeping this species in your collection.
The structure of the plant is quite different from typical houseplants because it grows from small, bulb-like rhizomes. These underground structures serve as energy reservoirs, allowing the plant to survive periods of drought or dormancy. Understanding that the life of the plant is centered in these corms is essential for long-term care. If the foliage dies back unexpectedly, the plant is often just resting rather than dying.
Maintenance involves more than just physical tasks; it requires observing the plant’s subtle signals. The leaves will often droop or change their angle if the environment is not quite right for their current metabolic needs. Professional gardeners always look at the tension in the stems and the vibrancy of the purple hues to gauge health. Once you learn to read these signs, the care process becomes almost intuitive.
Finally, it is important to recognize that this species has a distinct seasonal cycle that dictates its care requirements. It is not a plant that grows at a steady rate throughout the entire year without interruption. There will be times of explosive growth and times of quiet reflection where the plant requires very little from you. Respecting these natural phases is the hallmark of an expert caretaker.
More articles on this topic
Creating the ideal substrate environment
The foundation of any healthy plant starts with the medium in which its roots and rhizomes reside. For this specific species, a well-draining potting mix is non-negotiable to prevent the sensitive corms from rotting. A standard peat-based potting soil mixed with perlite or coarse sand usually provides the necessary aeration. You should aim for a texture that feels light and fluffy even when it is slightly damp.
Soil acidity plays a subtle but significant role in the nutrient uptake of the plant’s root system. A slightly acidic to neutral pH range is generally considered the “sweet spot” for maintaining leaf coloration. If the soil becomes too alkaline, you might notice the vibrant purple fading into a duller, washed-out brownish tone. Periodically refreshing the top inch of soil can help maintain a healthy chemical balance for the roots.
Drainage is perhaps the most critical factor when choosing or mixing your substrate for this plant. If the water lingers around the rhizomes for too long, they will quickly succumb to fungal pathogens and decay. You can test the drainage by pouring water on the surface and ensuring it begins to exit the bottom holes within seconds. Adding a layer of small stones at the very bottom of the pot can further enhance this essential flow.
The volume of the substrate also matters because this plant enjoys being slightly root-bound but still needs room to expand. A pot that is too large will hold excess moisture that the plant cannot use, leading to stagnant conditions. Choose a container that allows for about an inch of space between the rhizome cluster and the edge of the pot. As the plant grows, you can gradually move up to a larger size during the active growing season.
More articles on this topic
Temperature and climate preferences
Maintaining a stable temperature is vital for keeping the foliage lush and preventing premature dormancy. This plant thrives in moderate conditions that mirror a typical comfortable indoor environment during the day. Ideally, you should keep the room between 15 and 25 degrees Celsius to ensure steady metabolic activity. Extreme heat can cause the leaves to wilt and go limp as the plant tries to conserve its internal resources.
Nighttime temperatures can safely drop a few degrees, which actually mimics the natural environment of the plant’s origins. However, you must be careful to avoid exposing the leaves to cold drafts from windows or air conditioning units. Sudden shifts in temperature are a primary cause of leaf drop and can shock the plant into a sudden resting state. Consistency is much more important than achieving a specific “perfect” number on the thermometer.
Humidity is another factor that often gets overlooked by casual gardeners but is noticed by experts. While the plant is quite resilient, it definitely prefers a environment with moderate humidity levels rather than bone-dry air. If your home is particularly dry during the winter, placing the pot on a tray of pebbles and water can help. Just ensure the bottom of the pot never touches the water directly to avoid moisture wicking.
During the peak of summer, you might need to move the plant to a cooler spot in the house. If the ambient temperature stays consistently above 27 degrees, the plant may decide it is too hot to grow and start to go dormant. Providing good air circulation without direct wind can help dissipate heat around the foliage. This proactive climate management keeps the plant looking its best even during heatwaves.
The importance of seasonal cycles
Every gardener must understand that this plant is genetically programmed to take breaks from time to time. The dormant period usually occurs during the winter months, but it can happen at any time if the plant feels stressed. During this phase, the leaves will turn yellow and eventually die back to the soil level completely. It is a common mistake to think the plant is dead and throw it away at this stage.
When you notice the foliage starting to decline, you should begin to reduce the amount of attention you give the plant. Stop watering almost entirely and allow the soil to dry out significantly throughout the pot. The rhizomes are now storing energy and do not need the same level of hydration or nutrients. This period of rest is actually necessary for the plant to produce a spectacular show of leaves in the next cycle.
The duration of this resting phase can vary from a few weeks to several months depending on the conditions. You should store the dormant pot in a cool, dark place where it won’t be disturbed by regular traffic. Check the soil occasionally to make sure it hasn’t turned into a solid, hydrophobic brick, but otherwise leave it alone. This hands-off approach is the most difficult but important part of the care cycle.
Re-entry into the growing phase begins when you see tiny new shoots poking through the surface of the soil. Once this happens, you can move the pot back into the light and resume a regular care schedule. Start with small amounts of water to wake up the root system without overwhelming the new growth. Watching the first few purple leaves unfold is a clear signal that your care has been successful.
Managing growth and density
To maintain a full and bushy appearance, you have to monitor how the stems are developing over time. If the plant is not getting enough light, the stems will become long, “leggy,” and unable to support the weight of the leaves. High-quality care involves rotating the pot every week so that all sides of the plant receive equal exposure. This simple habit prevents the plant from leaning too far in one direction and keeps the shape symmetrical.
You can also encourage denser growth by being selective about which stems you allow to remain. If a particular area of the pot looks thin, you can sometimes stimulate the rhizomes by gently aerating the soil nearby. Over time, the corms will multiply and fill the entire surface area of the container with deep purple foliage. A dense canopy not only looks better but also helps the plant manage its own microclimate among the leaves.
The flowers of the false shamrock are delicate, pale pink or white bells that appear on long, thin stalks. While many people enjoy the bloom, they do take a significant amount of energy away from leaf production. If you prefer the look of the foliage, you can pinch off the flower stalks as soon as they appear. This redirects the plant’s resources back into the rhizomes and the vibrant purple leaves.
As the plant matures, the older leaves at the bottom will naturally age out and lose their luster. Regularly removing these spent leaves keeps the plant looking tidy and prevents potential mold issues. Simply tug gently at the base of the stem, and it should pop away from the rhizome quite easily. This cleaning routine ensures that the plant’s energy is always going toward the healthiest and most vibrant parts.
Advanced techniques for foliage health
Experienced growers often use specialized techniques to enhance the deep purple pigmentation of the leaves. The intensity of the color is often linked to the specific light spectrum and nutrient availability in the soil. Providing a bit of extra potassium can sometimes help in strengthening the cell walls and deepening the color. However, you must be careful not to over-apply any single nutrient without seeing a specific need first.
Cleaning the leaves is another “secret” to professional-grade plant health that is often missed. Dust can accumulate on the broad surfaces of the leaves and interfere with the plant’s ability to photosynthesize. Using a soft, damp cloth to gently wipe the foliage every month will keep the stomata clear and the color bright. Be very careful during this process as the stems are quite brittle and can snap under pressure.
Monitoring the soil’s salt buildup is also a task for the dedicated enthusiast who wants the best results. Over time, minerals from tap water and fertilizers can accumulate and start to burn the sensitive tips of the leaves. Periodically leaching the soil by running clear, filtered water through the pot until it drains freely can help. This keeps the root environment fresh and prevents the chemical imbalances that cause foliage browning.
The interaction between light and temperature is a delicate dance that dictates the leaf’s movement. If the plant stops folding its leaves at night, it might be an indicator that the ambient light is too high or the temperature is too low. Observing these small changes in behavior allows you to make micro-adjustments to the environment. This level of attention transforms gardening from a chore into a sophisticated hobby.
Long-term sustainability and repotting
Eventually, even the best-cared-for plant will outgrow its container or deplete the nutrients in its soil. You will know it is time to repot when you see roots or rhizomes pushing against the sides of the pot. Generally, this needs to happen every two to three years during the early spring just as the dormant period ends. Repotting at this time minimizes stress and gives the plant fresh energy for the upcoming growing season.
When you remove the plant from its old home, take the opportunity to inspect the health of the rhizomes. They should be firm to the touch and appear a healthy tan or reddish-brown color. If you find any soft or blackened areas, use a sterilized tool to remove them before moving to the new pot. This is also the perfect time to divide the plant if you want to create new individual specimens.
The new pot should only be one size larger than the previous one to avoid the moisture issues mentioned earlier. Use fresh, high-quality potting mix and try to position the rhizomes at the same depth they were previously. Gently firm the soil around them, but do not pack it so tightly that the air is squeezed out. A light watering after the move will help settle the soil around the roots without drowning them.
After repotting, the plant might look a bit sad for a week or two as it adjusts to its new surroundings. Resist the urge to overwater or fertilize during this recovery period, as the roots need time to heal. Keep it in a slightly more shaded spot than usual until you see signs of new, upright growth. Once the plant stabilizes, it will quickly fill out its new space and continue its beautiful cycle.