Starting your journey with vegetable marrow begins with a clear understanding of the planting process and the various methods of propagation available to the modern gardener. These plants are known for their vigorous growth, but they require a specific set of conditions to transition successfully from a tiny seed to a productive vine. By paying close attention to timing, soil preparation, and seedling care, you can establish a strong foundation for your entire growing season. This article provides professional insights into the best practices for getting your vegetable marrow crops off to the most promising start possible.
Seed selection and preparation
The first step in a successful planting season is choosing high-quality seeds that are suited to your specific climate and growing conditions. You should look for seeds from reputable suppliers that offer a high germination rate and are certified disease-free to minimize early-season risks. Consider whether you want to grow traditional heirloom varieties or modern hybrids that may offer improved resistance to common garden pests and diseases. Taking the time to research different varieties will help you select the ones that best match your culinary preferences and garden space.
Before you even touch the soil, you can improve your germination success by performing a simple sprout test on older seeds you might have stored. You should also check the “best by” date on your seed packets, as cucurbit seeds generally remain viable for several years if kept in a cool, dry place. If you are using seeds saved from your own previous harvest, ensure they were collected from fully mature fruits and have been properly dried and stored. Starting with healthy, vigorous seeds is the most important factor in achieving a uniform and productive crop.
Some gardeners prefer to pre-soak their marrow seeds for a few hours in lukewarm water to soften the outer shell and speed up the germination process. You should be careful not to leave them in the water for too long, as this can lead to rot or oxygen deprivation for the developing embryo. This optional step can be particularly helpful if you are planting directly into the soil where conditions might be slightly less than ideal. However, in most cases, fresh seeds planted in moist, warm soil will germinate quite readily on their own within a week.
More articles on this topic
Preparing your planting site involves more than just digging a hole; you must ensure the soil is warm enough to support tropical-origin plants. You should aim for a soil temperature of at least 18 degrees Celsius before committing your seeds or seedlings to the ground. Using black plastic mulch or row covers can help pre-warm the soil in early spring if you are eager to get a head start on the season. A well-prepared site provides the physical and thermal environment necessary for rapid root establishment and early growth.
Sowing techniques and timing
Knowing when to sow your vegetable marrow seeds is a critical skill that depends largely on the average last frost date in your specific region. You should wait until all danger of frost has passed and the weather has stabilized into a consistent pattern of warmth before planting outdoors. Sowing too early in cold, damp soil often results in the seeds rotting before they have a chance to germinate. If you are looking for an earlier harvest, you might consider starting your seeds indoors about three to four weeks before the expected transplant date.
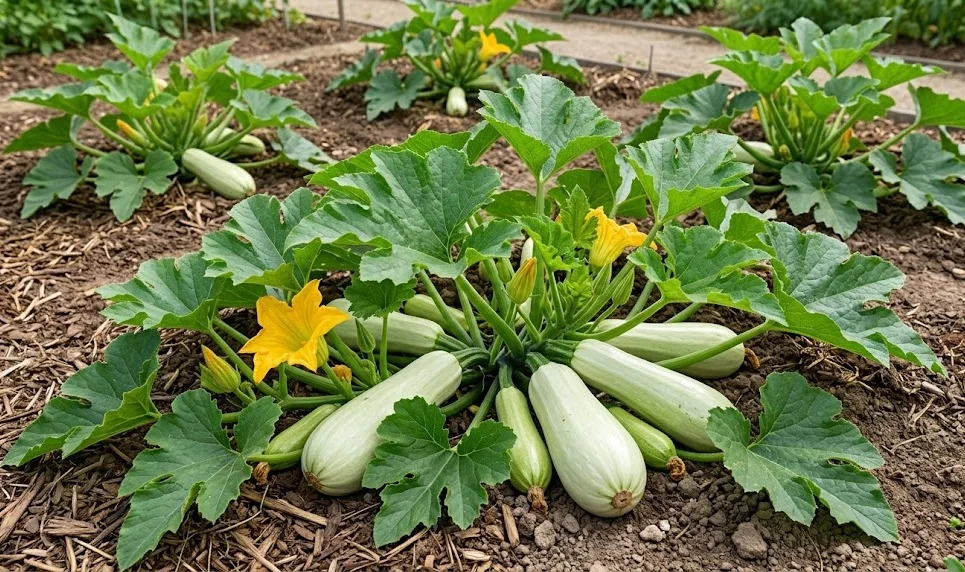
When sowing directly into the garden, you should create small mounds or “hills” spaced about one to one and a half meters apart to allow for the plant’s expansive growth. Place two or three seeds in each hill at a depth of about two to three centimeters, which provides enough protection while still allowing the sprout to reach the surface easily. Once the seedlings have developed their first true leaves, you should thin them out to leave only the strongest plant in each location. This method ensures that each plant has access to the maximum amount of nutrients and space from the very beginning.
More articles on this topic
Indoor sowing requires the use of biodegradable pots, such as peat or paper pots, because marrow roots are notoriously sensitive to being disturbed during transplanting. You should use a high-quality seed-starting mix that is light, sterile, and holds moisture well without becoming waterlogged. Place the pots in a warm location with plenty of light, such as a sunny windowsill or under dedicated grow lights, to prevent the seedlings from becoming leggy. Maintaining a consistent temperature of around 20-25 degrees Celsius will promote the fastest and most even germination.
Watering the newly sown seeds is a delicate task that requires a light touch to avoid washing the seeds out of place or compacting the soil. You should use a fine mist or a gentle spray to keep the soil surface consistently moist but not saturated until the sprouts emerge. Once the seedlings are established, you can gradually transition to deeper, less frequent watering to encourage the roots to grow down into the soil. Proper moisture management during the sowing phase is essential for creating a strong and resilient root system.
Seedling care and hardening off
As your indoor seedlings grow, they will require careful monitoring to ensure they remain healthy and vigorous until they are ready for the garden. You should provide them with at least 12 to 14 hours of bright light daily to encourage sturdy stems and deep green foliage. If the plants start to lean toward the light source, rotate the pots regularly to keep them growing straight and balanced. Gentle air movement from a small fan can also help strengthen the stems by mimicking the natural conditions they will face outdoors.
The process of “hardening off” is perhaps the most critical step in transitioning indoor seedlings to the outdoor environment. You should begin this process about a week before you plan to transplant by moving the pots to a sheltered outdoor spot for a few hours each day. Gradually increase the amount of time they spend outside and their exposure to direct sunlight and wind over the course of several days. This transition period allows the plants to toughen their leaf cuticles and adjust to the more variable outdoor conditions without experiencing transplant shock.
During the hardening-off phase, you should keep a close eye on the moisture levels in the small pots, as they can dry out very quickly in the wind and sun. You might need to water them more frequently than you did when they were indoors to prevent wilting and stress. If the forecast predicts a sudden cold snap or heavy rain, bring the seedlings back inside or provide them with extra protection. Taking these extra precautions ensures that your hard work in the early stages isn’t lost to a single environmental event.
Feeding your seedlings a half-strength liquid fertilizer once they have their first set of true leaves can provide a helpful nutrient boost. You should avoid over-feeding at this stage, as the goal is to produce steady, balanced growth rather than a sudden flush of weak foliage. Look for any signs of pests, such as aphids or fungus gnats, which can occasionally find their way into indoor growing areas. Starting with clean, healthy seedlings is the best way to ensure a productive and trouble-free season in the marrow patch.
Transplanting into the garden
When the day finally arrives to transplant your vegetable marrows, you should choose a cloudy day or work in the late afternoon to minimize stress on the plants. Prepare the planting holes in advance and consider adding a handful of compost or a slow-release organic fertilizer to the bottom of each hole. You should handle the seedlings with extreme care, especially if you are removing them from plastic containers rather than using biodegradable pots. Aim to keep the root ball as intact as possible to prevent any interruption in the plant’s growth cycle.
Place the seedling in the hole so that the top of the root ball is level with the surrounding soil surface. You should firm the soil gently around the base of the plant to remove any large air pockets but avoid pressing so hard that you damage the delicate roots. Water the newly transplanted marrows immediately and thoroughly to help settle the soil and provide the roots with much-needed hydration. Adding a light layer of mulch around the base of the plants will help retain moisture and keep the soil temperature stable during the first few days.
If you are using biodegradable pots, make sure the entire pot is buried beneath the soil surface to prevent it from acting like a wick and drying out the roots. You might also want to gently tear the bottom of the pot or score the sides to help the roots break through more easily into the surrounding garden soil. Providing some temporary shade for the first day or two can help the plants recover from the move, especially if the weather is particularly bright or breezy. Successful transplanting is all about minimizing disruption and providing a supportive environment for recovery.
After transplanting, you should monitor the plants closely for the first week to ensure they are taking hold and beginning to produce new growth. You might see a slight pause in development as the roots establish themselves in the new soil, which is perfectly normal. Keep the area well-watered and watch for any signs of pests that might be attracted to the tender new foliage. Once you see the first signs of new green leaves emerging from the center, you can be confident that your vegetable marrows have successfully made the transition to their permanent home.