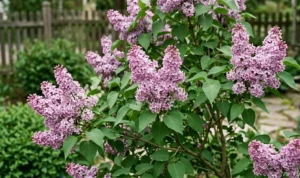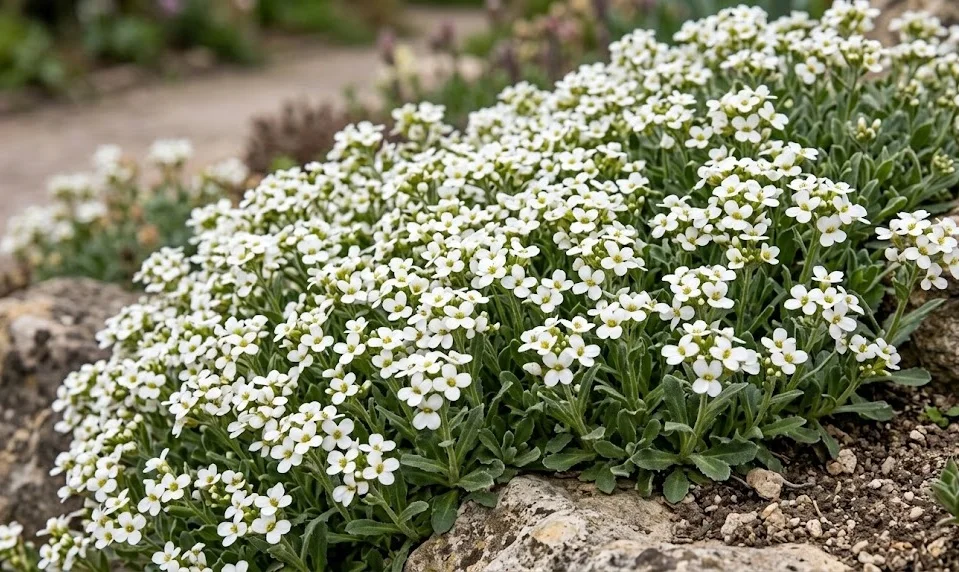
Establishing a thriving colony of Caucasian rockcress begins with a strategic approach to planting and a clear understanding of propagation methods. This species is highly valued for its ability to colonize rocky areas and slopes, making it a favorite for those looking to add texture to their gardens. Whether you are starting from seeds or taking cuttings from an established plant, the timing and technique are crucial for success. By following professional standards, you can ensure that your new plants develop strong root systems and healthy foliage from the very beginning.
The initial phase of planting requires you to select a site that receives ample sunlight and offers superior drainage. You should prepare the soil by removing all perennial weeds and loosening the ground to a depth of at least fifteen centimeters. Incorporating a mixture of coarse sand and well-rotted organic matter will provide the ideal starting environment. This preparation ensures that the young roots can penetrate the soil easily and find the nutrients they need for early growth.
When you are ready to put the plants in the ground, make sure to handle the root balls with extreme care. You should dig a hole that is slightly larger than the container and place the plant at the same depth it was growing previously. Firm the soil gently around the base to eliminate air pockets but avoid packing it too tightly. Watering immediately after planting helps settle the soil and provides the necessary hydration for the plant to recover from transplant shock.
Spacing is an essential consideration if you want to achieve a full, carpet-like effect within a reasonable timeframe. You should generally place individual plants about twenty to thirty centimeters apart to allow for their natural spread. Within two growing seasons, these gaps will disappear as the foliage merges into a solid and beautiful mat. Planning your layout in advance will help you calculate the number of plants required for your specific garden area.
Sowing seeds for future growth
Starting Caucasian rockcress from seeds is a rewarding process that allows you to produce a large number of plants at a low cost. You should sow the seeds in late winter or early spring using a well-draining seed-starting mix in shallow trays. Lightly cover the seeds with a thin layer of fine grit or vermiculite, as they require some light to germinate effectively. Maintaining a consistent temperature and moderate moisture will encourage the first sprouts to appear within a few weeks.
More articles on this topic
Once the seedlings have developed their first true leaves, you must provide them with plenty of light to prevent them from becoming leggy. You should gradually transition them to cooler conditions to toughen them up before they are moved outdoors. This hardening-off process is vital for ensuring that the delicate young plants can survive the transition to the garden. Neglecting this step can lead to significant losses due to sudden exposure to wind and direct sun.
Transplanting the seedlings into individual pots will give them more room to develop a robust root system before final planting. You should use a potting mix that mimics the gritty soil of their natural habitat to encourage proper development. Watering should be done carefully to avoid washing away the soil or damaging the tiny stems. Regular monitoring during this nursery phase will help you identify the strongest candidates for your rock garden.
The final move to the garden should take place when the danger of frost has passed and the plants are strong enough to handle environmental stress. You should choose an overcast day for transplanting to reduce the amount of moisture lost through the leaves. Provide consistent care during the first few weeks as the roots establish themselves in their permanent home. With a bit of patience, your seed-grown plants will soon be ready to join the rest of your collection.
Propagation through division and cuttings
Division is one of the most effective ways to rejuvenate old mats and increase your stock of Caucasian rockcress. You should perform this task in early autumn or immediately after the flowering season has ended in late spring. Carefully lift the entire mat with a garden fork and pull the sections apart by hand, ensuring each piece has healthy roots. Replanting these divisions immediately will give them the best chance of establishing themselves before the next season.
More articles on this topic
Taking softwood cuttings is another excellent method for propagating specific varieties that you want to replicate exactly. You should select healthy, non-flowering shoots in early summer and cut them to a length of about five to eight centimeters. Removing the lower leaves and dipping the base in a rooting hormone can help speed up the development of new roots. Place the cuttings in a gritty rooting medium and keep them in a shaded, humid environment until they show signs of growth.
Successful cuttings require a balance of high humidity and good air circulation to prevent rot during the rooting process. You might use a simple plastic cover or a specialized propagation dome to maintain the moisture levels around the foliage. Check the cuttings regularly and remove any that show signs of decay to protect the rest of the batch. Once roots have formed, you can gradually reduce the humidity and move the new plants into individual containers.
The primary advantage of division and cuttings is that you get a plant that is already partially developed and genetically identical to the parent. This ensures that the flower color and growth habit remain consistent across your entire garden. You should always choose the healthiest parent plants for propagation to avoid spreading diseases or vigor issues. By mastering these techniques, you can maintain a vibrant and expanding garden with very little additional investment.
Site preparation and long-term establishment
The long-term success of your Caucasian rockcress depends heavily on the quality of the site preparation you perform before planting. You should focus on creating a permanent home that will remain stable and well-drained for many years. Removing large rocks is not necessary, as the plants often enjoy growing in the crevices between them. In fact, integrating stones into the planting area can help regulate soil temperature and provide a natural aesthetic.
Mulching with fine gravel or stone chips is a professional technique that offers multiple benefits for newly planted rockcress. This layer helps to suppress weeds while allowing water to reach the roots quickly and efficiently. It also keeps the foliage dry and protects the crown from the damaging effects of fluctuating winter temperatures. A gravel mulch also provides a clean and attractive background that makes the flowers and foliage stand out.
During the first year of establishment, your main priority is to ensure that the plants do not dry out completely. While mature rockcress is drought-tolerant, young plants need a steady supply of moisture to build their underground structures. You should check the soil regularly and water whenever the top few centimeters feel dry to the touch. Once the plants have doubled in size and established a deep root system, you can gradually reduce the frequency of watering.
Observing how the plants interact with the local microclimate will help you make adjustments for future plantings. You might find that some areas of your garden are more sheltered or receive more intense sun than others. Use this information to place your rockcress in the most favorable positions for maximum health and flowering. A well-established plant is much more resilient and will require very little maintenance as it matures into a beautiful garden feature.