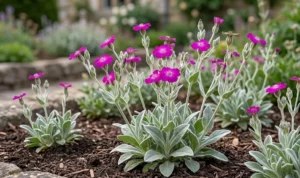
The foundation of a spectacular spring display lies in the quality of the bulbs you choose to plant in the autumn. You should always look for bulbs that are firm to the touch and free from any signs of mold, soft spots, or mechanical damage. A healthy bulb is a complete storage unit containing the embryonic flower and the energy needed to push through the soil. When purchasing your stock, prioritize larger bulbs, as these typically produce more vigorous stems and a higher count of individual florets.
Before you begin the actual planting process, it is wise to keep your bulbs in a cool, dry, and well-ventilated location. You must prevent the bulbs from sweating in plastic bags, which can quickly lead to fungal growth and rot. If you cannot plant them immediately, storing them in paper bags or mesh sacks is the professional choice for maintaining their integrity. Proper storage ensures that the internal biological processes are kept at a steady state until they meet the soil.
Preparing the bulbs for the transition into the ground can sometimes involve a light dusting of fungicidal powder if you are working in a damp climate. You should handle them with care to avoid knocking off the protective papery outer skin, known as the tunic. This skin serves as a natural barrier against moisture loss and minor abrasions during the handling and planting phases. Respecting the physical structure of the bulb at this stage directly influences the success rate of your planting project.
You might also consider sorting your bulbs by size if you are aiming for a specific aesthetic effect in your garden beds. Larger bulbs can be placed in the center of a drift for a taller focal point, while smaller ones can fill in the edges. This level of detail in the preparation phase is what separates a casual garden from a professionally curated landscape. Taking these extra steps ensures that every bulb you put into the earth has the best possible chance of reaching its full potential.
Setting the planting site
The success of your planting effort depends heavily on the preparation of the site and the technique used to settle the bulbs. You should begin by clearing the area of any existing debris and loosening the soil to allow for easy placement. The standard rule for planting depth is to place the bulb at a distance twice the height of the bulb itself. This depth provides enough insulation from temperature fluctuations while still allowing the shoot to reach the surface easily.
More articles on this topic
When placing the bulbs in the trench or hole, ensure the pointed end is facing upwards toward the sky. If you accidentally plant them upside down, they will still likely find their way to the light, but it will sap much of their stored energy. You should space the bulbs about five to eight centimeters apart to give each one enough room to expand and naturalize. A staggered planting pattern often looks more professional and natural than rigid rows or grids.
Once the bulbs are positioned, backfill the area with the original soil and firm it down gently with your hands to remove any large air pockets. You should avoid tamping the soil down with your feet, as this can compress the earth too much and hinder the emergence of the shoots. A light watering immediately after planting helps to settle the soil around the bulbs and initiates the root development process. This initial moisture is essential for the bulb to establish itself before the ground freezes solid.
Adding a thin layer of mulch over the newly planted area can help to regulate soil temperature and retain moisture throughout the autumn. You should use a natural mulch like shredded leaves or bark, which will break down over time and add nutrients back into the soil. Marking the site with small stakes or a light scattering of sand can prevent you from accidentally disturbing the area later in the season. A well-marked and prepared site is a sign of a thoughtful and organized approach to garden management.
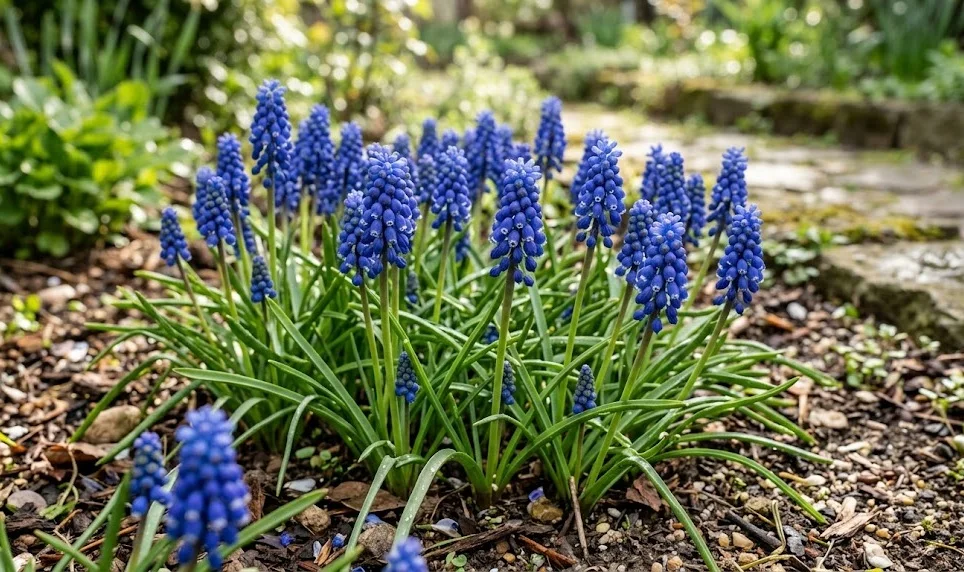
Naturalizing and division
One of the most appealing characteristics of these plants is their ability to naturalize and spread across a landscape over time. You will find that a small initial planting can transform into a vast, shimmering carpet of blue within just a few years. This process occurs both through the production of “daughter” bulbs and through the natural dispersal of seeds. Encouraging this behavior creates a garden that feels established and integrated with its natural surroundings.
More articles on this topic
However, after three or four years of successful growth, the clumps may become so dense that the quality of the flowers begins to decline. You should recognize this as the ideal time to perform division, which involves lifting the bulbs and separating them to reduce competition. The best time for this task is in the late spring or early summer, just as the foliage has finished yellowing. Using a garden fork to lift the entire clump carefully will minimize damage to the root systems and the bulbs themselves.
Once the bulbs are out of the ground, you can gently pull them apart by hand, ensuring that each new section has a healthy bulb and some roots. You should replant these divisions immediately in a freshly prepared area or share them with fellow gardeners to expand the reach of the species. If you cannot replant them right away, follow the same storage guidelines as you would for newly purchased stock. Regular division is a vital practice for maintaining the vigor and health of your bulb collection.
When replanting divided bulbs, you have the opportunity to improve the soil in the original location before putting some of the stock back in. This rotation of nutrients and the loosening of the earth will revitalize the remaining colony and lead to even better blooms. You should view division not as a chore, but as a way to renew and multiply your garden’s beauty at no additional cost. Managing the density of your plantings is a key aspect of professional horticultural care.
Alternative propagation methods
While bulb division is the most common and fastest way to propagate these plants, growing them from seed is a fascinating alternative. You should allow the seed pods to dry on the stem until they turn a tan color and begin to split open naturally. Collecting the small, black seeds at this stage ensures that they are fully mature and ready for germination. Keep in mind that plants grown from seed may take two to four years to produce their first flowers.
Sowing the seeds should be done in a cold frame or a protected outdoor seedbed during the late summer or early autumn. You should use a light, gritty compost mix that provides excellent drainage and prevents the seeds from rotting in the damp earth. A thin covering of fine grit over the seeds will protect them from being washed away by rain or disturbed by birds. This method requires patience, but it is an excellent way to produce a large number of plants for naturalizing extensive areas.
During the first year of growth, the seedlings will appear as tiny, grass-like leaves that are easily mistaken for weeds. You must be careful to label your seedbeds clearly and keep them free from competition while the young bulbs develop. It is often best to leave the seedlings in their original container or bed for at least two years before transplanting them to their final location. This allows them to build up enough energy to survive the transition and eventually begin their blooming cycle.
Propagation through these different methods allows you to gain a deeper understanding of the plant’s life cycle and reproductive strategies. You might find that some varieties produce more seeds than others, or that some respond better to division in your specific soil type. Experimenting with these techniques is a hallmark of an expert gardener who is dedicated to the craft of horticulture. Expanding your collection through your own efforts is both rewarding and a testament to your skill as a grower.