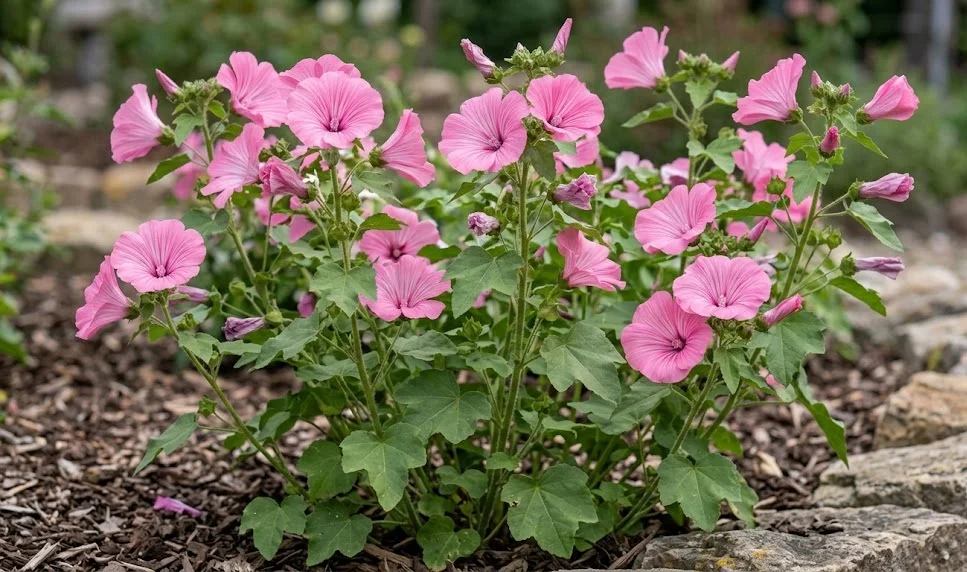
The process of establishing rose mallow in your garden begins with a precise approach to both seed starting and transplanting techniques. This plant is known for its rapid growth and spectacular visual impact, but it requires a solid start to reach its full potential. You must pay close attention to the timing of your activities to align with the natural warming of the soil in the spring. By following professional standards for propagation, you can ensure a high germination rate and vigorous seedlings that will eventually dominate the landscape.
Seed starting and germination techniques
Sowing seeds indoors gives you a significant head start on the growing season and allows for better control over the environment. You should start the process about six to eight weeks before the last expected frost to ensure the plants are large enough for transplanting. Using a high-quality seed starting mix that is light and well-draining is essential for preventing damping-off and other seedling diseases. Placing the trays on a heat mat can speed up the germination process significantly by maintaining a constant soil temperature.
The depth at which you plant the seeds is a critical factor that determines how easily the sprouts can reach the surface. You should sow the seeds about half a centimeter deep and cover them lightly with a fine layer of vermiculite or sifted soil. Keeping the medium consistently moist but not waterlogged is the key to triggering the biological processes inside the seed coat. You will usually see the first green shoots appearing within ten to fourteen days if the conditions are kept within the optimal range.
Light is the most important requirement once the first true leaves begin to emerge from the cotyledons. You should provide bright, indirect light for at least twelve to fourteen hours a day to prevent the seedlings from becoming leggy and weak. If you are growing them on a windowsill, you should rotate the trays daily to ensure that all sides of the plant receive equal exposure. Using supplemental grow lights is often the best way to produce the sturdy, compact plants that professionals prefer for their displays.
Thinning out the seedlings is a necessary step that ensures each plant has enough space to develop a strong root system. You should select the strongest individual in each cell and remove the smaller ones by clipping them at the soil level. This prevents the roots of the remaining plant from being disturbed, which could happen if you tried to pull the extras out. Providing adequate space from the very beginning leads to much more resilient plants that can handle the stress of being moved outdoors.
More articles on this topic
Transplanting into the garden
Hardening off the seedlings is a gradual process that prepares the indoor-grown plants for the harsh realities of the outdoor environment. You should start by placing them in a sheltered, shady spot for a few hours each day and slowly increasing their exposure to sun and wind. This transition typically takes about a week to ten days and is vital for toughening up the leaf cuticles and stems. Skipping this step often leads to transplant shock, which can stall the growth of your rose mallows for several weeks.
The choice of the final planting site should be based on the specific needs of the rose mallow for light, drainage, and space. You should dig a hole that is twice as wide as the root ball and just as deep to allow the roots to spread out easily. Mixing some slow-release fertilizer or compost into the bottom of the hole provides an immediate source of nutrients for the establishing plant. Ensure that the soil is moist before you place the seedling in the ground to reduce the immediate stress on the roots.
Proper spacing between the plants is essential for ensuring good air circulation and preventing the spread of diseases. You should leave at least forty to sixty centimeters between each rose mallow, depending on the expected size of the specific variety you are growing. While it might look sparse initially, these plants grow very quickly and will soon fill the gaps to create a solid wall of color. Overcrowding often leads to stunted growth and a higher incidence of fungal issues as the plants mature during the humid summer.
After setting the plant in the hole, you should firm the soil gently around the base to remove any large air pockets. You must water the area thoroughly immediately after planting to help settle the soil and ensure good contact between the roots and the earth. Applying a thin layer of organic mulch around the base will help keep the moisture in and prevent the surface from crusting over. Regular monitoring during the first two weeks is necessary to ensure the young plants are adapting well to their new home.
More articles on this topic
Direct sowing in the open ground
For those who prefer a more natural approach, direct sowing into the garden bed is a viable and often very successful method. You should wait until all danger of frost has passed and the soil has warmed up to at least fifteen degrees Celsius. Clearing the area of weeds and raking the soil to a fine tilth creates the perfect seedbed for these relatively large seeds. This method often results in stronger root systems as the plants do not have to endure the stress of being moved.
Marking the rows or clusters where you have sown the seeds helps you distinguish the mallows from emerging weeds. You should sow the seeds in groups of three or four every fifty centimeters and then thin them down to the strongest plant once they are established. Keeping the soil surface moist during the germination period is the most challenging part of direct sowing in an outdoor setting. Using a light fleece cover can help retain moisture and protect the seeds from birds or heavy rain during the early stages.
The advantage of direct sowing is that the plants can synchronize their growth perfectly with the local climate and day length. You will notice that direct-sown mallows often catch up to the indoor-started ones by mid-summer because they never experience transplant shock. Their taproots go deeper into the soil from the beginning, making them more drought-tolerant as the season progresses. This resilience is a major benefit in regions where the summer weather can be unpredictable or particularly dry.
Successive sowing is a professional trick used to extend the flowering season of annuals like the rose mallow. You can sow a new batch of seeds every three weeks until early summer to ensure a constant supply of fresh blooms. This prevents the entire garden from going out of flower at the same time and keeps the display looking vibrant for much longer. Careful planning of these sowing dates allows you to manage the space in your garden borders more effectively throughout the year.
Propagating through cuttings and seeds
While rose mallows are typically grown from seeds, it is possible to take cuttings from particularly desirable specimens in the early summer. You should select healthy, non-flowering side shoots and cut them just below a leaf node with a sharp, sterile knife. Removing the lower leaves and dipping the cut end into rooting hormone can increase the chances of successful root development. Placing the cuttings in a misting chamber or under a plastic dome keeps the humidity high while the roots are forming.
Cuttings should be kept in a bright spot but away from direct sunlight, which could cause them to wilt before they can take up water. You should see signs of new growth within three to four weeks, indicating that a functional root system has been established. Once rooted, the new plants should be potted up individually and allowed to grow on for a few weeks before being moved to the garden. This method is an excellent way to multiply a specific color or form that you find especially attractive in your collection.
Collecting seeds from your own plants at the end of the season is a rewarding way to ensure a supply for the following year. You should wait until the seed pods have turned brown and started to split open naturally on the plant. Store the dried seeds in a cool, dark, and dry place in paper envelopes to maintain their viability over the winter. Keep in mind that seeds collected from hybrid varieties may not produce plants that are identical to the parent in color or size.
Understanding the genetic diversity of the seeds you collect can lead to interesting surprises in the garden next year. You might find new color variations or slightly different growth habits appearing in your self-saved batches. This natural variation is part of the joy of gardening and allows you to select the best-performing plants for your specific microclimate. By continuing this cycle of saving and sowing, you develop a strain of rose mallow that is perfectly adapted to your local conditions.