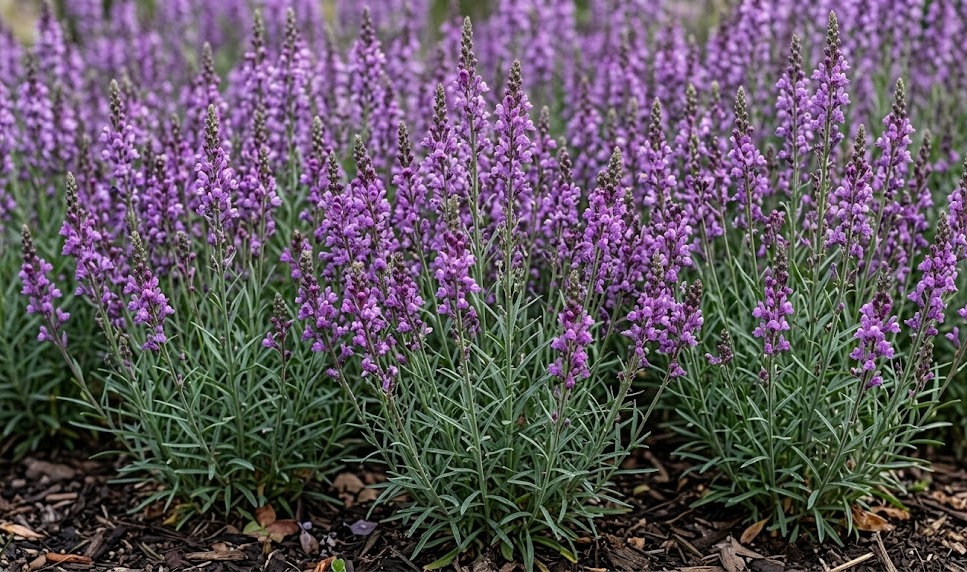
Establishing a thriving population of purple toadflax begins with a clear understanding of its preferred growing conditions and reproductive habits. This versatile perennial is known for its ability to colonize suitable areas with ease, making it an excellent choice for filling gaps in large garden borders. Whether starting from seed or using vegetative methods, the goal is to create a robust root system that can support the plant’s tall and elegant flowering spikes. Professional propagation requires patience and a keen eye for the right environmental cues during the early stages of development.
The timing of planting is crucial for ensuring that the young specimens have enough time to adapt before the stress of extreme weather. Early spring is often cited as the best season, as the increasing light levels and rising temperatures stimulate rapid growth. Alternatively, early autumn planting allows the roots to settle into the soil while the ground is still warm from the summer sun. Choosing the right moment in the seasonal cycle is a hallmark of expert horticultural planning.
Preparation of the planting site involves more than just digging a hole in the ground for the new arrival. The soil should be cleared of any aggressive weeds that might compete for moisture and nutrients during the establishment phase. Incorporating a small amount of organic compost can provide the initial boost needed for the young plants to take hold. A well-prepared site acts as a foundation for many years of successful growth and beautiful floral displays.
Space management is another professional consideration when introducing purple toadflax into a designed landscape. While the plants may look small initially, they will quickly expand and potentially self-seed if given the opportunity. Planning for their mature size ensures that they have enough room to breathe and reach their full aesthetic potential. This forward-thinking approach prevents the need for constant thinning or relocation in the future.
Sowing techniques and seed management
Growing purple toadflax from seed is one of the most cost-effective ways to add large numbers of these plants to a garden. The seeds are quite small and require a light touch during the sowing process to ensure they are not buried too deeply. Many professionals prefer to sow them directly onto the surface of a prepared seedbed, as light often aids in the germination process. A fine mist of water helps to settle the seeds into the soil without washing them away.
More articles on this topic
Cold stratification is sometimes used by experts to improve the germination rates of the seeds. This process mimics the natural winter conditions that the seeds would experience if they fell from the plant in the wild. Placing the seeds in a cool, damp environment for a few weeks before sowing can break their dormancy and lead to more even growth. Understanding these physiological requirements is what separates professional propagation from casual attempts.
Once the seedlings emerge, they must be monitored closely for any signs of damping-off or other early-stage issues. Thinning the young plants ensures that the strongest individuals have the space and resources they need to thrive. It can be difficult to remove healthy-looking seedlings, but it is a necessary step for the long-term health of the remaining crop. Professional gardeners focus on quality over quantity during this critical thinning phase.
Transplanting the seedlings to their final positions should be done with great care to avoid damaging the delicate root systems. It is best to wait until the plants have developed at least two sets of true leaves before moving them. Hardening off the young plants by gradually exposing them to outdoor conditions is a vital step in the process. This transition period reduces the risk of transplant shock and ensures a higher success rate in the garden.
Division and vegetative propagation
Division is a reliable method for multiplying existing clumps of purple toadflax while also rejuvenating the original plant. This process is best performed every three to four years to prevent the centers of the clumps from becoming woody and unproductive. By lifting the entire root mass and carefully pulling it apart, a gardener can create several new plants from a single source. Each new section should have a healthy amount of roots and at least one or two growing points.
More articles on this topic
The best time for division is during the dormant or semi-dormant periods of the plant’s lifecycle. Early spring, just as the first signs of green growth appear, is particularly effective because the plant is ready to grow rapidly. Professionals use sharp, clean tools to make clean cuts through the root system, which minimizes the risk of infection. Replanting the divisions immediately ensures that the roots do not dry out during the procedure.
Root cuttings are another expert technique that can be used to propagate this species, although it is less common than simple division. This involves taking small sections of the thickest roots and placing them in a specialized growing medium. Under the right conditions of moisture and temperature, these root fragments will develop new shoots and eventually become independent plants. This method requires a more controlled environment and is often done in a professional greenhouse setting.
Vegetative propagation ensures that the new plants are genetically identical to the parent, preserving specific traits such as flower color or growth habit. This is particularly important for named cultivars that might not come true from seed. Maintaining the integrity of a specific variety is a key goal for many horticultural professionals and specialist nurseries. Having a reliable source of identical plants allows for consistent and predictable garden designs.
Site selection and soil preparation
Choosing the right location is the first step in ensuring the long-term success of any new planting. Purple toadflax thrives in positions that receive full sun, although it can tolerate some very light shade during the hottest part of the day. The site should also have good air circulation to prevent the buildup of humidity around the dense spikes of flowers. Professional site selection takes into account the movement of the sun throughout the entire growing season.
The drainage characteristics of the soil are perhaps the most important physical factor to consider. These plants are naturally adapted to rocky or sandy areas where water does not linger around the root zone for long. If the chosen site has heavy clay soil, it must be amended with grit or organic matter to improve its structure. Testing the drainage by filling a hole with water and watching how fast it disappears is a simple but effective professional test.
Soil fertility does not need to be high for purple toadflax, and in fact, very rich soil can sometimes lead to structural problems. Plants grown in overly fertile conditions often become tall and weak, requiring artificial support to stay upright. A balanced, moderate level of nutrients encourages a more natural and sturdy growth habit. Professionals aim for a soil quality that promotes health without triggering excessive or unmanageable expansion.
Finally, the visual impact of the planting should be considered during the site selection process. Thinking about how the purple spikes will look against the background of a wall, fence, or other plants is part of the design phase. Creating a backdrop that complements the color and form of the toadflax enhances the professional look of the garden. A well-placed plant is not only healthy but also contributes significantly to the overall harmony of the landscape.
Post-planting care and establishment
The first few weeks after planting are the most critical for the survival of the new purple toadflax specimens. Even though the plant is drought-tolerant once established, it needs regular watering while the roots are moving into the surrounding soil. The soil should be kept consistently moist but never saturated during this initial period. Monitoring the moisture levels daily allows the gardener to respond quickly to any signs of wilting or stress.
Applying a thin layer of mulch around the base of the new plants can help to regulate soil temperature and conserve moisture. Care should be taken to keep the mulch away from the actual stems of the plant to prevent rot. Organic mulches, such as shredded bark or compost, will eventually break down and improve the soil structure over time. This professional practice provides both immediate and long-term benefits to the developing garden.
As the plants begin to show signs of new growth, any temporary supports can be adjusted or removed as needed. It is important to encourage the plant to stand on its own as much as possible to develop a strong stem structure. If the site is particularly windy, subtle supports that blend into the foliage might be necessary during the first year. Professional staking is always as invisible as possible, preserving the natural beauty of the plant.
Long-term success is measured by the plant’s ability to return year after year and eventually spread to fill its allocated space. Once the initial establishment phase is over, the care routine can transition to a more standard maintenance schedule. Observing how the plants interact with their environment provides valuable insights for any future propagation projects. Expert gardening is a journey of continuous learning and adaptation to the needs of the living landscape.