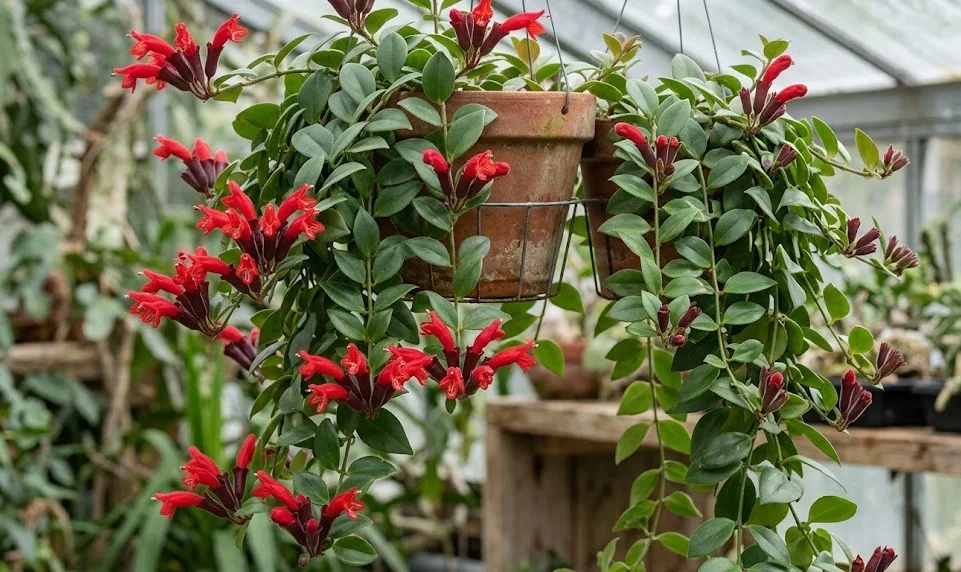

Planting and propagating the trailing lipstick plant begins with understanding that its roots need air as much as moisture. This is not a plant for dense garden soil or heavy indoor compost. It grows best in a light, open medium that drains quickly while holding enough humidity around the roots. When planted correctly, it establishes steadily, trails elegantly, and provides excellent material for propagation.
Preparing the right container and growing medium
The container should have generous drainage holes. This is essential because the trailing lipstick plant is highly sensitive to standing water around its roots. A decorative outer pot can be used, but the nursery pot inside must drain freely. After watering, excess liquid should always be emptied from the cover pot.
A hanging basket is often the most attractive choice. It allows the stems to cascade naturally and keeps the foliage away from surfaces where moisture might collect. A wall planter or elevated shelf can work just as well if light is adequate. The key is to give the trailing stems space to extend without being crushed.
The potting mix should be loose, airy, and moisture-retentive without becoming soggy. A suitable blend may include high-quality houseplant compost, orchid bark, perlite, and a little coco coir. The bark improves structure, while perlite increases drainage and oxygen flow. Coco coir helps retain even moisture without compacting as heavily as some peat-based mixes.
Avoid using ordinary garden soil indoors. It is usually too dense, may contain pests, and often drains poorly in containers. Heavy soil also increases the chance of root rot, especially during cooler months. A professional epiphytic or aroid-style mix is usually much closer to what this plant needs.
More articles on this topic
Planting and repotting without stress
Planting should be done gently because the roots are relatively fine. Before removing the plant from its old pot, water it lightly if the root ball is extremely dry. This makes the roots more flexible and reduces breakage. However, repotting a plant that is soaking wet can be messy and may damage delicate root tips.
The new pot should be only slightly larger than the previous one. Oversized containers hold too much unused moisture around the roots. This can slow establishment and encourage fungal issues. A small increase in pot size is usually enough for healthy growth.
Place a little fresh mix at the bottom of the pot, position the root ball, and fill around it with the prepared medium. The plant should sit at the same depth as before. Burying the stems too deeply can cause rot at the base. Press the mix lightly, but do not compact it hard.
After repotting, water thoroughly and allow the pot to drain. Keep the plant in bright indirect light and avoid fertilising for a few weeks. The roots need time to adjust before being pushed into strong growth. A calm recovery period usually leads to better establishment.
More articles on this topic
Propagation from stem cuttings
Stem cuttings are the most practical way to propagate the trailing lipstick plant. Choose healthy, non-flowering stems with firm leaves and no signs of pests. Each cutting should have several nodes, because roots form most readily from these points. A clean, sharp pair of scissors or pruning shears helps prevent crushed tissue.
Remove the lower leaves from each cutting before planting. This exposes nodes that can be inserted into the propagation medium. Leaves left below the surface may rot and contaminate the cutting. Keeping the upper leaves intact allows the cutting to continue photosynthesis.
Cuttings can be rooted in water, but a light propagation mix often produces stronger roots. A blend of perlite and coco coir, or perlite and fine bark, works well. Insert the cuttings so at least one or two nodes are below the surface. Firm the medium gently around them to ensure contact.
Humidity improves rooting success, but the cuttings still need fresh air. A clear cover or propagation box can help retain moisture, especially in dry rooms. Open it regularly to reduce condensation and prevent fungal growth. Bright indirect light and gentle warmth are more important than direct sun.
Aftercare for young plants
Rooting usually takes several weeks, depending on temperature, light, and cutting condition. Tugging cuttings repeatedly to check progress should be avoided. New growth is often a better sign that rooting has begun. If a cutting remains firm and green, patience is usually worthwhile.
Once rooted, young plants should be moved into a suitable airy potting mix. Several cuttings can be planted together to create a fuller basket. This is often more attractive than growing a single cutting alone. Group planting also produces a denser display more quickly.
Water young plants carefully while their root systems are still small. The mix should stay lightly moist but never saturated. Small pots dry quickly near the surface but may remain damp at the base. Checking pot weight and surface moisture helps prevent mistakes.
Pinching the tips of young plants encourages branching. This creates a fuller shape and prevents long, sparse stems. It may delay the first flowers slightly, but the long-term result is usually better. A strong, well-branched young plant becomes much easier to manage as it matures.