The act of planting a tulip bulb is an act of faith and an investment in future beauty, a simple task that promises a vibrant reward after the dormancy of winter. To ensure a spectacular spring display, however, requires more than just digging a hole; it involves careful timing, thoughtful preparation, and an understanding of the bulb’s needs. The success of your tulips is largely determined before you even see a single green shoot, beginning with the selection of healthy bulbs and their placement in a suitable environment. Proper planting techniques not only guarantee beautiful flowers in the first year but also set the stage for their potential return in subsequent seasons. This guide provides detailed instructions on how to plant and propagate tulips effectively, transforming your garden with their iconic, colorful blooms.
The optimal time for planting tulip bulbs is in the autumn, once the soil has cooled down from the summer heat but before it freezes solid. This typically falls between September and December in the Northern Hemisphere, depending on your specific climate zone. Planting during this window allows the bulbs sufficient time to establish a strong root system before winter sets in, which is crucial for the vigorous growth that will occur in the spring. If you plant the bulbs too early while the soil is still warm, you risk exposing them to fungal diseases and encouraging premature top growth that can be damaged by frost. Conversely, planting too late may not give the roots enough time to develop, leading to weaker plants and smaller flowers.
The selection of high-quality bulbs is a critical first step that cannot be overstated. When you are purchasing your tulip bulbs, choose those that are large, firm, and heavy for their size, as these attributes indicate a healthy bulb with ample stored energy. Avoid any bulbs that feel soft, have mouldy patches, or show signs of physical damage or shrivelling. The papery outer skin, known as the tunic, may be partially flaked off, which is generally not a problem, but the bulb underneath should be intact. Investing in top-size bulbs from a reputable supplier will pay dividends in the form of larger, more robust flowers and healthier plants overall.
Before you begin planting, preparing the garden bed is essential for creating an environment where your tulips can thrive. As tulips demand excellent drainage to prevent bulb rot, it is vital to amend heavy clay soils with organic matter like compost, shredded leaves, or well-rotted manure. This not only improves the soil structure and drainage but also adds valuable nutrients. Choose a location that receives at least six hours of direct sunlight per day during the spring growing season. A sunny spot ensures strong stems and vibrant, long-lasting blooms, as sunlight fuels the photosynthesis necessary for the plant’s energy production.
Once you have your prepared bed and quality bulbs, you can proceed with the planting process. A general rule of thumb for planting depth is to dig a hole that is two to three times the height of the bulb itself. This means that for a typical 2-inch (5 cm) tall bulb, you should plant it about 4 to 6 inches (10 to 15 cm) deep, measuring from the base of the bulb. Place the bulb in the hole with the pointed end facing upwards, as this is where the shoot will emerge. If you are unsure which end is which, planting the bulb on its side is a safe alternative, as the stem will naturally find its way towards the surface.
More articles on this topic
Spacing and design considerations
Proper spacing between tulip bulbs is crucial for both the health of the plants and the visual impact of your display. For a full, dense look in garden beds, plant the bulbs approximately 4 to 6 inches (10 to 15 cm) apart. This spacing gives each bulb enough room to access water and nutrients from the soil without excessive competition, and it also promotes good air circulation, which helps to prevent fungal diseases. If you plant them too close together, they may struggle to thrive, resulting in smaller flowers and weaker plants. Conversely, spacing them too far apart can lead to a sparse and less impactful display.
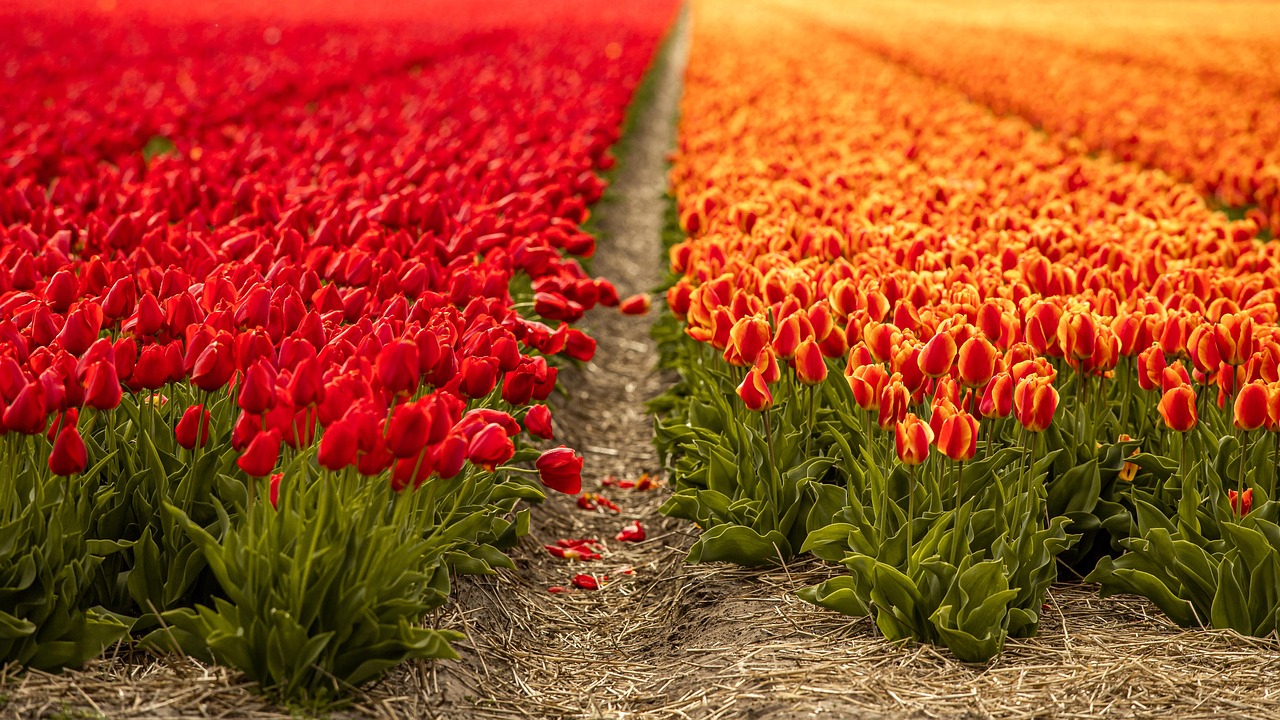
When planning the layout of your tulip planting, think in terms of creating drifts or clusters rather than planting in single, straight rows. Planting in groups of at least five to seven bulbs of the same variety creates a more natural and visually pleasing effect. For a truly dramatic statement, you can plant large swathes of tulips together, creating a river of color through your garden bed. Consider layering different varieties with different bloom times in the same area to extend the flowering season. You can also mix different colors that complement each other to design a vibrant and harmonious spring tapestry.
The technique of planting in trenches can be highly efficient, especially when you are working with a large number of bulbs. Instead of digging individual holes, you can excavate a larger area to the desired depth. You can then arrange the bulbs within the trench, ensuring correct spacing, before backfilling the entire area with the excavated soil. This method not only saves time and effort but also ensures a consistent planting depth for all the bulbs, which leads to a more uniform height and bloom time across the group. Gently firm the soil over the bulbs and water the area thoroughly to settle the soil and eliminate any air pockets.
In addition to garden beds, tulips are exceptionally well-suited for container gardening, which allows you to enjoy their beauty on patios, balconies, or entryways. When planting in pots, you can place the bulbs much closer together than in the ground—almost touching—to create a full and lush display. Ensure the container is deep enough to accommodate the bulbs and soil and has adequate drainage holes. A useful technique for containers is layering, also known as the “bulb lasagna” method, where you plant larger, later-blooming bulbs like tulips deeper in the pot and smaller, earlier-blooming bulbs like crocuses or grape hyacinths in the layers above them for a continuous spring show.
More articles on this topic
Propagation through offsets
The primary method by which tulips propagate naturally is through the production of offsets, which are small daughter bulbs that form at the base of the main, or mother, bulb. After a few years in the ground, a single tulip bulb can develop into a small clump of bulbs. While this multiplication is a sign of a healthy plant, it can eventually lead to overcrowding, which results in increased competition for resources and a subsequent decline in the size and quantity of flowers. Dividing these clumps every three to five years is a beneficial practice that rejuvenates your tulip stock and provides you with new bulbs to plant elsewhere in your garden.
The best time to divide tulip clumps is in the late summer or early autumn, after the foliage has completely died back and the bulbs are dormant. Carefully lift the entire clump from the ground using a garden fork or spade, being cautious not to damage the bulbs in the process. Once the clump is out of the soil, gently crumble away the excess earth and separate the individual bulbs by hand. You will find a mix of sizes, from the large mother bulbs to the smaller offsets. These can all be replanted to grow into new plants.
When you are ready to replant the divided bulbs, you should sort them by size. The larger bulbs have enough stored energy to produce a flower in the following spring and can be planted in your main display beds according to the standard depth and spacing guidelines. The smaller offsets, however, may need a year or two of growth before they are large enough to bloom. It is often practical to plant these smaller bulbs in a dedicated “nursery” bed, a less prominent spot in the garden where they can grow and mature without pressure to perform. Plant them at a slightly shallower depth, provide them with good care, and they will develop into flowering-size bulbs over time.
This process of lifting, dividing, and replanting offsets is not only essential for maintaining the vigor of your perennial tulips but is also the most reliable way for a home gardener to increase their stock. It allows you to expand your tulip displays over the years at no additional cost. Remember to label the different varieties as you lift and store them if you are working with multiple types. This simple propagation method ensures that your garden remains vibrant and full of healthy, blooming tulips season after season, rewarding your initial investment for many years to come.
Propagation from seed
While propagation from offsets is the most common and practical method for home gardeners, tulips can also be grown from seed. This method, however, is a long and patient process primarily used by professional breeders and tulip enthusiasts who are interested in creating new hybrid varieties. When tulips are grown from seed, the resulting plants will not be genetically identical to the parent plant, leading to variations in color, shape, and size. This genetic variability is what allows for the development of new cultivars, but it also means you cannot use seed to replicate a specific variety you admire.
The process begins with collecting the seeds after the tulip has finished flowering. If you have successfully pollinated a flower and wish to collect seed, you must leave the flower head on the stem instead of deadheading it. The seed pod will develop and ripen over the summer, eventually turning brown and dry and beginning to split open. At this point, you can harvest the flat, papery seeds. It is important to ensure the seeds are completely dry before storing them in a cool, dark, and dry place until you are ready to sow them.
Tulip seeds require a period of cold, moist stratification to break their dormancy and trigger germination. You can sow the seeds in the autumn in pots or seed trays filled with a well-draining seed-starting mix. Cover the seeds with a thin layer of compost or grit, water them gently, and then leave the containers outdoors in a protected spot to experience the natural winter cold. Alternatively, you can artificially stratify the seeds by placing the sown container in a plastic bag and refrigerating it for at least 12 to 16 weeks.
After the cold period, the seeds will begin to germinate as temperatures warm up in the spring, producing a single, grass-like leaf. This is where patience becomes paramount. The small bulb that forms in the first year will be tiny, and it will take anywhere from four to seven years of careful cultivation for the bulb to grow large enough to be able to produce its first flower. During this time, the young bulbs will need to be cared for, allowed to die back naturally each year, and potentially repotted as they grow, making it a true labor of love for the dedicated gardener.
Planting tulips is one of my favorite autumn rituals, and I’ve learned that timing is everything. You want to wait until the soil temperature has dropped consistently below 15 degrees Celsius before putting your bulbs in the ground. If you plant too early, the bulbs might try to sprout before the winter, which can lead to damage. I always plant mine at a depth of about three times the height of the bulb, which provides good insulation and helps prevent them from being dug up by curious squirrels. Adding a bit of bone meal to the bottom of the planting hole can also give the roots a great head start. It’s a simple investment that pays off beautifully in the spring.