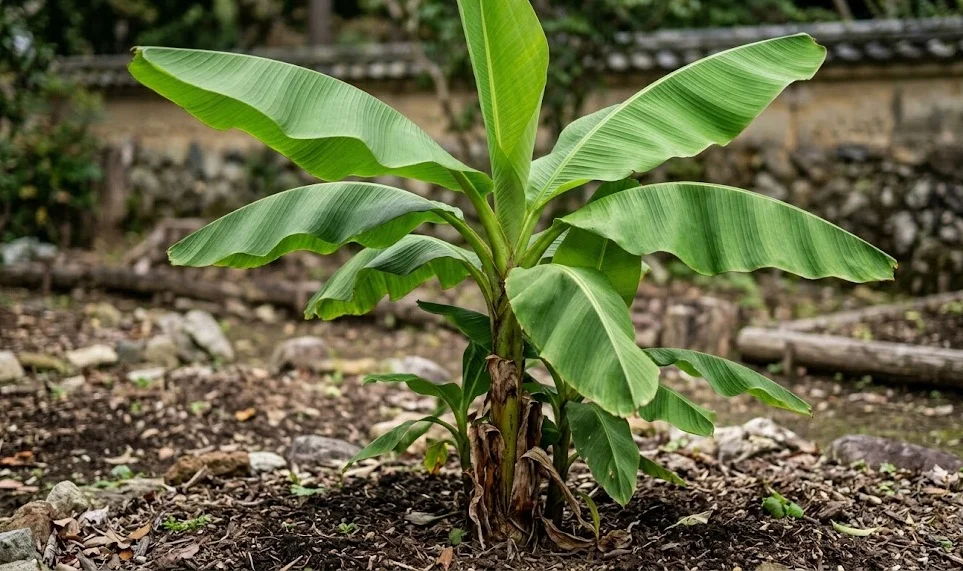
Successful planting of the Japanese banana begins with selecting a site that offers the perfect combination of sunlight, protection from the elements, and deep, fertile soil. This plant is a heavy-duty grower that requires a significant amount of space to accommodate its massive leaves and expanding root system over time. When you first introduce a specimen to your garden, the goal is to minimize transplant shock and encourage rapid root establishment before the peak of summer. A well-planted banana will settle in quickly and begin producing new growth within just a few weeks of being placed in the ground.
Selecting the ideal planting site
The most important factor when choosing a location for your Japanese banana is the amount of direct sunlight the area receives during the day. While it can tolerate partial shade, it truly thrives and reaches its most impressive size when given at least six to eight hours of full sun. Sunlight provides the energy necessary for the rapid photosynthesis that fuels its incredible growth rate. Observe your garden throughout the day to identify the brightest spots that remain sunny even as the seasons change.
Protection from the wind is equally important because the large leaves are prone to mechanical damage and heavy transpiration in breezy conditions. A site near a fence, a wall, or a cluster of sturdy shrubs can provide a vital windbreak that keeps the foliage looking pristine. However, you must ensure that these structures do not cast too much shade or compete excessively for root space. The ideal spot is a warm, sunny “pocket” where the air remains relatively still even on gusty days.
Soil quality and drainage should be assessed long before you dig the first hole to ensure long-term success for the plant. Japanese bananas prefer deep, loamy soil that is rich in organic matter and can hold a substantial amount of moisture without becoming stagnant. If your garden has heavy clay soil, you may need to plant in a raised mound or incorporate significant amounts of grit and compost to improve drainage. Avoid low-lying areas of the garden where water tends to collect after a heavy downpour, as this will lead to rhizome rot.
Finally, consider the mature size of the plant when spacing it relative to other garden features or buildings. A single pseudostem can grow several meters tall, and the leaves can extend quite far horizontally, potentially blocking paths or crowding out smaller neighbors. Allow for a diameter of at least two to three meters of clear space to let the plant expand naturally over the years. Planning for this growth now will save you the trouble of having to move the plant or perform heavy pruning later on.
More articles on this topic
Proper planting techniques
Once you have selected the perfect site, the actual planting process should be handled with care to protect the sensitive roots and rhizome. Dig a hole that is at least twice as wide and slightly deeper than the root ball of the specimen you are planting. This extra space allows you to backfill with a high-quality mixture of soil and compost, creating an “easy-growth zone” for the young roots. Loosening the soil at the bottom of the hole will also help the roots penetrate deeper into the earth more quickly.
Before placing the plant in the hole, it is beneficial to soak the root ball in a bucket of water for about an hour to ensure it is fully hydrated. This is especially important if the plant has been sitting in a nursery pot for a long time and the soil has become compacted or dry. When you set the plant in the hole, make sure the top of the rhizome is level with or just slightly below the surrounding soil surface. Planting too deep can cause the stem to rot, while planting too shallow can lead to instability and drying out.
Backfilling the hole should be done in stages, gently tamping down the soil as you go to remove any large air pockets. You can mix in a handful of slow-release organic fertilizer at this stage to provide a steady supply of nutrients for the coming months. Once the hole is filled, create a small “basin” or ring of soil around the base of the plant to help direct water toward the roots during irrigation. This simple step ensures that water goes exactly where it is needed most during the critical establishment phase.
The final step in the planting process is to apply a thick layer of mulch around the base of the plant, being careful not to let it touch the pseudostem directly. Mulch helps to retain soil moisture, suppress weeds, and provide a gradual source of organic matter as it breaks down over time. Water the plant thoroughly immediately after planting to settle the soil and eliminate any remaining air gaps around the roots. For the first few weeks, keep a close eye on the soil moisture to ensure the young plant does not dry out.
More articles on this topic
Propagation via division of pups
One of the most rewarding aspects of growing Japanese bananas is the ease with which they can be propagated through the division of offsets, commonly known as “pups.” These pups emerge from the base of the parent plant as the rhizome expands and are essentially genetic clones of the mother plant. Propagating your own plants allows you to expand your garden or share this exotic beauty with friends and neighbors. The best time to perform this division is in late spring or early summer when the plant is in its most active growth phase.
To begin the propagation process, identify a pup that is at least thirty to fifty centimeters tall and has started to develop its own set of leaves. Smaller pups often lack a sufficient root system of their own and are less likely to survive the separation from the parent. Carefully clear away the soil from around the base of the pup to reveal where it is attached to the main rhizome. You will need a sharp, clean spade or a heavy-duty knife to make a clean cut through the connecting tissue.
When making the cut, try to ensure that the pup comes away with a good portion of the rhizome and as many of its own roots as possible. This “chunk” of the parent system will provide the necessary energy for the pup to establish itself in its new location. Once separated, handle the pup gently to avoid damaging the soft, fleshy roots and the emerging leaves. It is often helpful to trim back the largest leaves of the pup by about half to reduce water loss while the roots are recovering.
The newly separated pup should be planted immediately into a prepared spot in the garden or into a large pot filled with high-quality potting mix. Follow the same planting guidelines as you would for a mature specimen, ensuring proper depth and immediate watering. Keeping the newly moved pup in a slightly more sheltered or shaded spot for a week or two can help it recover from the stress of division. With proper care, these pups will grow rapidly and can often reach a significant size before the end of their first season.
Initial establishment and care
The first growing season is the most critical period for a newly planted or propagated Japanese banana as it focuses on building a strong foundation. During these initial months, the plant’s priority is developing a deep and wide-reaching root system that can support future growth. You may notice that the plant doesn’t put on much height for the first few weeks as it adapts to its new environment. This is perfectly normal, and once the roots are established, the top growth will accelerate dramatically.
Watering is the most frequent task you will face during the establishment phase, as young plants have a limited root volume to draw from. The soil should be kept consistently moist but never soggy, which may require daily watering during particularly hot or dry spells. Check the moisture level by sticking your finger an inch or two into the soil; if it feels dry, it is time to irrigate. Providing a deep soak rather than frequent light sprinkles encourages the roots to grow deeper into the ground.
While you may be eager to see rapid growth, avoid the temptation to over-fertilize young plants in their first few weeks. Wait until you see the first sign of a new leaf unfurling before starting a regular feeding schedule with a balanced, diluted liquid fertilizer. This ensures that the plant has a functional root system ready to process the nutrients you are providing. Once growth is clearly underway, you can gradually increase the strength and frequency of the applications to match the plant’s needs.
Finally, keep the area around your new banana free of competing weeds that might steal moisture and nutrients from the young plant. A well-maintained mulch layer should handle most of this, but any stubborn weeds should be removed by hand to avoid damaging the banana’s roots with tools. Protecting the young pseudostem from physical damage, such as from lawnmowers or pets, will prevent scarring and potential entry points for disease. By providing this extra bit of care early on, you set the stage for a massive, healthy specimen in the years to come.