For many gardeners, the successful overwintering of the aztec lily is the most challenging yet rewarding part of the entire cultivation process. Since these plants are sensitive to freezing temperatures, they require a deliberate plan to survive the cold months in most temperate climates. A professional approach to overwintering involves a series of steps that transition the bulb from active growth to a safe and secure state of dormancy. Mastering this seasonal transition is the key to ensuring your exotic collection remains a permanent and thriving feature of your garden.
Timing the harvest and preparation for rest
The signal to begin the overwintering process usually comes from the plant itself as the weather cools and the days shorten in late autumn. You will notice the vibrant green leaves starting to turn yellow and eventually brown, which indicates that the plant is withdrawing its nutrients into the bulb. This is a critical natural process that should not be rushed by cutting the leaves while they are still green and active. Patience at this stage ensures that the bulb has the maximum possible energy reserves to survive the long winter ahead.
Once the foliage has completely withered and dried, you can safely remove it by gently pulling it away or cutting it close to the bulb’s neck. If you are growing your lilies in the ground, this is the time to carefully lift the bulbs before the first hard frost of the season arrives. Use a garden fork to loosen the soil several inches away from the plant to avoid accidentally piercing the sensitive tissues of the bulb. Lifting the bulbs is a delicate operation that requires a steady hand and a professional level of care.
For plants grown in containers, the process is slightly simpler but still requires a thoughtful transition to a cooler and drier environment. You can gradually reduce the amount of water you provide over several weeks to encourage the soil to dry out completely. Once the soil is dry and the foliage is gone, the entire pot can be moved to its winter storage location. Keeping the bulb in its original container can help protect the root zone from rapid temperature fluctuations during the cold months.
Always inspect each bulb thoroughly during the harvesting process to ensure you are only storing healthy and viable specimens. Any bulbs that show signs of rot, physical damage, or pest infestation should be separated and either treated or discarded. Storing a diseased bulb along with healthy ones is a recipe for disaster, as the infection can easily spread in the still air of a storage room. A professional gardener knows that the quality of the “stock” going into storage determines the success of the spring awakening.
More articles on this topic
Lifting and curing bulbs for safe storage
If you have lifted your bulbs from the garden, the next essential step is the curing process, which prepares them for several months of inactivity. You should start by gently shaking off any excess soil, but avoid washing them with water as this can introduce unwanted moisture into the storage area. Lay the bulbs out in a single layer on a screen or a tray in a dry, shaded, and well-ventilated spot. This initial drying period usually takes about one to two weeks, depending on the ambient humidity and temperature.
Curing allows the outer skins of the bulb to toughen up and any small wounds from the lifting process to callous over and heal. This protective layer acts as a natural barrier against dehydration and the entry of opportunistic fungal pathogens during the winter. You should turn the bulbs occasionally to ensure they are drying evenly on all sides and that there are no pockets of moisture. A professional curing process is a slow and steady preparation that cannot be bypassed if you want to avoid bulb loss.
Once the curing is complete and the bulbs feel dry and firm, you can perform a final cleaning to remove any remaining loose dirt or dead roots. Some gardeners like to lightly dust the bulbs with a sulfur-based fungicidal powder as an extra layer of protection during storage. This is a common professional practice that helps manage the risk of mold in environments that might not have perfect air circulation. Labeling your bulbs at this stage is also a good idea, especially if you have different varieties or colors in your collection.
If you find that your bulbs have produced offsets during the growing season, the end of the curing period is an excellent time to separate them. Handle these smaller bulbs with the same care as the mature ones, ensuring they also go through a proper drying phase. By organizing your bulbs by size and health, you can make the spring planting process much more efficient. Proper lifting and curing are the technical foundations of a successful overwintering strategy for any tender bulb species.
More articles on this topic
Optimal environmental conditions for winter storage
Finding the right location for winter storage is a matter of balancing temperature, humidity, and air circulation to keep the bulbs dormant but alive. The ideal storage temperature for these exotic lilies is usually between ten and fifteen degrees Celsius, which is cool enough to prevent growth but well above freezing. A cool basement, a frost-free garage, or a dedicated root cellar are often the most suitable locations for this purpose. You must avoid areas that are subject to extreme heat, such as near a furnace or a water heater, which could cause the bulbs to dry out or sprout too early.
The humidity in the storage area should be low to moderate to prevent the development of mold and mildew on the dormant bulbs. If the air is too damp, you can improve the situation by using a small fan to keep the air moving or by using a dehumidifier. Conversely, if the air is extremely dry, the bulbs may start to shrivel and lose their viability over the long winter months. A professional trick is to store the bulbs in a breathable material like peat moss, sawdust, or even dry sand to help maintain a stable internal moisture level.
Using paper bags, mesh sacks, or wooden crates is much better than using plastic containers, which trap moisture and lead to rapid decay. These breathable storage options allow for the necessary gas exchange and prevent the buildup of heat and humidity around the bulbs. You should arrange the bulbs so they are not touching each other, which further reduces the risk of any potential rot spreading through the entire collection. Organizing your storage space effectively makes it much easier to monitor the health of your bulbs throughout the winter.
Regularly checking on your stored bulbs is a critical but often overlooked part of the professional overwintering process. Once a month, you should take a few minutes to inspect the collection for any signs of trouble like soft spots, mold, or premature sprouting. If you find a bulb that is starting to go bad, remove it immediately to protect the rest of the group. These brief check-ins allow you to make small adjustments to the environment, such as moving the bulbs to a cooler spot if they seem to be waking up too soon.
Reawakening and preparing for the spring season
As the winter begins to fade and the first signs of spring appear, it is time to start thinking about bringing your bulbs out of their dormant state. You should wait until the danger of frost has passed and the soil temperatures have begun to rise before starting the reawakening process. About four to six weeks before you plan to move them outdoors, you can bring the pots into a warmer and brighter location to stimulate growth. This gradual transition helps the plant’s metabolic systems restart smoothly without the shock of sudden environmental change.
If you stored your bulbs loose in bags or crates, this is the time to repot them into fresh, high-quality soil as described in the planting chapters. You may notice small white roots starting to emerge from the base of the bulb, which is a clear signal that the plant is ready to grow. Start with very light watering, just enough to moisten the soil and encourage further root development. Avoid the temptation to saturate the soil immediately, as the plant does not yet have enough foliage to process a large volume of water.
Providing plenty of bright, indirect light is essential during these early weeks to prevent the new growth from becoming leggy and weak. If you are growing indoors, a sunny windowsill or a dedicated grow light can provide the necessary energy for the plant to produce its first strong leaves. As the weather outdoors becomes consistently warm, you can begin the process of “hardening off” the plants by moving them outside for a few hours each day. This professional technique gradually acclimates the tender new growth to the intensity of the sun and the movement of the wind.
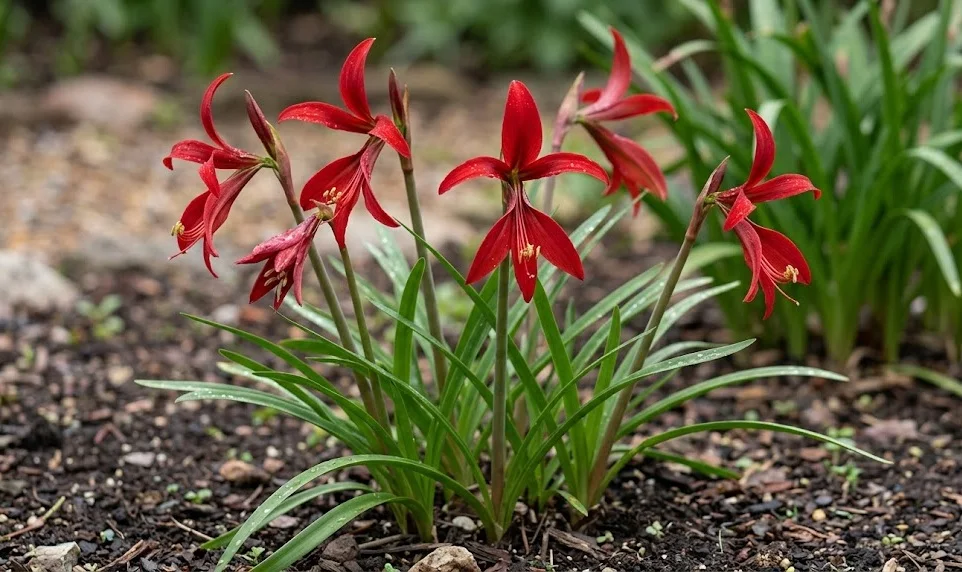
The final step in the overwintering cycle is the permanent placement of the plants in their summer home, whether in the garden or on a patio. Seeing those first vibrant green shoots turn into a spectacular red flower is the ultimate reward for the months of careful storage and attention. Each successful year of overwintering adds to the size and strength of your bulbs, leading to even more impressive displays in the future. Mastery of the dormant phase is what separates a casual hobbyist from a truly expert grower of exotic lilies.