The initial phase of establishing this species requires careful thought regarding its ultimate size and its impact on the surrounding landscape. You should choose a location that offers plenty of space for both the canopy and the wide-reaching root system to develop without restriction. Experienced planters often emphasize that while the tree is incredibly tough, a good start is key to long-term success. It is important to consider the proximity to structures, as the fast growth can quickly lead to unforeseen spatial conflicts.
Site preparation is the next crucial step after you have selected the perfect spot for your new botanical addition. You should clear the area of any aggressive weeds or competing vegetation that might steal nutrients from the young sapling during its first year. Digging a hole that is twice as wide as the root ball allows the new roots to penetrate the surrounding soil more easily. Ensuring that the soil is loose and friable will significantly boost the initial growth rate and help the tree establish its foundation.
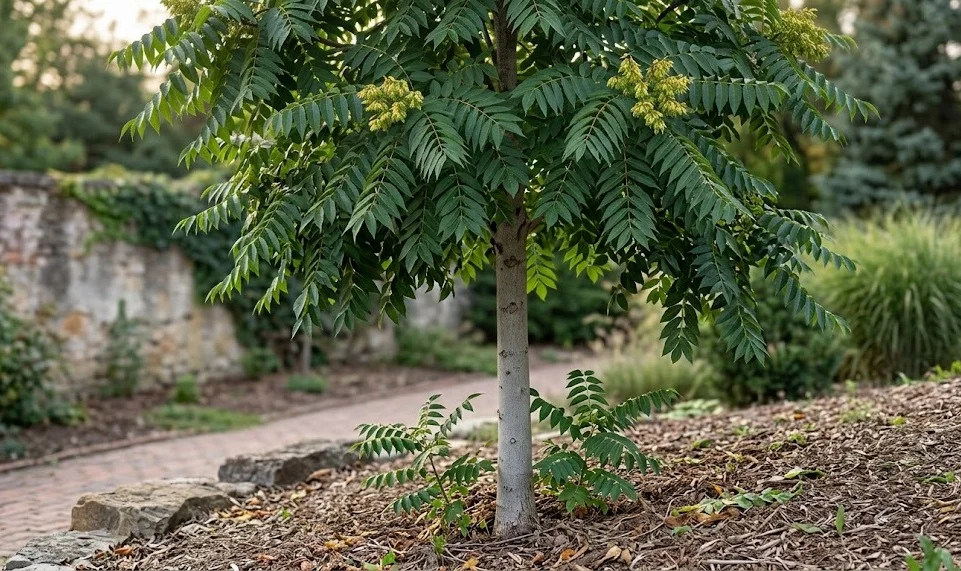
When it is time to actually place the tree in the ground, the depth of the planting is a factor that determines its future health. You should make sure that the root flare, where the trunk meets the roots, remains at or slightly above the soil surface level. Burying the trunk too deeply can lead to bark rot and a host of other health issues that might not appear for several years. Once the tree is positioned, backfill the hole with the original soil and firm it down gently to remove any large air pockets.
After the planting is complete, a thorough watering is necessary to settle the soil and provide immediate hydration to the roots. You might also add a layer of organic mulch around the base, being careful not to let it touch the bark of the trunk directly. This mulch helps retain moisture and suppresses weeds while the young tree is still focusing its energy on root development. Following these expert steps during the planting process ensures that your tree has the best possible chance to thrive in its new environment.
Site selection and preparation
The environmental conditions of your chosen site will dictate the pace and health of the tree’s development over the coming years. You should look for a spot that receives full sun for the majority of the day, as this species is highly light-demanding. Soil quality is less of a concern than with many other trees, but a well-drained location is always preferable for preventing root issues. Avoiding areas with heavy, stagnant clay will help the tree avoid potential fungal problems in the root zone.
More articles on this topic
Accessibility for future maintenance is a practical consideration that you should not overlook during the site selection process. You will need enough room around the tree to bring in ladders or pruning equipment as the specimen grows taller. Consider how the shade will move across your garden during different times of the day and throughout the seasons. A well-placed tree can provide excellent summer cooling for a patio or a home while remaining far enough away to be safe.
Before you begin digging, it is always a professional best practice to check for any underground utilities that might be in the area. You should contact local authorities to mark the location of water pipes, gas lines, and electrical cables to ensure a safe planting experience. The expansive nature of the root system means you should plan for a wide area of influence beyond the initial planting hole. Being aware of what lies beneath the surface prevents costly accidents and ensures the long-term stability of the tree.
Improving the soil texture in the immediate vicinity of the planting hole can provide a helpful boost for the young tree’s initial roots. You might mix in a small amount of compost or well-rotted manure to improve the organic content and water-holding capacity of the earth. This is particularly useful in very sandy or rocky soils where moisture can disappear quickly during the heat of the summer. A little extra effort during the preparation phase pays off with a much more vigorous and resilient young specimen.
Seed propagation techniques
Propagating this species from seed is a straightforward process that allows you to produce a large number of young trees with very little expense. You should collect the winged seeds, known as samaras, in late autumn or early winter when they have turned a tawny brown color. These seeds are designed by nature to be dispersed by the wind, so they are incredibly lightweight and easy to handle. Once collected, store them in a cool, dry place until you are ready to begin the stratification process.
More articles on this topic
Cold stratification is an essential step that mimics the natural winter cycle and breaks the seed’s dormancy for better germination. You can achieve this by placing the seeds in a container with moist sand or peat moss and keeping them in the refrigerator for about sixty days. This treatment signals to the seeds that winter has passed and it is now safe to begin the growth process. Experienced propagators find that this method significantly increases the germination rate compared to simply planting dry seeds.
Sowing the seeds in the spring should be done in a well-prepared seedbed or in individual pots filled with a high-quality starting mix. You should plant them at a shallow depth, roughly twice the thickness of the seed itself, and keep the soil consistently moist but not saturated. Germination usually occurs within a few weeks when temperatures remain consistently warm and the light levels are sufficient. Watching the first true leaves emerge is a rewarding experience for any gardener who enjoys starting plants from scratch.
Once the seedlings have reached a height of about ten to fifteen centimeters, they are ready to be transplanted into larger containers or their permanent positions. You should handle the young plants carefully to avoid damaging the delicate taproot that is already starting to form. Providing a bit of shade during the first few days after transplanting helps the young trees adjust to their new surroundings without too much stress. Starting from seed gives you the opportunity to select the most vigorous individuals for your long-term landscape goals.
Vegetative propagation methods
If you wish to create an exact genetic clone of a particular specimen, vegetative propagation through cuttings or root segments is the way to go. You should take semi-hardwood cuttings in the late summer when the current year’s growth has started to firm up slightly. These cuttings should be about fifteen centimeters long and have several nodes where new roots can eventually develop. Using a rooting hormone can help speed up the process and increase the success rate of your cloning efforts.
Root cuttings are another highly effective method for this species, taking advantage of its natural ability to sprout from its underground system. You should dig up a small section of a healthy root, about the thickness of a pencil, during the dormant winter season. Cut these roots into sections of five to ten centimeters and bury them horizontally in a tray of sandy compost. Within a few months, new shoots will emerge from the root segments, creating independent young trees that are ready for planting.
Grafting is a more advanced technique that you might use if you want to combine the vigor of a wild rootstock with the characteristics of a specific variety. While not commonly necessary for this species, it remains a valuable tool in the kit of a professional nurseryman or plant breeder. You will need to practice your knife skills to ensure a clean union between the scion and the rootstock for a successful take. This method allows for the rapid production of specialized ornamental forms that might be slower to establish on their own roots.
Layering is a simple and low-maintenance way to propagate a tree by encouraging a low-hanging branch to form roots while still attached to the parent. You should gently wound a small section of a flexible branch and bury it under a few centimeters of soil, securing it with a wire hoop. Over the course of a growing season, roots will form at the site of the wound, allowing you to eventually sever the new plant. This technique is ideal for home gardeners who want to expand their collection without needing specialized greenhouse equipment.