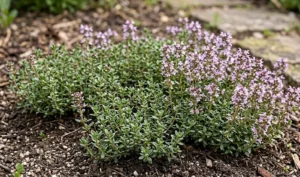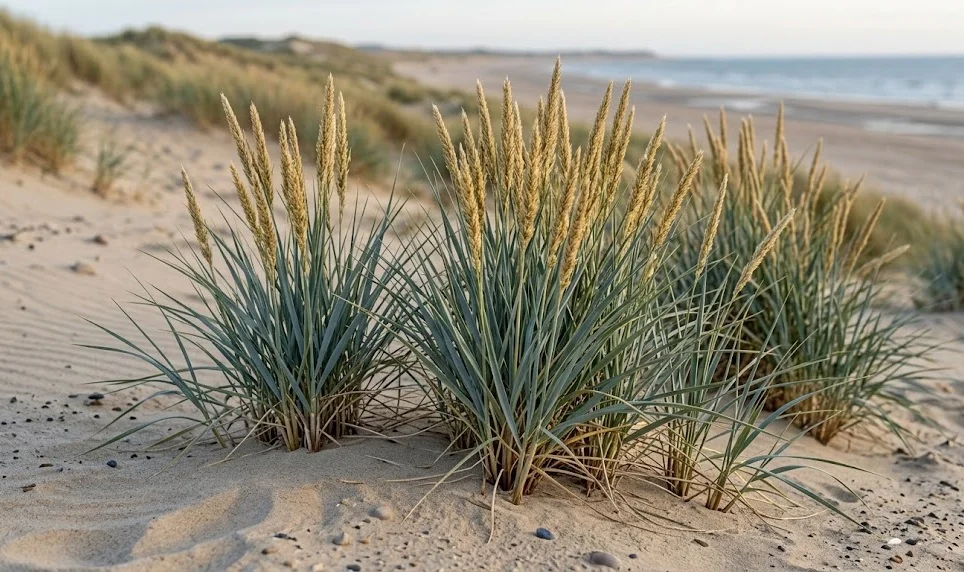
Successfully establishing blue lyme grass requires a clear understanding of its natural coastal origins and its preference for well-drained environments. Whether you are starting with small nursery pots or taking divisions from an existing stand, the timing and soil preparation are the most critical factors for success. As a professional, you should focus on creating a site that allows the roots to settle quickly before the plant begins its aggressive horizontal expansion. When planted correctly, this grass will quickly become a dominant and beautiful feature of any landscape design.
Site selection is the first step in a professional planting plan, and it must prioritize maximum sun exposure. This species requires at least six to eight hours of direct sunlight to maintain its intense silver-blue coloration and sturdy form. Planting in a shady location will result in weak, floppy stems and a shift toward a less desirable green foliage. You should also ensure the site has excellent air circulation to prevent moisture from sitting on the leaves for too long.
Soil preparation for this grass is often the opposite of what is required for most ornamental perennials. Instead of adding rich compost or manure, you should aim for a lean, sandy substrate that drains rapidly after rain. If your garden has heavy clay soil, you must incorporate significant amounts of grit or crushed stone to prevent root rot. Professionals often build slightly raised mounds for these plants to further ensure that the crown remains dry and healthy during wet seasons.
The timing of your planting efforts should ideally coincide with the moderate temperatures of spring or early autumn. Spring planting allows the root system to establish itself during the period of most active growth before the stress of summer heat. Autumn planting is also successful in many regions, provided there is enough time for the roots to anchor before the first hard frost. A professional approach involves monitoring local weather patterns to find the perfect window of opportunity for soil moisture and temperature.
Planting techniques for success
When you receive your plants from a nursery, it is important to inspect the root ball for health and vigor before putting them in the ground. The roots should be firm and light-colored, indicating that the plant is actively growing and not stressed by being pot-bound. If the roots are circling tightly, gently loosen them by hand to encourage them to grow outward into the new soil. Professional gardeners know that a little extra care during this stage prevents the plant from struggling later.
More articles on this topic
The planting hole should be twice as wide as the root ball but no deeper than the container the plant was originally growing in. Placing the plant too deep can lead to crown rot, while planting it too high can cause the roots to dry out prematurely. You should backfill the hole with the native soil, perhaps mixed with a bit of sand, and firm it down gently with your hands. Avoid tamping the soil down with your feet, as this can crush the delicate new roots and remove vital air pockets.
Initial watering is the only time this grass truly requires a significant amount of moisture from the gardener. After the plant is in the ground, give it a deep soak to settle the soil and eliminate any large air gaps around the roots. For the first few weeks, you should monitor the soil moisture closely and water whenever the top inch feels dry to the touch. Once you see new growth emerging from the center, you can gradually reduce the frequency of irrigation as the plant matures.
Spacing is a critical professional consideration, especially if you are planting a large area for ground cover or erosion control. Since this grass spreads rapidly, you can space individual plants about two to three feet apart to allow for future expansion. If you want a more immediate “filled-in” look, you can plant them closer together, but be prepared for the clumps to merge quickly. A professional layout considers both the immediate visual impact and the long-term growth habits of the species.
Propagation through division
Division is the most common and effective professional method for increasing your stock of blue lyme grass while maintaining its genetic characteristics. The best time to divide an established clump is in early spring just as the first signs of new growth appear. You should use a sharp, heavy-duty spade to lift the entire clump out of the ground, being careful to get as much of the root system as possible. Large, mature stands can be quite heavy, so having a partner or a sturdy lever can be very helpful.
More articles on this topic
Once the clump is removed, you can use a saw or a sharp knife to cut the root mass into smaller, manageable sections. Each new division must have a healthy portion of both roots and at least three to five emerging shoots to ensure survival. Discard the older, woody center of the original plant and focus on the vigorous growth from the outer edges. Professional propagators always keep the divisions shaded and moist while they are waiting to be replanted in their new locations.
Replanting the divisions follows the same principles as planting new nursery stock, with an emphasis on immediate hydration. Dig a hole appropriate for the size of the division and ensure the soil is loose enough for the new roots to penetrate easily. Because the plant has been through the stress of being cut, it may look a bit wilted for a few days after the move. However, the resilient nature of this grass usually results in a very high success rate for spring divisions.
This propagation method is also an excellent way to rejuvenate an old planting that has become sparse or cluttered with dead material. By regularly dividing your plants every three or four years, you ensure a continuous supply of young, vibrant specimens for your garden. Professional landscapers often use this technique to expand a design without the cost of purchasing new plants. It is a sustainable and cost-effective way to manage large-scale ornamental grass displays.
Growing from seed
While division is faster, growing blue lyme grass from seed is a viable professional option for large-scale projects or restoration work. You can collect seeds from mature plants in the late summer or early autumn once the seed heads have turned brown and dry. The seeds should be stored in a cool, dry place over the winter to maintain their viability for spring sowing. Some professionals find that a period of cold stratification can help improve the germination rates of these seeds.
Sowing should take place in a controlled environment like a greenhouse or a cold frame to protect the young seedlings from extreme weather. Use a well-draining seed-starting mix and barely cover the seeds with a thin layer of fine grit or sand. Keep the trays consistently moist but not soggy, and provide plenty of light to prevent the seedlings from becoming leggy. Germination can be somewhat irregular, so patience is required during this initial phase of the process.
Once the seedlings have developed a strong root system and a few leaves, they can be transplanted into individual pots for further growth. It is important to harden off the young plants by gradually exposing them to outdoor conditions over a period of two weeks. This professional step prevents transplant shock and ensures that the plants are tough enough to handle the wind and sun. You should wait until the plants are at least six inches tall before placing them in their permanent garden positions.
Direct sowing in the garden is possible but often less successful due to competition from weeds and fluctuating moisture levels. If you choose this route, clear the area of all existing vegetation and rake the soil to a fine texture before scattering the seeds. You will need to keep the area weeded and watered until the grass is large enough to compete on its own. Most professional gardeners prefer the transplant method because it offers much greater control over the final appearance of the planting.
Establishing a root barrier
Given the aggressive nature of the rhizomes, establishing a professional-grade root barrier is often considered part of the planting process. You should install the barrier at the same time you plant to prevent the grass from ever gaining a foothold in unwanted areas. A thick plastic liner specifically designed for bamboo or aggressive grasses is the most reliable material for this purpose. The barrier should be at least 12 to 18 inches deep to catch the deep-diving rhizomes that this species produces.
When installing the barrier, it is crucial to leave an inch or two of the material protruding above the soil surface. This prevents the rhizomes from simply growing over the top of the barrier and into the surrounding mulch or lawn. You can hide the edge of the barrier with decorative stones or by tucking it just under the edge of a path or patio. Professional installers pay close attention to the seams of the barrier, ensuring they are overlapped and taped securely to prevent leaks.
If you are planting in a confined space like a small urban garden, consider using large, bottomless containers as a built-in barrier. This technique allows the roots to grow deep into the ground for stability while preventing horizontal spread. You must still monitor the top of the container for any shoots that attempt to jump over the rim. This professional trick provides the architectural beauty of the grass without the long-term maintenance headache of an invasive plant.
Even with a barrier in place, a professional gardener never assumes the job is finished permanently. You should conduct a quick inspection of the perimeter at least twice a year to ensure the system is still intact and functioning. Occasionally, soil can wash over the top of a barrier, providing a bridge for the rhizomes to cross. Maintaining a clear “no-man’s-land” of an inch or two around the barrier is the best way to ensure your planting stays exactly where you intended.