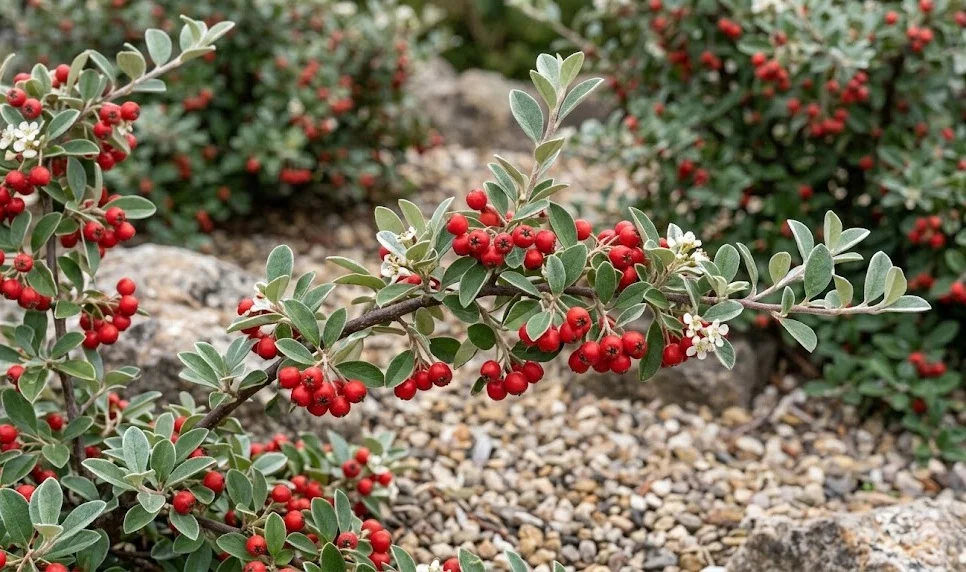
Choosing the right spot for a new addition to the garden is the most critical step in ensuring its long-term success. The bright-beaded cotoneaster is a hardy and adaptable shrub, but it will only reach its full potential if its basic environmental needs are met. You should look for a location that offers plenty of room for the plant to spread to its mature width without being crowded. Taking the time to evaluate your garden’s microclimates will pay dividends in the form of a healthy, vibrant specimen.
The ideal site should receive a good amount of sunlight, as this directly influences the density of the foliage and the abundance of berries. While the plant can tolerate some partial shade, a location with at least six hours of direct light is generally preferred. Professional landscapers often place this shrub in spots where it can serve as a structural anchor for a garden bed. Consider the view from both inside your home and from the street when deciding on the final placement.
Soil drainage is another non-negotiable factor when selecting a planting site for this species. It does not perform well in areas where water tends to pool after a heavy rain or where the soil remains soggy for long periods. If your garden has heavy clay soil, you may need to choose a slightly elevated spot or amend the area to improve drainage. Testing the soil’s drainage capacity before planting is a simple step that can prevent root rot later on.
Proximity to other plants and structures should also be considered to allow for proper airflow around the shrub. Good ventilation is essential for minimizing the risk of fungal diseases that thrive in stagnant, humid environments. You should also ensure that the site is easily accessible for future maintenance tasks like pruning and watering. By considering these factors holistically, you can select a location where the cotoneaster will thrive for many years to come.
Step-by-step planting techniques for success
Once you have selected the perfect location, the actual planting process must be carried out with care and precision. You should start by digging a hole that is twice as wide as the root ball but no deeper than the container it came in. This extra width allows the roots to spread easily into the loosened surrounding soil as they begin to establish. Breaking up the sides of the hole with a shovel prevents the roots from becoming “pot-bound” within the planting site.
More articles on this topic
Gently remove the plant from its nursery container and inspect the roots for any signs of being tightly coiled. If necessary, use your fingers or a small tool to lightly loosen the outer roots to encourage outward growth. Place the shrub in the center of the hole, ensuring that the top of the root ball is level with the surrounding ground. Planting too deep can suffocate the roots and lead to stem rot, while planting too shallow can cause the roots to dry out.
As you backfill the hole with soil, firm it down gently with your hands to remove any large air pockets. You can mix in a small amount of organic compost with the native soil to provide an initial boost of nutrients. Avoid the temptation to add high-nitrogen fertilizer directly into the planting hole, as this can burn the sensitive new roots. Once the hole is filled, create a small basin of soil around the base to help hold water during the initial establishment phase.
The final step in the planting process is a thorough watering to settle the soil and hydrate the roots. Apply a layer of organic mulch around the base of the shrub, making sure it does not touch the main stem directly. This mulch helps retain moisture and keeps the soil temperature stable as the plant adjusts to its new home. Regular monitoring during the first few weeks will ensure that the shrub is recovering from the transplant and starting to grow.
Propagation methods using semi-hardwood cuttings
Propagating your own plants is a rewarding way to expand your garden or share your favorite varieties with others. Semi-hardwood cuttings are the most reliable method for reproducing the bright-beaded cotoneaster during the summer months. You should select healthy, current-season growth that has started to become slightly woody at the base but remains flexible at the tip. Using a clean, sharp knife or pruners is essential for making precise cuts that will root successfully.
More articles on this topic
Each cutting should be approximately four to six inches long and taken just below a leaf node. Remove the leaves from the bottom half of the stem to prevent moisture loss and to expose the nodes where roots will form. For the best results, dip the base of the cutting into a rooting hormone powder or liquid before planting. This step provides the necessary chemical signal for the plant to prioritize root development over leaf growth.
Place the prepared cuttings into a container filled with a well-draining propagation mix, such as a blend of peat and perlite. You can fit several cuttings into a single pot, provided they are not touching each other and have enough space for airflow. Keep the medium consistently moist but not saturated, and place the container in a bright spot out of direct sunlight. Covering the pot with a clear plastic bag can create a mini-greenhouse effect that maintains high humidity.
Roots usually begin to develop within six to eight weeks, depending on the temperature and the health of the parent plant. You can check for progress by very gently tugging on a cutting; if you feel resistance, it means roots have started to take hold. Once the root system is well-established, the new plants can be transitioned to individual pots with standard potting soil. Gradually acclimate the young shrubs to outdoor conditions before eventually planting them in their permanent garden locations.
Seed propagation and germinating conditions
While slower than using cuttings, growing this shrub from seed is a fascinating process for the patient gardener. The seeds are found inside the colorful berries that mature in late autumn and persist into the winter months. You should collect ripe berries and remove the fleshy outer pulp to reveal the small seeds hidden inside. This cleaning process is important because the fruit contains natural inhibitors that can prevent germination if left intact.
The seeds of the cotoneaster often require a period of cold stratification to mimic the natural winter cycle. You can achieve this by placing the cleaned seeds in a moist medium like sand or vermiculite and storing them in the refrigerator for several months. This chilling period breaks the seed’s dormancy and prepares it to sprout once warmer temperatures arrive in the spring. Without this step, germination rates can be very low and inconsistent across the batch.
When spring arrives, sow the stratified seeds in a nursery flat filled with a high-quality seed-starting mix. Cover them lightly with soil and keep the tray in a warm, bright location where the temperature remains stable. It is important to maintain consistent moisture during this stage, as the emerging seedlings are very delicate and susceptible to drying out. Patience is key, as some seeds may take several weeks or even months to show signs of life.
Once the seedlings have developed their first set of true leaves, they can be carefully transplanted into small individual pots. Growing them on in a sheltered environment for their first year allows them to gain strength before facing the challenges of the open garden. Although it takes several years for a seed-grown plant to reach a significant size, the sense of accomplishment is unmatched. This method allows you to observe the entire life cycle of the shrub from its very beginning.