Successful planting of the scarborough lily begins with the selection of healthy, dormant bulbs that are firm to the touch. These bulbs serve as the primary storage organ for the plant, containing all the energy needed for the first flush of growth. You must inspect each bulb for signs of soft spots, mold, or physical damage before introducing them to the soil. Starting with high-quality material is the most important factor in achieving a professional result in your garden.
The timing of planting is crucial to align the plant’s development with the natural light cycles of the year. Early spring is generally considered the optimal time for planting, as the increasing day length stimulates root and leaf growth. If you plant too early in the cold soil, the bulb may sit dormant and rot before the growing season begins. Waiting for the soil or ambient temperature to stabilize ensures a quick and healthy start for the new lily.
When preparing the site or the container, you must ensure that the drainage is impeccable to protect the bulb’s health. Adding a layer of coarse gravel or broken pottery at the bottom of the pot can facilitate the movement of water. The depth of planting is another technical detail that requires your full attention during the process. A bulb planted at the correct depth will have the stability it needs to support a heavy flower stalk later.
Spacing is particularly important if you are planting multiple bulbs in a single large container or a garden bed. You should leave enough room for the bulbs to expand and produce offsets over the next few years. Crowding them too much from the start can lead to competition for nutrients and poor air circulation between the leaves. Proper spacing allows each plant to develop its full potential and creates a more aesthetically pleasing display.
The planting process
Before placing the bulb in the soil, you should prepare a planting hole that is twice as wide as the bulb itself. This allows you to surround the bulb with loose, fertile soil that encourages rapid root penetration and expansion. You should gently spread the existing roots outward and downward to prevent them from circling the bulb. Taking the time to position the roots correctly will pay dividends in the plant’s future growth rate.
More articles on this topic
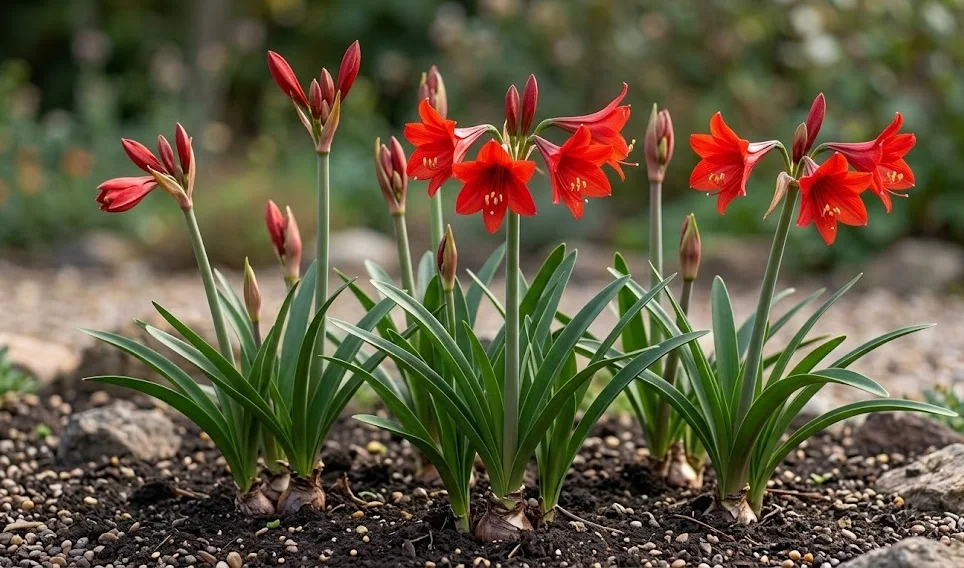
The depth should be such that the top third or even the neck of the bulb remains visible above the soil surface. This technique, common among professional bulb growers, prevents water from collecting in the crown and causing rot. You should firm the soil gently around the base of the bulb to remove any large air pockets. Avoid packing the soil too tightly, as this can impede the growth of tender new roots.
Once the bulb is positioned, you should provide an initial watering to settle the soil and activate the bulb’s metabolism. This first irrigation should be thorough but you must ensure that the water drains away quickly and completely. Place the pot in a warm, brightly lit area but keep it out of direct, scorching sunlight for the first week. This allows the plant to recover from the planting process without the added stress of intense heat.
Labeling your plants with the date of planting and the specific variety is a professional habit that prevents confusion later. You might think you will remember, but as a collection grows, these details can easily be lost or forgotten. A simple tag placed in the soil will help you track the progress and age of each individual lily. This systematic approach is a hallmark of an organized and successful horticulturalist.
Propagation through offsets
The most common and reliable way to propagate the scarborough lily is by the separation of daughter bulbs, also known as offsets. These small bulbs form at the base of the parent plant and can be easily detached during the repotting process. You should wait until the offsets are at least one-third the size of the parent before attempting to remove them. Larger offsets have a much higher success rate and will reach flowering size much more quickly.
More articles on this topic
To separate the offsets, you must carefully remove the entire clump from the pot and gently shake away the excess soil. Use a clean, sharp knife or your fingers to tease the small bulbs away from the main bulb without damaging the basal plate. If the offsets are tightly attached, it is sometimes better to leave them for another season to grow larger. Each separated bulb should have its own set of roots or at least a healthy base where roots can form.
After separation, the small bulbs should be planted immediately into a fresh, well-draining potting mix suitable for young plants. You should use smaller pots for these offsets to avoid the problems associated with excess soil and moisture retention. Treat the young plants with care, providing them with consistent warmth and bright, indirect light to encourage establishment. It may take two to three years for these offsets to reach a size where they are capable of flowering.
Propagation by offsets is an excellent way to expand your collection or share the beauty of the lily with fellow enthusiasts. Because the daughter bulbs are genetically identical to the parent, you can be sure that the flowers will have the same vibrant color. This method is much faster and more predictable than growing the plants from seed. It allows you to maintain the quality and characteristics of a particularly fine specimen in your care.
Seed propagation techniques
Growing the scarborough lily from seed is a fascinating project for the patient gardener who enjoys a challenge. To obtain seeds, you must allow the flowers to be pollinated and the seed pods to mature and dry on the plant. Once the pods split open, the black, papery seeds can be collected and sown immediately for the best germination results. Fresh seeds have a much higher viability than those that have been stored for long periods.
You should sow the seeds on the surface of a fine, sandy compost and cover them with only a very thin layer of grit. Maintaining a constant temperature of around 20 degrees Celsius is essential for the germination process to be successful. You can cover the seed tray with a plastic lid or a piece of glass to maintain high humidity during this phase. Germination usually occurs within a few weeks, but it can be erratic depending on the freshness of the seeds.
Once the seedlings appear, they need plenty of light and careful watering to prevent them from damping off. You should avoid overwatering the young plants, as their tiny bulbs are extremely sensitive to excess moisture in the early stages. As they grow, you can gradually thin them out and move them to individual small pots to continue their development. Seedlings require several years of steady growth before they are mature enough to produce their first spectacular flowers.
While seed propagation is slower, it offers the exciting possibility of discovering subtle variations in flower color or form. Many professional breeders use this method to develop new cultivars with improved characteristics for the horticultural market. If you have the space and the time, raising plants from seed is a rewarding way to deepen your understanding of the plant’s life cycle. It requires a high level of dedication and technical skill to bring a seedling to its first bloom.
Aftercare for new plants
The first few months after planting or propagation are a critical time for the long-term health of the lily. You must monitor the moisture levels closely, ensuring that the soil never stays completely dry for too long. However, you must be equally vigilant about preventing the soil from becoming waterlogged or swampy. Finding this balance is the most important part of the aftercare process for any newly established bulbous plant.
Young plants and newly repotted bulbs should not be fertilized immediately after they are moved to fresh soil. Most high-quality potting mixes contain enough nutrients to support the plant for the first few weeks of growth. Introducing heavy fertilizers too early can burn the tender new roots and set the plant’s development back. Wait until you see strong, active leaf growth before beginning a regular fertilization schedule at half the recommended strength.
Pest management is another vital aspect of aftercare, as young plants are often more vulnerable to attacks by aphids or mites. You should inspect the undersides of the leaves and the base of the bulbs regularly for any signs of trouble. Catching an infestation early allows you to use milder control methods that are less stressful for the plant. Maintaining a clean growing environment is the best defense against pests and diseases in newly propagated lilies.
As the plant matures, you will need to adjust the light levels to ensure it receives enough energy for strong growth. A plant that is stretching toward the light is a sign that it needs a brighter location to develop a sturdy structure. On the other hand, if the leaves start to look bleached or scorched, you should provide more shade during the afternoon heat. Professional care involves constant observation and small adjustments to keep the plant in its optimal growing zone.