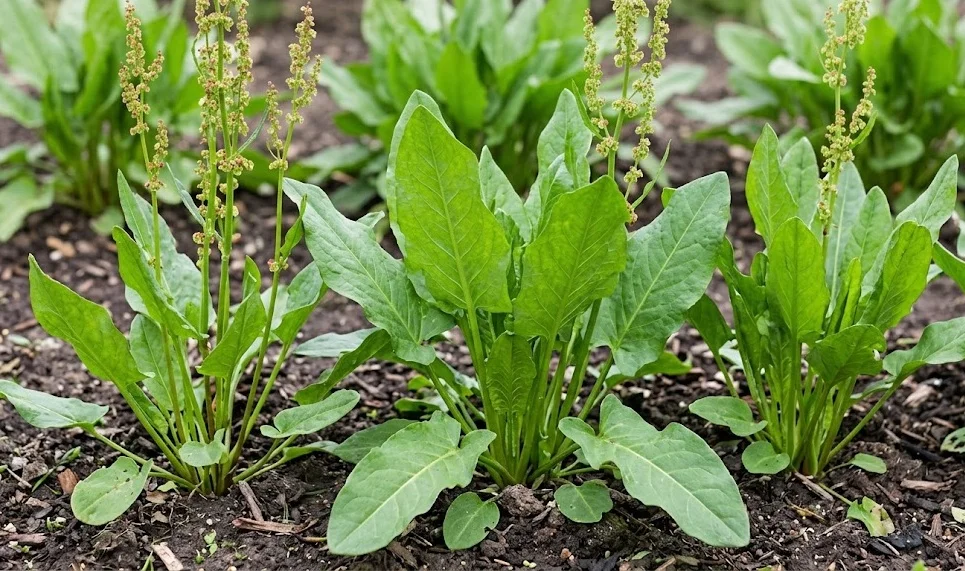

Choosing an appropriate location is the most critical first step when planning to establish a permanent sorrel bed in your garden. This herb prefers a spot that receives full sun, though it can tolerate partial shade in regions with very hot summers. The soil must be well-drained to prevent the long taproots from rotting during the wet seasons of the year. Look for an area that is relatively level to ensure that water is distributed evenly across the entire planting zone.
The proximity to a reliable water source should be considered to make irrigation tasks more manageable during the dry months. While sorrel is relatively hardy, it will produce much better leaves if it is not subjected to extreme water stress. You should also consider the wind patterns in your garden, as very strong gusts can tear the large, tender leaves. A sheltered position or the use of windbreaks can help maintain the aesthetic and culinary quality of the harvest.
Soil quality at the chosen site can be assessed by looking at the natural vegetation or by conducting a professional laboratory test. If the area is prone to standing water after a heavy rain, you might need to install raised beds or improve the drainage. The presence of aggressive perennial weeds like couch grass or bindweed should be addressed before any planting occurs. A clean site provides the young plants with the best possible start without immediate competition for resources.
Consider the layout of your garden and how the sorrel will fit into your long-term crop rotation or permanent landscaping plans. Because it is a perennial, it will occupy the space for several years, so it should not be placed in an area designated for annual tilling. Leaving enough space between the sorrel and other large plants ensures that everyone has adequate room to expand. A well-thought-out site selection process saves time and effort in the future by reducing the need for relocation.
Sowing seeds for success
Starting sorrel from seed is an economical way to produce a large number of plants for a commercial or home kitchen garden. Seeds can be sown directly into the prepared garden bed as soon as the soil can be worked in early spring. It is best to sow the seeds thinly in shallow drills, covering them with only a fine layer of sifted soil or compost. Keeping the seedbed consistently moist is essential during the germination period, which typically takes one to two weeks.
More articles on this topic
If you live in a region with a very short growing season, you may prefer to start the seeds indoors in modular trays. Use a high-quality seed-starting mix that is light and sterile to prevent issues like damping-off disease. Provide plenty of light to the young seedlings to prevent them from becoming leggy and weak before they are transplanted. Hardening off the plants by gradually exposing them to outdoor conditions is a vital step in professional cultivation.
Thinning the seedlings is necessary once they have developed their first set of true leaves and are approximately two inches tall. Space the remaining plants about twelve inches apart to allow for the mature size of the foliage clumps. The thinned seedlings are edible and can be used as microgreens in salads or as a garnish for various dishes. Proper spacing ensures adequate airflow and reduces the risk of fungal infections within the dense canopy of the mature crop.
Record the variety name and the date of sowing to track the performance of different seed batches over time. Some varieties may germinate faster or show more vigor in your specific climate than others. If you are saving your own seeds, ensure that they are completely dry before storing them in a cool, dark place. Using fresh, high-quality seeds is the most reliable way to ensure a high germination rate and a healthy start for your crop.
Division of mature clumps
Division is a fast and effective method of propagation that also helps rejuvenate older sorrel plants that have become less productive. This process is best carried out in the early spring or autumn when the plant is not in active growth or under heat stress. Dig up the entire root ball carefully, trying to keep as much of the soil intact as possible to minimize transplant shock. Use a sharp spade or a garden knife to split the clump into several smaller sections, each with a healthy portion of roots and shoots.
More articles on this topic
Each new division should be replanted immediately at the same depth it was growing previously to ensure a smooth transition. Firm the soil gently around the new plants to remove large air pockets and provide good root-to-soil contact. Watering the new divisions thoroughly helps them settle into their new location and begin the process of establishing new roots. This method allows you to expand your garden quickly using plants that are already adapted to your local environment.
Division is often recommended every three to four years to prevent the center of the clump from becoming woody and unproductive. By removing the older, less vigorous parts of the plant, you encourage the development of fresh, tender growth. This practice is a staple of professional perennial management and helps maintain the overall health of the plantation. It is also an excellent opportunity to share surplus plants with other gardeners or to expand your own production areas.
After dividing and replanting, keep a close eye on the moisture levels for the first few weeks as the roots recover. The plants may wilt slightly at first, but they should quickly regain their turgor as they begin to draw water from the soil. Providing a light application of compost around the base of the new divisions can provide a gentle nutrient boost. This simple propagation technique ensures that your sorrel bed remains vibrant and productive for many years.
Transplanting and early care
Successful transplanting requires careful timing and attention to detail to ensure that the young plants do not suffer from excessive stress. Choose a cloudy day or work in the late afternoon to prevent the sun from drying out the exposed roots during the process. Dig a hole that is slightly larger than the root ball and add a handful of compost to the bottom to provide immediate nutrients. Place the plant in the hole, ensuring that the crown is level with the surrounding soil surface.
Immediately after transplanting, the plants should be watered deeply to help consolidate the soil around the roots. This initial irrigation is critical for preventing the roots from drying out and for encouraging them to grow into the new environment. You may need to provide temporary shade for a few days if the weather is particularly hot or windy after planting. Monitoring the plants daily during the first week allows you to react quickly to any signs of distress or pest damage.
Early care involves keeping the area around the new transplants free of weeds that would compete for limited water and light. A light layer of mulch can be applied around the base, taking care not to let it touch the stems directly. Avoid applying heavy fertilizers until you see signs of new growth, as the roots need time to establish before being pushed into rapid production. This patient approach leads to stronger, more resilient plants that will be more productive in the long run.
Labeling your rows or individual plants helps you keep track of different varieties and planting dates for future reference. Consistent record-keeping is a hallmark of professional agriculture and provides insights into which practices are most effective. If a transplant fails to thrive, investigate the potential causes, such as poor drainage or pest issues, before replacing it. Taking care of the small details during the early stages of growth sets the foundation for a successful and abundant harvest.