To begin your journey with this impressive climber, you must first understand the fundamental techniques of planting and the various ways you can create new plants from existing ones. This species is quite forgiving, but a thoughtful start will significantly accelerate its establishment and ensure that it thrives for decades. You should approach the planting process with a focus on soil preparation and site selection, as these factors determine the vine’s future vigor. Propagation, on the other hand, allows you to expand your greenery without the need to purchase new specimens from a nursery.
The first step in planting is to prepare a hole that is at least twice as wide as the root ball but no deeper than the original container. You should gently loosen the roots if they have become pot-bound, as this encourages them to spread out into the surrounding soil more quickly. Mixing some high-quality organic compost into the backfill material will provide an immediate boost of nutrients for the young plant. Once the ivy is in place, firm the soil down gently with your hands to remove any large air pockets that could dry out the roots.
Choosing the right time of year for planting can make a significant difference in how quickly the ivy takes hold in its new environment. You will find that early spring or early autumn are the most favorable windows because the temperatures are moderate and the soil is usually moist. If you must plant during the summer, you will need to be extremely diligent about watering to prevent the young vine from suffering from heat stress. Planting in the autumn allows the root system to settle in before the plant enters its winter dormancy period.
After the initial planting, a thorough watering is essential to settle the soil and ensure that the roots are in good contact with the earth. You should apply a layer of organic mulch around the base of the plant to help maintain consistent moisture levels and suppress competing weeds. Be careful not to let the mulch touch the main stem directly, as this can sometimes lead to rot issues in very damp conditions. Monitoring the plant’s progress over the first few weeks will help you identify any immediate needs for adjustment or extra care.
Site selection and soil preparation
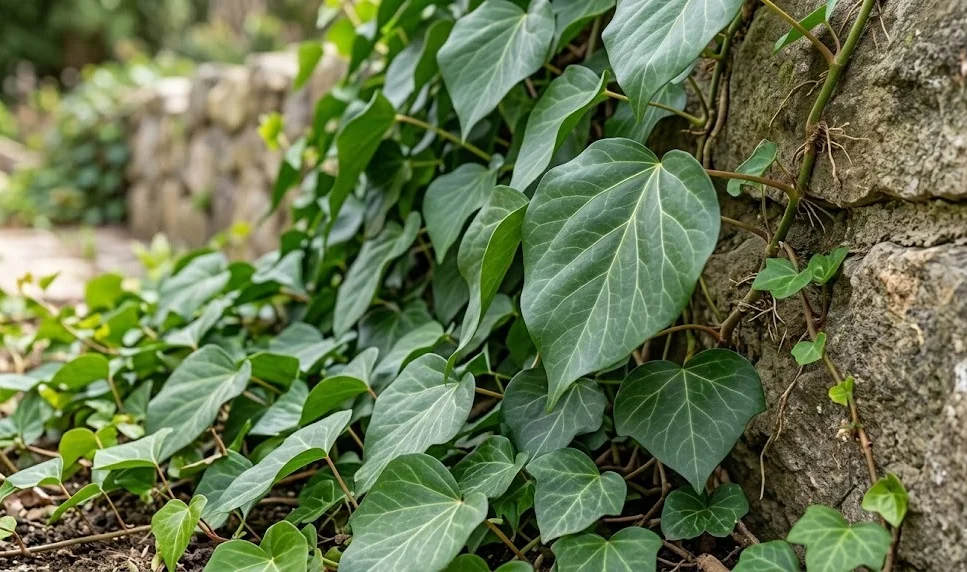
When you are looking for the perfect spot to plant your ivy, you must consider both the current conditions and the future size of the mature vine. You should look for a location that offers some protection from the harsh afternoon sun, which can sometimes bleach the large, dark leaves. While the plant can grow in full shade, it will often develop a more robust habit and better color in a partially shaded area. Assessing the structural strength of any nearby walls or fences is also a priority given the plant’s eventual weight and climbing method.
More articles on this topic
The soil at the planting site should be well-drained and fertile to provide the best possible environment for the developing root system. You can test the drainage by digging a small hole, filling it with water, and observing how quickly it disappears into the ground. If the water sits for a long time, you may need to amend the area with grit or compost to improve the internal structure. This ivy is not particularly picky about pH, but it generally prefers a soil that is neither too acidic nor overly alkaline.
Preparation of the entire planting area, rather than just the individual hole, will encourage the roots to explore a wider volume of soil. You should clear away any large stones, roots from other plants, and perennial weeds that might compete for moisture and nutrients. Digging over the soil to a depth of about thirty centimeters will break up any compaction and make it easier for the delicate new roots to penetrate. Adding a balanced, slow-release fertilizer during this phase will ensure that the plant has everything it needs for its first growing season.
If you are planting multiple specimens to create a screen or groundcover, you should space them according to how quickly you want the area to be covered. Spacing plants about sixty to ninety centimeters apart is usually sufficient to achieve a dense effect within a few years. You can plant them closer together for a faster result, but this may lead to more competition between the individuals as they mature. Taking the time to plan the layout before you start digging will result in a much more professional and attractive final appearance.
Planting techniques for success
The actual process of putting the plant into the ground requires a gentle touch and an eye for detail to avoid damaging the tender stems. You should hold the plant by the root ball rather than the stems to prevent breaking any of the main growth points. Placing the plant at the same depth it was growing in its pot is crucial for preventing stem rot or root exposure. If you plant it too deep, the buried stem tissue may decay, whereas planting it too shallow can cause the roots to dry out.
More articles on this topic
Once the plant is situated in the hole, you should fill in the gaps with the prepared soil and press down firmly but carefully. You want to create a slight depression or a “basin” around the base of the plant to help catch and direct water toward the root zone. This is particularly helpful during the first year when the plant’s ability to forage for water is still quite limited. After filling the hole, give the plant a generous drink of water even if the soil already feels somewhat moist.
If the ivy is intended to climb a vertical surface, you should tilt the plant slightly toward the wall or fence as you plant it. You can use a small bamboo stake to lead the stems from the ground toward the support structure during the initial establishment phase. This helps the plant find its way and encourages the development of the aerial roots that will eventually hold it in place. You will notice that the plant begins to latch onto the surface once it feels the physical contact and stability of the support.
Mulching the area immediately after planting is one of the best things you can do to ensure the long-term health of your new ivy. You should use a material like shredded bark, wood chips, or well-rotted garden compost for the most natural and effective results. A layer of about five to seven centimeters is usually enough to provide the benefits of moisture retention and temperature regulation. Keeping the area around the base clear of grass and other groundcovers will reduce the pressure on the young plant as it gets started.
Methods of propagation
One of the most rewarding aspects of growing this species is the ease with which you can create new plants through various propagation methods. You should consider taking stem cuttings in late spring or early summer when the plant is in a state of active, vigorous growth. Selecting a healthy, non-flowering shoot with several sets of leaves will give you the highest chance of success with this technique. You can also try layering, which involves pinning a stem to the ground until it develops its own roots while still attached to the parent.
To propagate from cuttings, you need to remove a section of stem about ten to fifteen centimeters long and strip the leaves from the bottom half. You should insert the base of the cutting into a pot filled with a moist, well-draining seed starting mix or a blend of peat and perlite. Keeping the cuttings in a warm, humid environment with bright but indirect light will encourage the formation of new roots within a few weeks. You will know the roots have formed when you see new growth emerging or feel resistance when you gently tug on the cutting.
Water propagation is another simple method that many gardeners use for this variety because it allows you to see the roots as they develop. You can simply place a stem cutting in a jar of clean water, making sure that no leaves are submerged below the surface. You should change the water every few days to keep it fresh and prevent the growth of algae or bacteria that could rot the stem. Once the roots are a few centimeters long, you can carefully transplant the cutting into a small pot with regular potting soil.
Layering is perhaps the most foolproof way to propagate this ivy because the new plant remains supported by the mother plant during the entire process. You should find a flexible stem that can reach the ground, make a small nick in the underside, and bury that section under a few centimeters of soil. Pinning it down with a piece of wire or a small stone will keep it in place until the roots are strong enough to support the new growth. After a few months, you can simply snip the connection to the parent plant and move your new ivy to its permanent home.
Establishing young plants
The period immediately following planting or propagation is a critical time when the young ivy requires consistent care and attention. You should monitor the soil moisture levels daily, especially during dry spells, to ensure that the roots never become completely desiccated. It is much better to water deeply and less frequently than to give the plant frequent shallow sprinkles that don’t reach the root zone. You will see the plant begin to put out new, lighter green leaves as it starts to feel comfortable in its new surroundings.
Young plants are more vulnerable to extreme weather conditions, so you might need to provide some temporary protection during the first winter or a particularly hot summer. You can use a piece of burlap or a garden fleece to shield the foliage from freezing winds or intense, scorching sunlight. Once the plant has spent a full year in the ground, it will have developed enough of a root system to handle these challenges much better. Patience is key during this early stage, as the most dramatic growth usually happens after the second or third year.
You should avoid the temptation to heavily prune or train the plant too aggressively while it is still trying to establish itself. Let the vines grow naturally for the first season so that the plant can maximize its leaf area and energy production through photosynthesis. You can gently guide the stems in the right direction, but avoid cutting off any healthy growth unless it is absolutely necessary for the plant’s health. The goal is to build a strong, resilient foundation that will support decades of future growth and beauty.
Finally, keep a close eye out for any signs of pests or diseases that might target the tender tissues of a young, developing plant. You will find that healthy, well-watered plants are much less likely to be bothered by insects like aphids or scale. If you do notice a problem, address it early with organic methods to avoid stressing the plant with harsh chemical treatments. With the right start and a little bit of early care, your Persian ivy will quickly become a dominant and beautiful feature of your garden landscape.