Starting your journey with these colorful plants begins with mastering the fundamental techniques of planting and creating new individuals. Whether you are filling a vast garden bed or a single decorative pot, the way you establish the plant determines its future vigor. Professional propagation is remarkably rewarding because these species are known for their high success rates when handled with precision. By understanding the biological requirements of both seeds and cuttings, you can exponentially increase your collection with very little financial investment.
Propagation through stem cuttings
Taking stem cuttings is the most popular and efficient way to multiply your favorite varieties while ensuring they remain true to the parent plant. You should select a healthy, non-flowering shoot that is approximately ten to fifteen centimeters in length for the best results. Use a very sharp, clean knife to make a diagonal cut just below a leaf node, as this area contains the highest concentration of growth cells. Removing the lower leaves prevents them from rotting in the rooting medium and directs energy toward root formation.
You have the choice of rooting your cuttings in either clean water or a specialized seed-starting mix. Water rooting is fascinating because it allows you to see the roots develop in real-time, providing a clear indication of when the plant is ready for soil. If you choose a solid medium, dipping the end of the stem in a rooting hormone can accelerate the process, though it is often unnecessary for these vigorous plants. Keep the cuttings in a bright, warm spot but away from direct sunlight to prevent wilting during this vulnerable stage.
Maintaining high humidity around the cutting is essential to prevent it from losing too much moisture before it has roots to take up water. You can create a simple mini-greenhouse by placing a clear plastic bag or a dome over the container. Be sure to provide some ventilation every day to prevent the buildup of mold and to allow for gas exchange. Within two to three weeks, you should see significant root development, at which point the plant can be transitioned to a regular potting mix.
Once the root system is well-established, you should begin a gradual process of hardening off the new plant. Start by removing the humidity cover for a few hours a day and slowly increasing the light intensity it receives. This strengthens the cellular structure of the stems and leaves, preparing the young plant for the rigors of its final environment. Proper propagation not only saves money but also ensures that you always have a backup of your most prized and beautiful cultivars.
More articles on this topic
Growing from seeds successfully
Growing from seed is an excellent option if you want to discover a wide range of color variations and patterns in a single batch. You should start the seeds indoors about eight to ten weeks before the last expected frost date in your region. These seeds are tiny and require light to germinate, so you must sow them on the surface of the soil without covering them. Gently pressing them into the moist medium ensures good contact without burying them too deep for the light to reach.
The ideal temperature for germination is between twenty-one and twenty-four degrees Celsius, which usually requires a heat mat in cooler homes. You should keep the soil surface consistently moist but never waterlogged, using a fine spray bottle to avoid washing the tiny seeds away. Covering the tray with a transparent lid helps maintain the necessary warmth and humidity during the initial stages of life. Germination typically occurs within ten to fourteen days, at which point you will see the first tiny green leaves appear.
As soon as the seedlings emerge, they need a very bright light source to prevent them from becoming leggy and weak. A dedicated grow light placed just a few inches above the plants is often better than a windowsill, as it provides consistent intensity. Once the seedlings have developed two sets of true leaves, they are ready to be thinned out or transplanted into individual small pots. This gives each young plant enough space and nutrients to develop a strong root system and a bushy habit.
Seed-grown plants often exhibit a surprising amount of diversity, even if they come from the same parent packet. This is part of the excitement, as you might find a unique color combination that isn’t available anywhere else. However, remember that seed-grown specimens may not always look exactly like the picture on the packet due to genetic variation. Carefully selecting the strongest and most vibrant individuals for your garden will result in a spectacular and highly personalized display.
More articles on this topic
Soil preparation and composition
The quality of the soil into which you transplant your plants will dictate their growth rate and the intensity of their colors. You should aim for a mix that is light, airy, and rich in decomposed organic matter like high-quality compost. A professional-grade potting soil often contains a mix of peat moss or coconut coir, perlite, and vermiculite to ensure perfect drainage. This combination prevents the soil from compacting over time, which is essential for the health of the delicate, fibrous roots.
If you are planting directly into garden beds, you must take the time to amend the existing earth before the plants go in. Digging in a generous amount of well-rotted manure or garden compost will improve the soil structure and provide a slow-release source of nutrients. If your garden has heavy clay, adding coarse sand or expanded shale can help improve the drainage to the necessary levels. These plants are quite heavy feeders, so starting with a nutrient-rich base gives them the best possible start in the spring.
The pH level of the soil is another factor that can influence how well the plant absorbs nutrients from its environment. These plants prefer a slightly acidic to neutral pH, ideally between six and seven on the scale. You can easily test your soil with a simple kit from a garden center to see if any adjustments are needed. If the soil is too alkaline, adding elemental sulfur or peat moss can help bring the level down to a more suitable range for tropical species.
Before the actual planting begins, make sure the soil is thoroughly moistened but not dripping wet. Working with bone-dry soil can damage the tender roots of a transplant, while mud can lead to compaction and air pocket issues. Creating a hospitable environment from the very first second is the most important thing you can do for your collection. A well-prepared bed or pot acts as a reservoir of life that supports the plant through the stresses of the growing season.
Spacing and garden placement
How you space your plants will significantly impact the overall look of your landscape and the health of each individual. You should research the expected mature width of the specific variety you are planting to avoid overcrowding later in the season. Generally, spacing plants twenty to thirty centimeters apart is a safe bet for most medium-sized cultivars. This allows for plenty of air circulation while still creating a dense, carpet-like effect once the plants reach their full size.
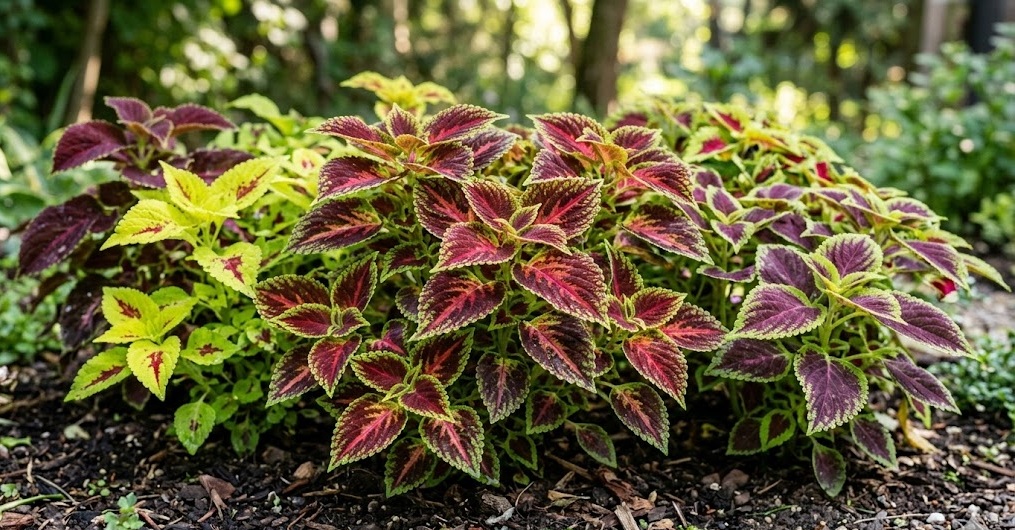
Placement in the garden should be determined by the light requirements of the specific leaf colors you have chosen. As a general rule, varieties with darker or more intense colors can often handle more sun than those with lighter, variegated leaves. You should also consider the height of neighboring plants to ensure that your collection isn’t completely shaded out or physically crowded. Placing taller varieties at the back of a border and shorter ones at the front creates a professional, multi-layered visual effect.
Wind protection is another vital consideration when choosing the permanent home for your plants in the garden. Because their stems can be somewhat brittle, a location that is shielded from strong gusts will prevent physical damage and broken branches. If you must plant in a windy area, consider using low-profile varieties or providing some form of decorative screening. A sheltered spot also helps maintain higher humidity levels, which we know these tropical beauties absolutely love.
Finally, think about the visual composition of your planting scheme and how the colors will interact with each other. Grouping similar colors together can create a bold, monochromatic statement, while contrasting colors will make each individual plant pop. You might also consider the background; a dark green hedge or a light-colored wall can provide the perfect canvas for the brilliant foliage. Taking the time to plan the layout thoughtfully will result in a garden that looks like it was designed by a professional landscape architect.