Planting and propagating celery is a process that requires precision and a deep understanding of the plant’s long growing season. Since celery seeds are exceptionally small and slow to germinate, starting them indoors is usually the most reliable method for success. You must provide a controlled environment where temperature and moisture levels are kept within a very narrow range. Starting early in the year gives the plants enough time to mature before the heat of summer or the deep frosts of autumn arrive.
The quality of the seeds you choose will have a direct impact on the vigor of your entire crop. It is best to source seeds from reputable suppliers who specialize in varieties adapted to your specific local climate. Some cultivars are bred for heat resistance, while others are better suited for shorter, cooler growing seasons. Investing in high-quality genetics is the first step toward a professional-grade harvest that meets your expectations.
Sowing seeds too deep is a common mistake that can lead to poor germination rates in the nursery. Celery seeds actually need a bit of light to trigger the germination process, so they should barely be covered with soil. You can simply press them into the surface of a fine seed-starting mix and mist them gently with water. This ensures they have the contact they need with the growing medium without being buried too far.
Maintaining a constant temperature of around twenty degrees Celsius will encourage the seeds to sprout within two to three weeks. You might find that using a heating mat under your seed trays provides the consistent warmth needed for uniform germination. Once the green shoots appear, they will need plenty of bright light to prevent them from becoming leggy and weak. A strong start in the tray leads to a much more resilient plant once it is moved outdoors.
Seedling development and nursery care
After the seeds have sprouted, the young seedlings require careful management to build a strong root system. You should ensure that the growing medium stays moist but never becomes waterlogged, as this can cause damping-off. Thinning the seedlings early on is necessary to prevent crowding and to allow the strongest individuals to thrive. This selection process ensures that only the most robust plants make it to the final garden beds.
More articles on this topic
Potting up the seedlings into larger containers is a professional technique used to prevent them from becoming root-bound. When the plants have developed their first set of true leaves, they are ready to be moved into individual cells. This gives the roots more space to expand and allows for easier nutrient management at this critical stage. Using a high-quality potting mix during this transition provides the necessary minerals for rapid growth.
Light management in the nursery is essential for developing thick, sturdy stems rather than thin, weak ones. If you are growing indoors, you may need to use supplemental LED or fluorescent lights to mimic natural sunlight. Position the lights close to the tops of the plants and move them up as the seedlings grow taller. This intensity of light encourages the production of chlorophyll and strengthens the overall structure of the plant.
Air movement is another factor that professional growers use to “exercise” their young celery plants. A small fan placed near the nursery area can provide a gentle breeze that mimics outdoor conditions. This slight physical stress encourages the stems to grow thicker and more resilient to the wind they will face later. It also helps to prevent stagnant air, which can lead to the development of mold or mildew on the leaves.
The transplanting process
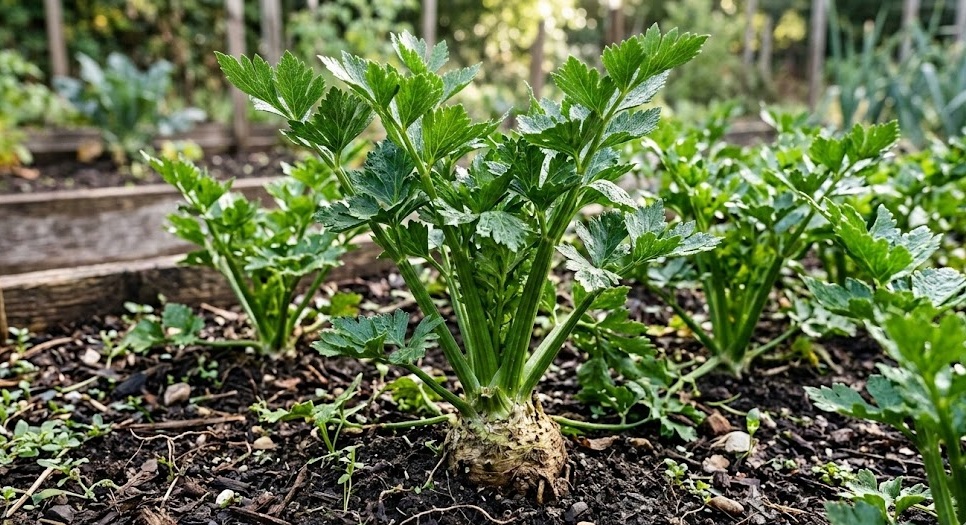
Moving celery from the nursery to the outdoor garden is a delicate operation that must be timed perfectly. You should wait until the danger of hard frost has passed and the soil has warmed up significantly. Hardening off the plants by gradually exposing them to outdoor conditions over a week is a vital step. This prevents transplant shock and allows the plants to adjust to the intensity of direct sunlight and fluctuating temperatures.
More articles on this topic
When you are ready to transplant, prepare the beds by incorporating fresh compost and ensuring the soil is loose and friable. Space the plants approximately twenty to thirty centimeters apart to allow for future growth and air circulation. Dig a hole that is deep enough to accommodate the entire root ball without bending or cramping it. Firm the soil gently around the base of the plant to eliminate air pockets that could dry out the roots.
Watering immediately after transplanting is essential for helping the roots establish a connection with the surrounding soil. You can use a weak solution of liquid fertilizer to provide an immediate boost of nutrients to the young plants. This initial hydration helps the celery recover from the stress of being moved and encourages new root growth. Keep the area consistently moist for the first few days to ensure the transition is successful.
Mulching around the new transplants can help to regulate soil temperature and keep moisture levels stable. A layer of organic mulch also protects the young stems from being splashed with soil during heavy rains. This cleanliness reduces the risk of soil-borne diseases infecting the lower leaves of the plants. As the mulch breaks down, it will continue to support the long-term health of the entire planting bed.
Propagation from base cuttings
An interesting and sustainable way to propagate celery is by using the base of a harvested plant. If you cut off the bottom two inches of a bunch of celery, you can often get it to grow new leaves and roots. Place the base in a shallow bowl of water, making sure the top remains above the surface. Within a few days, you should see small green shoots emerging from the center of the base.
Once the new growth is several inches tall and small roots have appeared, the cutting can be moved into a pot with soil. This method is a great way to extend your harvest or to grow a small amount of celery on a windowsill. While these plants may not always grow as large as those started from seed, they produce flavorful leaves and small stalks. It is a simple professional secret for reducing waste and enjoying fresh greens year-round.
When growing from a base cutting, you must be diligent about changing the water every day to keep it fresh. Stagnant water can quickly lead to rot, which will kill the developing shoots before they have a chance to grow. Once moved to soil, the plant needs consistent moisture and a bright location to continue its development. It is a fun and educational way to see the resilience of the celery plant in action.
While this method is effective for home use, large-scale agricultural propagation still relies primarily on high-quality seeds. However, understanding how the plant can regenerate itself provides valuable insight into its physiological capabilities. You can use these cuttings to test different soil mixes or nutrient solutions on a small scale. It is a practical example of how vegetative propagation can be used in a professional horticultural context.