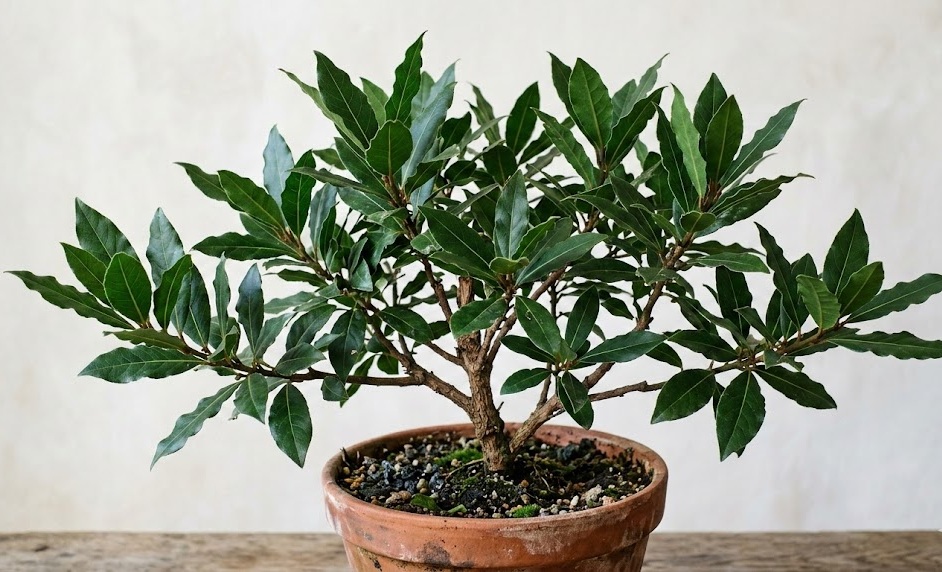
Pruning is an essential aspect of bay laurel maintenance that serves both aesthetic goals and the overall health of the plant. This evergreen shrub is remarkably resilient and responds well to regular cutting, making it a favorite for topiary and formal hedging. Whether you are maintaining a simple bush or a complex sculptural shape, understanding the principles of pruning is key to success. A professional approach to cutting back will ensure that your laurel remains dense, vibrant, and perfectly sized for your garden.
The best time to perform regular pruning on a bay laurel is in late spring or early summer after the first flush of growth has appeared. This timing allows the plant to heal quickly and to produce new shoots before the end of the growing season. If you are growing your laurel for its aromatic leaves, this is also a great time to harvest the prunings for use in the kitchen. Avoid pruning too late in the autumn, as the new growth that follows will not have enough time to harden off before the frost.
Before you begin pruning, it is vital to ensure that your tools are sharp, clean, and well-maintained to prevent damage to the plant. Using dull shears can crush the stems instead of cutting them cleanly, which creates an entry point for various diseases and pests. Sterilizing your blades with a bit of alcohol between plants is a professional practice that prevents the spread of pathogens throughout your garden. The quality of your tools is directly reflected in the health and the appearance of the finished plant after pruning.
There are two main types of pruning you might perform on a laurel: structural pruning and maintenance trimming. Structural pruning involves removing larger branches to shape the plant or to open up the canopy for better light and air circulation. Maintenance trimming is a more frequent and lighter task that focuses on keeping the existing shape neat and encouraging a denser growth habit. Both types are important for the long-term development of a prize bay laurel specimen in any garden or container.
Structural pruning and shaping
Structural pruning is best done while the plant is young to establish a strong framework that will support future growth and development. You should identify the main stems you want to keep and remove any crossing or rubbing branches that could cause wounds later. This process helps create a balanced and stable shape that is more resilient to heavy snow or strong winter winds. Always cut back to a healthy bud or a main branch to ensure the plant can recover effectively from the surgery.
More articles on this topic
If you are training your laurel into a specific form, such as a ball on a stem (a standard), structural pruning is the most critical step. This requires removing all the lower side shoots to create a clear trunk while allowing the top to branch out into a dense canopy. It takes several years of patient pruning to achieve a professional-looking standard laurel, but the results are well worth the effort. Consistency is the key, as you must regularly remove any new shoots that appear on the trunk to maintain the clean look.
Thinning out the interior of a dense laurel bush is another form of structural pruning that can greatly improve the plant’s health over time. By removing some of the older, inner branches, you allow more light and air to reach the center of the shrub. This prevents the interior from becoming a dead zone of brown leaves and reduces the risk of fungal infections like powdery mildew. A well-thinned plant looks more natural and is much easier to inspect for pests like scale insects or mites.
When removing large branches, always make your cuts at a slight angle to prevent water from sitting on the wound and causing rot. You should also avoid leaving “stubs,” which are short sections of branch that have no buds to produce new growth. These stubs will eventually die back and can become a highway for wood-rotting fungi to enter the main body of the tree. A clean, professional cut that respects the plant’s natural anatomy is the hallmark of a skilled and careful gardener.
Maintenance trimming for density
The goal of maintenance trimming is to encourage the bay laurel to produce more side shoots, which results in a much thicker and more lush appearance. Each time you clip the tip of a branch, you stimulate the buds further down the stem to grow, creating a denser canopy. This is particularly important for laurel hedges or topiary where a solid wall of green is the desired aesthetic outcome. Regular, light trimming is always better than infrequent, heavy pruning for maintaining a neat and formal shape.
More articles on this topic
Using hand pruners or secateurs is generally preferred over power hedge trimmers for a bay laurel, especially for high-quality specimens. Hedge trimmers tend to cut through the large, leathery leaves, leaving them looking ragged and causing the edges to turn brown and unsightly. By using hand tools, you can cut the stems individually, hiding the wounds beneath the remaining foliage for a much cleaner finish. This “leaf-saving” technique is a professional secret that makes a massive difference in the plant’s overall appearance.
If your laurel has become overgrown and leggy, don’t be afraid to perform a more significant cutback to rejuvenate the entire plant. Bay laurel is capable of “breaking” from old wood, which means it can produce new shoots even from thick, leafless branches. You can cut a neglected laurel back quite hard in the spring, and it will usually respond with a burst of fresh, vibrant growth. While it may look a bit bare for a few months, this process is often necessary to restore the vigor and shape of an old plant.
After a significant pruning session, it is a good idea to give the plant a little extra care to help it recover from the stress. A light application of a balanced fertilizer and a thorough watering will provide the nutrients and hydration needed for the new growth. Keep a close eye on the plant for a few weeks to ensure that no pests are taking advantage of the fresh, tender shoots. With this professional level of aftercare, your laurel will quickly bounce back and look better than ever before.
Tool maintenance and technique
Maintaining your pruning tools is not just about making the job easier; it’s about the safety and health of your bay laurel. After every use, you should clean your shears to remove any sap or debris that can gum up the mechanism and harbor bacteria. A light coat of oil on the blades will prevent rust and ensure that the tools are ready for action the next time you need them. Investing in high-quality tools and taking care of them is a hallmark of a professional and dedicated gardener.
The technique of making a cut is just as important as the tool you use for the task at hand. When cutting back to a bud, ensure the cut is about half a centimeter above the bud and angled away from it. This prevents water from running onto the delicate bud and causing it to rot before it can start to grow. If the cut is too far from the bud, the remaining wood will die back, creating an unsightly and potentially dangerous stub on the plant.
For very large laurel trees that have reached their mature height, you might need to use a pruning saw for some of the thicker branches. These tools allow you to make clean cuts through wood that is too thick for regular secateurs or loppers. When using a saw, always support the branch to prevent it from tearing the bark as it falls away from the tree. A clean bark is essential for the tree’s defense against pathogens and for its general aesthetic appeal in the garden.
Finally, remember that pruning is an art as much as a science, and it takes time to develop a “feel” for how the laurel will respond. Start with small, cautious cuts if you are unsure, and observe how the plant reacts over the following weeks and months. You will quickly learn how much you can remove and where the best places are to make your cuts for the desired effect. Gardening is a lifelong learning process, and pruning your bay laurel is a wonderful way to connect more deeply with the natural world.