Successfully overwintering spearmint is an essential skill for any gardener who wants to enjoy a perennial harvest of this aromatic herb year after year. While spearmint is known for its remarkable hardiness, the extreme cold and fluctuating temperatures of winter can still pose a threat to its long-term health. By taking a few proactive steps in the autumn, you can ensure that the root system remains protected and ready to burst into growth as soon as spring arrives. Whether your mint is in the ground or in a container, the professional approach to winter care makes all the difference.
Preparing the soil for the first frost
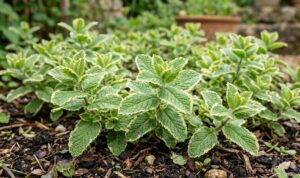
As the days grow shorter and the temperatures begin to drop, the first step in overwintering spearmint is to prepare the surrounding soil for the coming freeze. You should start by removing any fallen leaves, spent annuals, or other garden debris that might be resting on top of the mint patch. This cleaning process prevents the buildup of moisture and mold around the crown of the plant during the damp winter months. It also removes potential overwintering sites for pests that could emerge in the spring to feed on the new growth.
A final, deep watering in late autumn is crucial, as plants that go into the winter with well-hydrated roots are much more likely to survive a deep freeze. Even though the plant is entering a dormant state, the roots still need a small amount of moisture to prevent them from drying out completely in the cold air. If the ground freezes while it is dry, the roots can suffer from “winter burn,” which leads to a slow or nonexistent recovery in the spring. Make sure the water penetrates deep into the soil to reach the lower rhizomes where the plant’s energy is stored.
You should also avoid any heavy pruning or fertilization in the weeks leading up to the first expected frost. Late-season fertilization can stimulate fresh, succulent growth that is extremely vulnerable to freezing temperatures and can lead to unnecessary stress for the plant. Instead, let the existing foliage naturally die back as the plant enters its dormancy phase. This natural transition allows the spearmint to move its essential nutrients from the leaves down into the root system for safekeeping.
If you have noticed any drainage issues in your mint bed during the summer, now is the time to address them before the winter rains or snow arrive. Soil that remains saturated and cold for long periods is the number one cause of root rot in dormant spearmint plants. You can slightly mound the soil around the base of the plants to encourage water to run off rather than pooling in the center of the patch. Proper preparation of the soil environment provides the foundation for a successful overwintering process.
More articles on this topic
Mulching and insulation techniques
One of the most effective ways to protect the delicate crown and shallow rhizomes of spearmint is through the application of a protective layer of mulch. A three- to four-inch layer of organic material, such as straw, shredded bark, or evergreen boughs, acts as an insulating blanket against extreme temperature swings. This insulation helps to keep the soil temperature more consistent, preventing the damaging cycle of freezing and thawing that can push plants out of the ground. Wait until the ground has slightly frozen before applying the mulch to avoid trapping too much heat and moisture initially.
In regions with particularly harsh winters, you can use more substantial materials like fallen autumn leaves, provided they are not matted together in a way that prevents air movement. Some gardeners prefer to use a specialized frost cloth or burlap to cover their mint patches during the coldest nights for an extra layer of defense. These materials are breathable, which is essential for preventing the buildup of fungal pathogens that thrive in stagnant, moist air. The goal is to provide protection without creating a completely airtight environment that could lead to rot.
If you are growing spearmint in a more exposed or windy area, you might consider creating a small windbreak using stones or wooden slats. Cold winter winds can be incredibly dehydrating for dormant plants, especially if there is no snow cover to provide natural insulation. Snow is actually a fantastic natural insulator, and if you have a snowy winter, you should leave it undisturbed on top of your mint beds. However, if the snow is followed by a period of ice, you should be careful that the weight doesn’t crush the underlying structure of the garden.
As the winter progresses, check on your mulched areas periodically to ensure the material hasn’t blown away or been disturbed by hungry wildlife. Many small mammals may try to use your mulch as a winter nesting site, which is generally fine unless they begin to gnaw on the mint roots. By maintaining a consistent and effective layer of insulation, you are significantly increasing the chances of your spearmint surviving even the most challenging winter conditions. This professional attention to detail pays off when the first green shoots appear in the spring.
More articles on this topic
Indoor container transition for year-round harvest
If you want to continue harvesting fresh spearmint throughout the winter months, bringing a portion of your plant indoors is an excellent strategy. This transition should ideally take place a few weeks before the first frost to allow the plant to acclimate to the lower light levels found inside a home. Choose a healthy, vigorous section of the plant and move it into a pot with fresh, high-quality potting soil to ensure it remains productive. It is important to inspect the plant thoroughly for any hitchhiking pests like aphids or mites before bringing it indoors.
Once inside, place your spearmint in the brightest window available, preferably one that faces south or west to maximize the limited winter sunlight. If you don’t have enough natural light, a simple LED grow light can provide the supplemental energy the plant needs to keep producing leaves. Keep in mind that indoor air is often much drier than outdoor air, especially when the heating system is running, so the plant may require more frequent watering. Misting the leaves or placing the pot on a tray of pebbles and water can help maintain the humidity levels that mint loves.
Be careful not to place your indoor mint near cold drafts or heat vents, as sudden temperature changes can cause the plant to drop its leaves. Indoor mint will grow more slowly than it does in the garden, so you should adjust your harvesting expectations accordingly. Lightly pinching off the tips will still encourage a bushier habit, but avoid heavy pruning until the days begin to lengthen again in late winter. This indoor “backup” plant not only provides fresh herbs for cooking but also serves as a source of cuttings if your outdoor patch suffers during the winter.
If you find that your indoor mint is becoming leggy or losing its flavor, it may be a sign that it is not getting enough light or that the soil nutrients have been depleted. You can use a very diluted organic liquid fertilizer once a month to provide a small boost of energy during the winter. As spring approaches, you can begin the process of “hardening off” the plant by moving it back outdoors for a few hours each day. This gradual transition ensures that the indoor plant is ready to be replanted in the garden or kept in its container for the new season.
Early spring revival and post-winter care
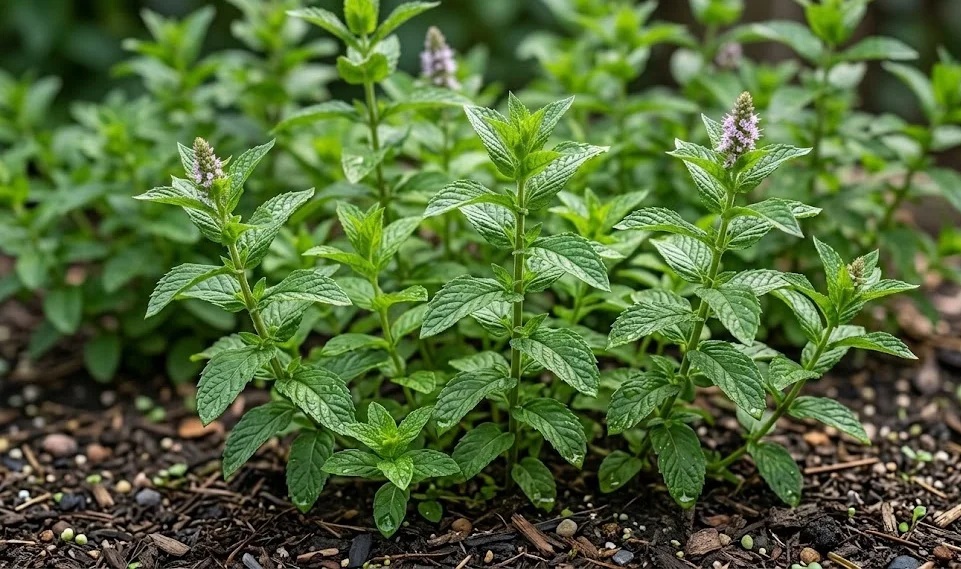
The arrival of spring is an exciting time for spearmint growers, as the first tiny green leaves begin to push through the soil or the remaining mulch. Once you are certain that the danger of a hard freeze has passed, you should gradually remove the protective mulch to allow the sun to warm the soil. Leaving the mulch on too long can trap cold moisture and delay the plant’s emergence, or even encourage early-season fungal issues. This is also the perfect time to inspect the mint patch for any signs of winter damage or dead wood that needs to be cleared away.
Removing the old, brown stems from the previous year is a professional way to clean up the plant and make room for the new, vibrant growth. You can cut these stems right back to the ground using sharp shears, taking care not to damage the emerging shoots. This cleanup process improves air circulation and gives the mint a much neater appearance as it begins its rapid spring expansion. You might also notice that the mint has spread slightly during the winter, which is a good time to decide if you need to redefine its boundaries.
A light application of compost or a balanced organic fertilizer in the early spring will provide the nutrients needed for the plant’s first major growth spurt. As the temperatures rise, the spearmint will quickly regain its vigor and start producing the aromatic leaves you’ve been waiting for all winter. Keep a close eye on the soil moisture during this transition period, as the combination of increasing sun and wind can dry out the surface roots surprisingly fast. Consistent care during the first few weeks of spring ensures a healthy and productive start to the new growing season.
If your spearmint appears to have suffered during the winter and isn’t showing signs of life, don’t give up on it too quickly. Sometimes the roots remain healthy even if the crown appears dead, and new shoots may emerge from further down in the soil as it warms up. You can gently scratch the surface of a rhizome to see if it is still firm and green inside, which indicates that the plant is still alive. With a little patience and the right care, your spearmint will soon be back to its lush, fragrant self, ready for another year of enjoyment.