Choosing the right time to start your pumpkin journey is perhaps the most important decision you will make all season. These plants are incredibly sensitive to cold temperatures, so rushing the process often leads to stunted growth or total loss. You must wait until the soil has warmed up significantly and all danger of frost has passed in your specific region. Once the conditions are right, the rapid growth of a pumpkin seedling is truly a sight to behold in any garden.
Selecting high-quality seeds from a reputable source ensures that you are starting with the best possible genetic potential. You might choose traditional heirlooms for their unique flavors or modern hybrids for their increased resistance to common garden diseases. It is always a good idea to check the “days to maturity” listed on the seed packet to ensure your growing season is long enough. Saving seeds from your own pumpkins can be fun, but remember that they may cross-pollinate and produce unexpected results next year.
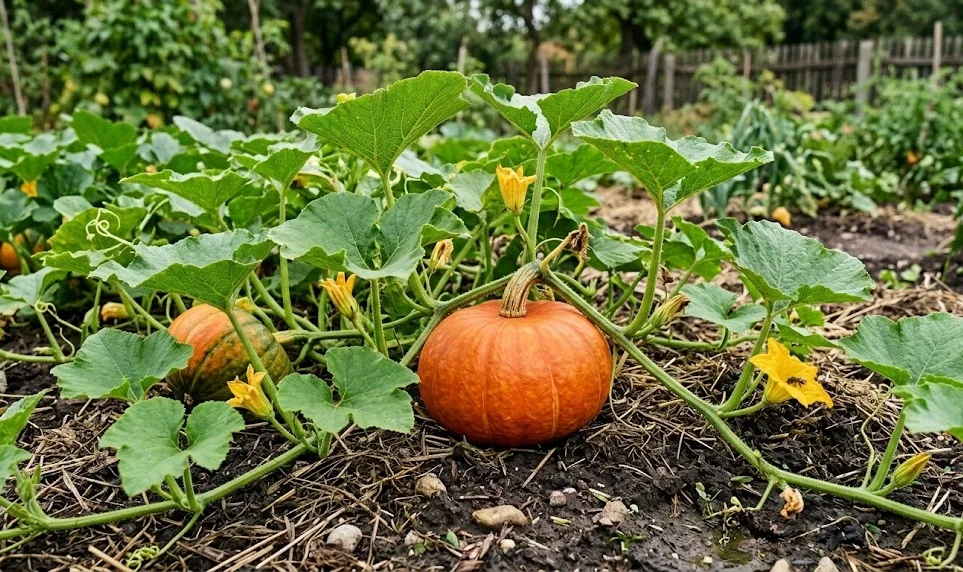
Before you ever put a seed in the ground, you should take the time to prepare the planting site with care. Pumpkins love “hills,” which are basically small mounds of soil enriched with plenty of well-rotted manure or finished compost. These mounds provide excellent drainage and allow the sun to warm the soil more quickly around the young root systems. Space these hills several feet apart to give the future vines plenty of room to expand without competing for territory.
If you live in a northern climate with a short growing season, starting your seeds indoors can give you a necessary head start. You should use biodegradable peat pots to minimize root disturbance, as pumpkins are notoriously “fussy” about having their roots moved. Place the pots in a warm, sunny window or under grow lights about three to four weeks before the last frost date. Transition the seedlings to the outdoors gradually through a process called hardening off to prevent transplant shock.
Direct sowing techniques
Direct sowing is the preferred method for many experienced gardeners because it allows the plant to establish a deep taproot from day one. You should plant about three to five seeds per hill, burying them about an inch deep into the prepared soil. This “safety in numbers” approach ensures that at least one or two strong plants will emerge even if some seeds fail to germinate. Once the seedlings are a few inches tall, you can thin them out to leave only the most vigorous individual.
More articles on this topic
The depth at which you plant the seeds can significantly influence how quickly they break through the surface of the soil. If you plant them too deep, the young sprout might run out of energy before it reaches the sunlight and begins photosynthesis. Conversely, planting them too shallow makes the seeds vulnerable to being dug up by birds or drying out in the sun. Finding that sweet spot of about one inch deep provides the perfect balance of protection and accessibility for the emerging plant.
Moisture management during the germination phase is a delicate balancing act that requires daily attention from the gardener. The soil should remain consistently damp but never waterlogged, as excess water can cause the seeds to rot before they sprout. You might find it helpful to cover the planting hills with a light layer of mulch or a clear plastic dome to retain humidity. As soon as you see the first green loops breaking the surface, remove any covers to allow for full light and airflow.
Vegetative propagation methods
While most people grow pumpkins from seeds, it is technically possible to propagate them through vine cuttings in some experimental settings. This method involves taking a healthy section of a side vine and encouraging it to grow its own roots in a moist medium. While not common for commercial production, it can be a fascinating way to clone a particularly vigorous or unique plant mid-season. However, success rates are generally lower than traditional seed-starting methods and require very high humidity to succeed.
Another advanced technique involves grafting pumpkin scions onto the rootstocks of other hardy gourds or squashes to improve disease resistance. This is a common practice in professional agriculture where soil-borne pathogens like Fusarium wilt are a significant concern for growers. Grafting requires a steady hand and a very clean environment to ensure the vascular tissues of the two plants bond successfully. For the average home gardener, this is rarely necessary but represents the high-tech side of modern pumpkin cultivation.
Layering is a natural form of propagation where the vine develops roots wherever a leaf node touches moist, fertile soil. You can actively encourage this process by burying small sections of the vine and keeping that specific area well-watered throughout the summer. These secondary root systems provide the plant with extra stability and multiple points of entry for water and essential nutrients. In some cases, these rooted sections can even survive if the main “mother” stem is damaged by borers or mechanical injury.
Spacing and layout planning
The layout of your pumpkin patch should account for the massive scale these plants will eventually reach by late August. Giant pumpkin varieties can easily cover hundreds of square feet, while smaller “pie” pumpkins are much more manageable for backyard gardeners. You should always read the specific spacing recommendations for the variety you have chosen to avoid overcrowding and poor air circulation. Overcrowded plants are much more susceptible to fungal diseases and will likely produce smaller, lower-quality fruits.
Consider the orientation of your garden rows in relation to the sun to ensure every leaf gets maximum exposure throughout the day. Planting your pumpkins on the north side of the garden can prevent them from shading out shorter vegetables like lettuce or carrots. You might also want to plan for “walking paths” between the rows so you can access the plants for weeding and harvesting. Planning your space efficiently now will save you a lot of frustration when the vines become a tangled, impassable mess later.
Companion planting can be an effective way to maximize the productivity of your planting area while providing natural benefits to the pumpkins. Some gardeners plant corn or sunflowers near their pumpkins to act as a living trellis for the vines to climb. Others use radishes or nasturtiums to help repel common pests like squash bugs and cucumber beetles through natural chemical signals. Just be careful not to plant other heavy feeders too close, as they will compete with the pumpkins for the same limited soil nutrients.

