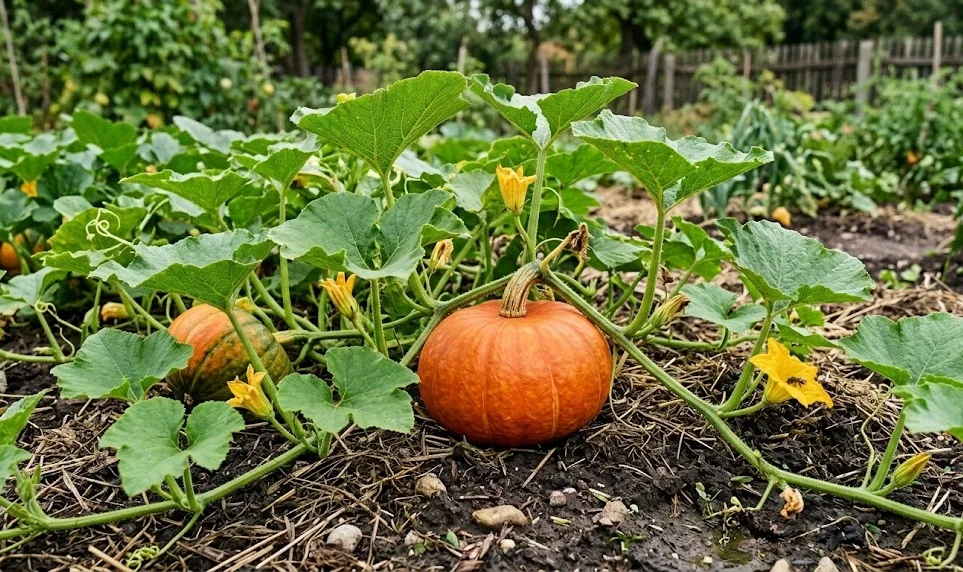
Successfully storing your pumpkin harvest through the long winter months requires a careful transition from the field to a controlled environment. While pumpkins are naturally rugged, they are still living organisms that continue to respire and lose moisture even after being cut from the vine. If you simply leave them in a pile on the porch, they will likely rot or succumb to the first deep freeze of the season. Mastering the art of overwintering allows you to enjoy the fruits of your labor well into the spring and even early summer.
The first step in the overwintering process happens before the pumpkins even leave the garden, during the critical “curing” phase. You should leave the pumpkins in a warm, dry spot with good air circulation for about ten days to allow the skin to reach its maximum hardness. This process also allows any minor nicks or scratches from the harvest to heal over with a protective layer of callous. A properly cured pumpkin has a much higher resistance to the fungi and bacteria that cause decay during long-term storage.
Once the curing is complete, you need to find a storage location that offers the perfect balance of temperature and humidity. The ideal environment is cool, between 50 and 55 degrees Fahrenheit, and relatively dry to prevent the growth of mold on the rinds. A basement, root cellar, or an unheated but insulated garage are often the best choices for the home gardener. You should avoid placing pumpkins directly on concrete floors, as the cold and moisture can seep in and cause the bottom of the fruit to rot.
Air circulation is an often-overlooked factor that can make or break your success in keeping pumpkins fresh through the winter. You should never stack pumpkins on top of each other, as this creates “hot spots” where moisture can accumulate and spread rot quickly. Instead, arrange them in a single layer on wooden pallets or shelves lined with cardboard or straw to allow air to move around each fruit. Providing a small fan to keep the air moving in your storage area can also significantly reduce the risk of spoilage over time.
Monitoring during storage
Storing pumpkins is not a “set it and forget it” task; it requires regular check-ups to ensure the health of your entire collection. You should inspect every pumpkin at least once a week, looking for soft spots, mold growth, or signs of insect activity. If you find a pumpkin that is starting to show signs of decay, remove it immediately before the rot can spread to its neighbors. These “spoiled” pumpkins can often still be used for cooking if you catch the damage early and cut away the affected areas.
More articles on this topic
The weight of the pumpkin can be a good indicator of its internal health during the long months of winter storage. If a pumpkin feels surprisingly light when you lift it, this often means it has lost too much moisture and the flesh inside is becoming stringy or dry. While these fruits are still safe to eat, they may not have the same quality or flavor as those that have retained their weight. Monitoring the physical condition of your crop helps you decide which pumpkins to use first and which ones are built for the long haul.
Humidity control is a delicate dance, as too much moisture leads to rot, while too little moisture causes the pumpkins to shrivel and become tough. If your storage area is too dry, you can place a small bowl of water nearby to add just enough humidity to the air. Conversely, if you notice condensation forming on the rinds, you need to increase ventilation or use a dehumidifier to dry things out. Finding that “Goldilocks” zone for humidity is the key to maintaining the texture and sweetness of the pumpkin flesh.
Preparing for the final use
When you are finally ready to use one of your overwintered pumpkins, bring it into the kitchen and let it come up to room temperature for a day. This makes the rind easier to cut and allows the natural aromas of the flesh to develop fully before you start cooking. You might be surprised to find that some varieties actually taste better after a few months of storage, as the complex starches have slowly broken down into sugars. The satisfaction of baking a fresh pumpkin pie in the middle of January is the ultimate reward for your hard work.
If you find that you have more pumpkins than you can realistically use before they spoil, you might consider processing and freezing the flesh. Roasting the pumpkins and mashing the pulp allows you to store the essence of your harvest in a much more compact and stable form. These frozen portions are perfect for soups, stews, and baking projects throughout the year, ensuring that nothing goes to waste. It is a great way to “extend” your harvest even further than traditional whole-fruit storage would allow.
Saving seeds from your best-performing overwintered pumpkins is a tradition that connects you to the next growing season. You should select seeds from a pumpkin that showed exceptional storage qualities and a flavor profile that you particularly enjoyed. Rinse the seeds thoroughly, dry them completely, and store them in a cool, dark place in a paper envelope until it is time to plant again. This cycle of selection and storage helps you develop a strain of pumpkins that is perfectly adapted to your local climate and storage conditions.
Dealing with storage pests
Rodents like mice and rats can be a major problem in winter storage areas, as they are often looking for both food and shelter. These pests can gnaw through the tough rinds of your pumpkins, leaving them vulnerable to rot and contamination. You should ensure your storage area is as rodent-proof as possible and consider using safe traps if you notice any signs of unwanted visitors. Protecting your harvest from these hungry intruders is an essential part of the overwintering process.
Fruit flies and other small insects can sometimes be attracted to pumpkins that have developed small cracks or soft spots during storage. While they don’t usually cause the initial damage, their presence is a clear signal that something is wrong with one of your fruits. Keeping your storage area clean and free of decaying organic matter will help minimize these secondary pest issues. If you see flies, it is time for a thorough inspection to find the source of the problem and remove any compromised pumpkins.
In the end, the success of your overwintering efforts depends on the quality of the fruit you started with and the consistency of your care. Not every pumpkin will make it through to the spring, but by following these professional guidelines, you can significantly improve your odds. Every year provides new lessons on which varieties store best and how your specific storage environment behaves under different winter conditions. Enjoying your own homegrown pumpkins during the coldest months of the year is a true gardener’s delight.