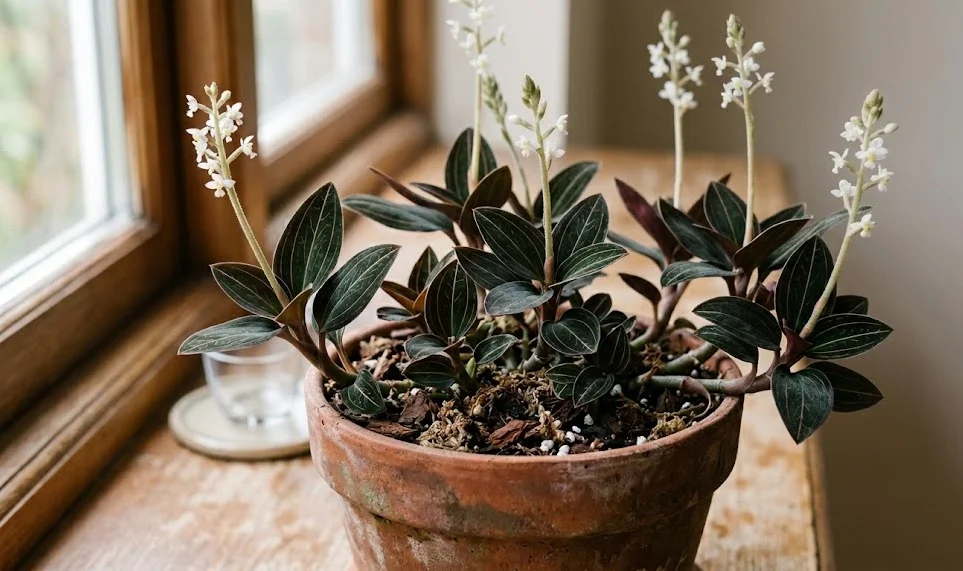
The process of planting a black jewel orchid requires a delicate touch and a specific understanding of its terrestrial nature. Unlike many of its epiphytic relatives, this orchid prefers to have its roots nestled in a substrate that mimics the rich, damp floor of a tropical rainforest. Success starts with selecting the right materials and ensuring the environment is prepared to support the unique creeping growth habit of the rhizomes. When done correctly, planting sets the foundation for a long-lived and healthy specimen that will eventually provide ample material for propagation.
Preparation is key when you are getting ready to pot a new acquisition or a recently divided plant. You should ensure that all your tools, including scissors and the pot itself, are thoroughly cleaned and sterilized to prevent the introduction of pathogens. Because these orchids have fleshy stems, they are particularly vulnerable to rot if bacteria or fungi are present in the planting environment. Laying out your substrate components beforehand allows for a smooth transition, minimizing the time the roots are exposed to the open air.
The initial planting depth is a common area where beginners make mistakes with this specific species. The rhizomes should be placed horizontally on top of the substrate, with only the roots and perhaps the lower half of the stem lightly covered. If you bury the entire stem too deeply, the risk of crown and stem rot increases significantly, especially in high-humidity environments. Gently pressing the substrate around the roots will provide enough stability to keep the plant in place while it establishes itself.
Once the orchid is planted, it is vital to give it a “settling-in” period where it is kept in a warm, shaded spot with high humidity. Avoid fertilizing immediately after planting, as the roots need time to heal and adapt to the new medium without being burned by salts. A light watering with room-temperature water will help settle the soil and ensure the roots have immediate access to moisture. Watching for the first signs of new leaf growth will tell you that the planting was successful and the orchid is ready for regular care.
Mastering the art of rhizome division
Division is the most common and reliable method for propagating this orchid, taking advantage of its natural tendency to creep and branch. This process is best performed during the spring or early summer when the plant is in its most vigorous growth phase. You should look for a mature plant with several healthy stems and a well-developed root system before attempting a division. Each new section must have at least one or two nodes and its own set of established roots to ensure survival.
More articles on this topic
To begin the division, carefully remove the entire plant from its pot and gently shake away the old substrate to reveal the structure of the rhizomes. Identify the natural breaking points where the stems have branched out, as these are the best places to make your cuts. Using a sterilized blade, slice through the rhizome cleanly, making sure to cause as little trauma to the surrounding tissue as possible. Some growers apply a small amount of cinnamon powder to the cut ends to act as a natural fungicide.
After the cuts are made, the individual sections should be potted into their own containers using the same substrate mix as the parent plant. It is often helpful to use smaller pots for these divisions to prevent the soil from staying too wet, which can happen if the pot is too large for the root mass. Label each new pot with the date so you can track the progress of the propagation over the following months. Maintaining high humidity is even more critical for these new divisions as they lack a large root system to draw up water.
The success rate for rhizome division is generally very high if the parent plant was healthy and the sections are given proper care. You will likely see new growth emerging from the nodes within a few weeks of the operation. Avoid moving the new plants around too much, as they need stability to anchor their roots into the new medium. This method allows you to quickly expand your collection or create gifts for fellow gardening enthusiasts without much risk to the original plant.
Propagation through stem cuttings
If your orchid has become leggy or if you want to experiment with a different technique, stem cuttings are another viable option. This method involves taking a section of the stem that may not yet have roots and encouraging it to develop them. You should select a healthy, firm stem and cut a section that includes at least two or three nodes, which are the points where leaves or roots emerge. The top cutting, which includes the growing tip, usually has the highest success rate because it contains the most active growth hormones.
More articles on this topic
Once you have your cutting, you can either place it directly into a moist substrate or use a specialized propagation medium like live sphagnum moss. Many professionals find that sphagnum moss provides the perfect balance of moisture and aeration for encouraging new root development. Place the cutting horizontally on the moss and keep it in a bright, warm location away from direct sunlight. Covering the propagation tray with a clear plastic lid can help maintain the near-constant humidity required for this process.
Roots will typically begin to emerge from the nodes within three to six weeks depending on the environmental conditions. It is important to resist the urge to tug on the cutting to check for roots, as this can break the delicate new tissues as they form. Instead, look for signs of new leaf development or visible roots pressing against the sides of a clear propagation container. Once the roots are at least two or three centimeters long, the cutting can be transitioned into a regular potting mix.
The transition from a propagation medium to soil is a delicate time, as the new roots must adapt to a different texture and moisture level. Start by adding small amounts of the final potting mix to the moss over a week or two to help the plant acclimate. Once fully moved into its permanent pot, treat it like a mature jewel orchid but keep a closer eye on its hydration. This method is an excellent way to rejuvenate an older plant that has lost its lower leaves and become unsightly.
Establishing young plants for long-term success
The first few months after planting or propagation are the most critical for the long-term health of your black jewel orchid. Young plants have smaller energy reserves and are more sensitive to environmental stressors like dry air or temperature fluctuations. You should provide them with the most stable conditions possible, ideally in a dedicated “nursery” area where humidity is consistently high. Avoid the temptation to overwater, as the smaller root systems cannot process as much moisture as a mature specimen.
Light levels for young plants should be kept on the lower end of the spectrum to prevent the delicate new leaves from scorching. A north-facing window or a spot several feet away from a brighter window usually provides the gentle glow they need. As the plant grows and becomes more established, you can gradually move it to slightly brighter conditions if desired. You will know the plant is happy when the new leaves emerge with deep, rich colors and the characteristic velvet texture.
Fertilization should be introduced very gradually once you are certain the plant has established a strong root system. Use a highly diluted, balanced liquid fertilizer and apply it only after watering the plant with plain water first. This “weakly, weekly” approach prevents the buildup of salts that can damage sensitive young roots and lead to leaf tip burn. If you see any signs of stress, such as yellowing leaves or stalled growth, stop fertilizing and flush the soil with pure water.
As the young orchid develops, it will begin to show its true potential, with larger leaves and a more robust growth habit. This is the time to start thinking about its final display location and whether it will need a larger pot in the near future. Growing an orchid from a small division or cutting is a deeply satisfying experience that teaches you much about the plant’s needs. By providing a solid start, you ensure that your black jewel orchid will be a beautiful fixture in your home for years to come.