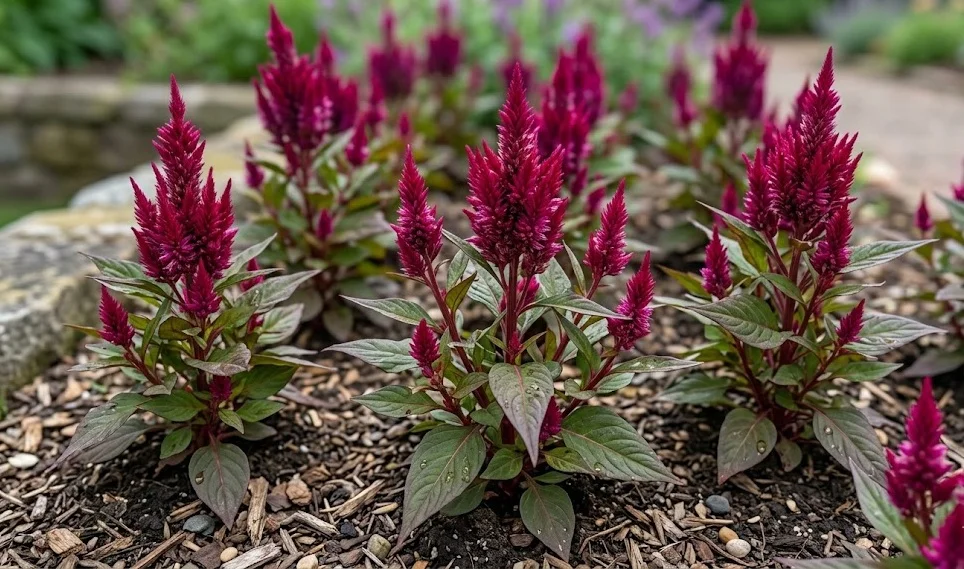
Successfully establishing a purple celosia begins with a deep understanding of its planting requirements and the various methods available for its propagation. This plant is a favorite among those who enjoy vibrant colors and unique textures in their garden beds or indoor collections. Whether you are starting from a young nursery plant or attempting to grow your own from seeds, precision is required. By following professional planting techniques, you can ensure that the root system develops strongly and supports a season of heavy blooming.
The timing of planting is perhaps the most critical factor for this heat-loving tropical variety. It is essential to wait until the outdoor environment is consistently warm, as cold soil can permanently stunt the plant’s development. Most experts recommend waiting until the night temperatures stay above twelve degrees Celsius before moving them outdoors. This patience rewarded with a much faster growth rate once the plant is finally placed in its permanent home.
The site selection for planting must prioritize maximum sun exposure and excellent soil structure. A location that receives at least six to eight hours of direct sunlight is necessary for the plant to maintain its deep purple hues. Without sufficient light, the plant will likely become leggy and produce fewer, smaller flower spikes. Therefore, assessing the light patterns in your garden throughout the day is a vital preparatory step.
Propagation allows a gardener to multiply their collection or share this beautiful variety with others interested in horticulture. While many choose to buy established plants, growing from seeds or cuttings provides a more rewarding and cost-effective experience. Each method has its own set of technical requirements and specific timelines that must be followed for success. With the right approach, you can create a continuous supply of these stunning purple plumes for your landscape.
Site selection and soil preparation
The first step in a professional planting process is identifying a location that meets all the physiological needs of the plant. This variety demands a spot with full sun and protection from strong, drying winds that could damage the flower spikes. Consider how the sun moves across your yard and choose an area that is not shaded by buildings or large trees. A warm south-facing border is often the most successful location for achieving high-quality floral displays.
More articles on this topic
Once the site is chosen, you must focus on creating the ideal soil environment for the delicate root system. Begin by clearing the area of all weeds and debris that could compete for nutrients and water. Incorporating a significant amount of organic compost will improve the soil structure and provide a slow-release source of food. If your soil is naturally heavy, adding a layer of grit or sharp sand will ensure that water does not pool around the roots.
Proper drainage is non-negotiable for this cultivar, as it is highly susceptible to root diseases in waterlogged conditions. You can test the drainage by digging a small hole, filling it with water, and timing how long it takes to empty. If the water sits for more than an hour, you should consider planting in raised beds or improving the soil further. Professionals often create a slightly mounded planting area to help excess water run away from the main stem.
The soil pH should also be checked and adjusted to fall within the slightly acidic to neutral range. If the soil is too alkaline, the plant may suffer from nutrient lockout, specifically affecting its ability to absorb iron. Adding peat moss or specialized acidifying fertilizers can help bring the pH down to the desired level of 6.0 to 6.5. Taking these steps before the plant even touches the ground sets a high standard for future growth and health.
The technical process of planting
When you are ready to plant your purple celosia, handle the root ball with extreme care to avoid any unnecessary damage. These plants have sensitive roots that do not like being disturbed more than is absolutely required. Dig a hole that is twice as wide as the current pot but no deeper than the depth of the root system. This allows the new roots to easily penetrate the loosened soil surrounding the planting site.
More articles on this topic
Carefully remove the plant from its nursery container by turning it upside down and gently squeezing the sides. If the roots are circling the bottom, you can very gently tease them outward to encourage lateral growth. Place the plant in the center of the hole, ensuring that the top of the root ball is level with the surrounding soil. Burying the stem too deeply can lead to crown rot, while planting it too high can cause the roots to dry out.
Fill the remaining space with the prepared soil mixture, pressing down lightly with your hands to remove any large air pockets. You should avoid packing the soil too tightly, as this can restrict oxygen flow to the roots and hinder drainage. Once the plant is secure, give it a thorough watering to help settle the soil and provide immediate hydration. This initial watering is crucial for establishing good contact between the roots and the new environment.
Spacing is another professional consideration that prevents overcrowding and promotes healthy air circulation between the plants. For the ‘Caracas’ variety, a distance of twenty-five to thirty centimeters between individuals is usually ideal. This gap allows each plant to reach its full width without competing for light or nutrients with its neighbors. Proper spacing also makes it much easier to perform maintenance tasks like weeding and deadheading later in the season.
Growing purple celosia from seeds
Starting from seeds is a rewarding way to produce a large number of plants for a relatively low cost. Because this variety has a long growing season, you should start the seeds indoors about six to eight weeks before the last expected frost. Use a sterile seed-starting mix in shallow trays to provide the best environment for germination. The seeds are quite small, so they only need a very light covering of fine soil or vermiculite to stay in place.
Temperature control is the most important factor when trying to germinate celosia seeds successfully. They require a warm environment, ideally between twenty-two and twenty-five degrees Celsius, to break dormancy. Using a heated germination mat under the trays can significantly increase the success rate and speed of the process. You should see the first sprouts appearing within one to two weeks if the conditions are consistently warm and moist.
Once the seedlings have emerged, they need a high level of light to prevent them from becoming thin and weak. Placing them under professional grow lights for fourteen to sixteen hours a day is often better than relying on natural window light. As soon as they have two sets of true leaves, you can transplant them into individual pots to give them more space. Be sure to handle them by the leaves rather than the stems to avoid crushing the delicate vascular system.
Before moving your homegrown seedlings into the garden, they must undergo a process called hardening off. This involves exposing them to outdoor conditions for increasing periods each day over the course of a week. Start with an hour in a shaded, protected spot and gradually move them into more sun and wind. This transition period allows the plants to toughen their cell walls and prevents transplant shock when they are finally moved.
Propagation from stem cuttings
Propagating through stem cuttings is an excellent way to create exact clones of a particularly beautiful or healthy specimen. This method is often faster than growing from seeds and can be done at various points during the active growing season. Select a healthy, non-flowering stem that is about ten centimeters long for the best chance of success. Using a sharp, sterilized knife or shears is essential to make a clean cut that will heal quickly.
Remove the leaves from the bottom half of the cutting to expose the nodes where new roots will eventually form. You can dip the cut end into a rooting hormone powder to stimulate faster root development, though this is not strictly necessary. Insert the cutting into a moist, well-draining medium such as a mix of perlite and peat moss. Ensure that at least one or two nodes are buried beneath the surface of the soil.
To maintain the high humidity required for rooting, you can cover the cuttings with a clear plastic dome or a simple plastic bag. Place the cuttings in a warm spot with bright, indirect light but avoid direct midday sun which could overheat them. Check the moisture levels regularly, as the medium should stay damp but never soggy to prevent the stem from rotting. Roots should begin to develop within two to three weeks under these controlled conditions.
You can test for root development by giving the cutting a very gentle tug; if you feel resistance, roots have likely formed. Once a strong root system is established, you can move the new plant into a larger pot with standard potting soil. Continue to grow the plant in a protected environment until it is large enough to be moved to its permanent location. This method is a professional secret for maintaining a high-quality collection of purple celosia year after year.