Successful establishment of the Japanese gold chrysanthemum begins with a deep understanding of its preferred habitat and growth requirements. This resilient perennial thrives when its initial transition into the garden is managed with professional care and attention to detail. Choosing the right moment for planting and the most effective method for propagation ensures a lifetime of beauty. By following established horticultural standards, you can transform a single specimen into a thriving colony of silver and gold.
The timing of planting is crucial to allow the root system to settle before environmental stresses occur. Mid-spring is generally considered the optimal window, as the soil begins to warm up but the intense summer heat is still weeks away. This allows the plant to focus its energy on subterranean growth rather than trying to cool itself through transpiration. Avoid planting during periods of heavy rain or extreme drought to minimize transplant shock and encourage rapid establishment.
Preparation of the planting site is a step that cannot be rushed if you desire professional results. The area should be cleared of all perennial weeds and the soil should be loosened to a depth of at least twelve inches. Incorporating a small amount of grit or coarse sand can enhance the natural drainage of the site significantly. A well-prepared bed provides the loose, airy environment that the delicate new roots need to spread and anchor the plant.
Professional gardeners often emphasize the importance of air space and light access when choosing a permanent home for this species. It should not be crowded by faster-growing, aggressive neighbors that might shade it out or steal its nutrients. Providing a dedicated space where it can expand into its natural mounded shape is aesthetically and biologically beneficial. Once the site is ready and the timing is right, the actual process of planting can proceed with confidence.
Selecting the ideal location
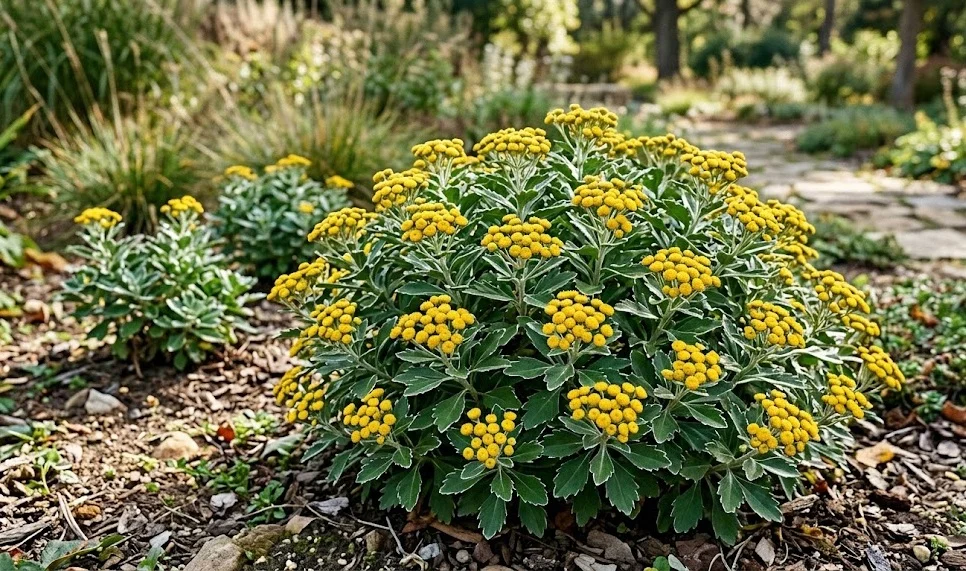
The Japanese gold chrysanthemum is native to coastal areas, so it naturally craves environments that offer maximum light and excellent air movement. A spot that receives at least six to eight hours of direct sunlight is essential for the development of its silver leaf margins. Without sufficient light, the plant will become leggy and the striking contrast of the foliage will fade to a dull green. Observe your garden throughout the day to identify the areas with the most consistent solar exposure.
More articles on this topic
Proximity to structures like walls or fences can provide a beneficial microclimate by reflecting heat and providing wind protection. However, ensure that these structures do not create a rain shadow that prevents the plant from receiving natural moisture. A location with a slight slope is often ideal as it naturally facilitates the drainage of excess water away from the root zone. Avoiding low spots in the garden where cold air or water tends to pool is a fundamental rule for this species.
Consider the surrounding soil chemistry and history before committing the plant to the ground for the long term. If the area has previously hosted plants with fungal issues, it may be wise to treat or replace the soil first. The site should also be far enough from large trees whose roots might compete for moisture and nutrients in the upper soil layers. A professional assessment of the site’s strengths and weaknesses will prevent many future problems and ensure the plant thrives.
Visual integration is the final piece of the location puzzle, as the plant should complement the existing landscape design. Its low-growing, mounded form makes it a perfect candidate for the front of a border or along a walkway. The silver-grey tones of the leaves provide a neutral backdrop that makes brighter flowers in the vicinity pop with color. By placing it where its late-season flowers can be easily seen, you maximize the impact of its unique bloom cycle.
The planting process and initial care
When you are ready to plant, start by digging a hole that is twice as wide as the root ball but no deeper. Placing the plant too deep in the soil can lead to crown rot, while planting it too high can cause the roots to dry out. The top of the root ball should be exactly level with the surrounding soil surface for optimal health. Carefully loosen any circling roots to encourage them to grow outward into the new garden soil.
More articles on this topic
Fill the space around the root ball with a mixture of native soil and a small amount of organic compost. Gently firm the soil with your hands to remove large air pockets, but be careful not to pack it so tightly that you crush the roots. Watering the plant immediately after planting is essential to settle the soil and provide much-needed hydration. Use a gentle stream of water to avoid eroding the soil or exposing the sensitive upper roots.
A thin layer of mulch applied after planting can help retain moisture and keep the soil temperature stable during the first few weeks. Ensure the mulch does not touch the stems of the plant, as this can trap moisture and encourage fungal growth. During the first growing season, the plant will need more frequent watering than an established specimen until its roots are fully functional. Monitor the foliage for signs of wilting, which indicates that the plant is struggling to take up enough water.
Avoid the temptation to apply heavy fertilizers immediately after planting, as the roots need time to adjust without being burned by salts. A very dilute, liquid seaweed solution can be used to help the plant recover from the stress of being moved. Most professional gardeners wait until they see new top growth before starting a regular fertilization schedule. This patient approach ensures that the plant builds a strong internal structure before it is pushed to grow rapidly.
Propagation through stem cuttings
Stem cuttings are the most common and effective way to multiply your Japanese gold chrysanthemum collection during the growing season. The best time to take cuttings is in late spring or early summer when the stems are firm but still actively growing. Choose healthy, non-flowering shoots that are about four inches long for the best chance of success. Using a sharp, sterilized knife or shears will ensure a clean cut that heals quickly and resists infection.
Remove the leaves from the bottom half of the cutting to prevent them from rotting in the rooting medium. Some professionals recommend dipping the cut end into a rooting hormone powder to speed up the development of new roots. Insert the cutting into a well-draining medium, such as a mix of perlite and peat moss or clean river sand. Ensure that at least two nodes—the points where leaves were attached—are buried beneath the surface of the medium.
Maintain a high level of humidity around the cuttings by covering them with a clear plastic dome or placing them in a greenhouse. However, it is vital to provide some ventilation to prevent the growth of mold or mildew on the delicate stems. Keep the rooting medium consistently moist but never saturated, and place the cuttings in bright, indirect light. Direct sunlight can overheat the cuttings and cause them to wither before they have a chance to form roots.
Roots usually begin to form within three to six weeks, depending on the temperature and the health of the parent plant. You can check for root development by giving the cutting a very gentle tug; resistance indicates that roots have taken hold. Once the root system is well-established, the new plants can be slowly acclimated to drier air and brighter light. Gradually hardening them off over a week will prepare them for the transition to their permanent pots or garden beds.
Multiplication by root division
Division is a fast and reliable method for rejuvenating older plants while simultaneously creating several new ones. This process is best performed in the early spring just as the new shoots are beginning to emerge from the ground. Lift the entire plant carefully with a garden fork, taking care to preserve as much of the root mass as possible. A healthy, mature plant will often have several distinct growing points that can be separated into individual units.
Use a sharp spade or a garden knife to cut the root ball into sections, ensuring each piece has a healthy amount of roots and at least one or two shoots. Discard the older, woody center of the plant, as it often has less vigor than the younger outer sections. This is the perfect time to inspect the root system for any signs of pests or disease before replanting the divisions. Dividing the plant every three to four years keeps it from becoming too crowded and maintains its characteristic mounded shape.
Replant the new divisions immediately into prepared soil at the same depth they were growing previously. Because these divisions already have an established root system, they tend to grow much faster than plants started from cuttings. Water them thoroughly and monitor them closely for the first few weeks to ensure they are recovering well from the surgery. Most divisions will grow enough during the summer to look like mature plants by the time the autumn flowering season arrives.
The success rate for division is very high, making it a favorite technique for professional landscapers who need to fill large areas quickly. It is an economical way to expand your garden without the cost of buying new nursery stock every year. Furthermore, plants grown from division are genetically identical to the parent, ensuring that the beautiful silver foliage and golden flowers are preserved. This practice not only multiplies your plants but also strengthens the overall health of your garden’s perennial population.