The successful establishment of a purple heart colony begins with a strategic approach to planting and understanding the plant’s reproductive mechanics. This species is remarkably easy to propagate, making it a favorite for gardeners looking to expand their collection without additional cost. Whether you are starting from a purchased specimen or a simple stem cutting, the process is straightforward and rewarding. Following professional protocols ensures that your new plants develop strong root systems and vibrant foliage.
Preparation of the planting site or container is the first critical step in the process of introduction. You should ensure the soil is loose and free of any large debris that could hinder root penetration. Adding a small amount of organic matter can provide the initial nutrients needed for a young plant to thrive. A well-prepared environment reduces transplant shock and encourages rapid establishment in the new location.
When placing the plant into the soil, pay close attention to the depth at which it is situated. The root ball should be level with the surrounding soil surface to prevent stem rot or dehydration. Burying the stems too deeply can trap moisture against the delicate tissues, leading to fungal issues. Once the plant is in place, gently firm the soil around the base to provide stability during the initial rooting phase.
Initial watering after planting is essential for settling the soil and making contact between the roots and the medium. You should provide a thorough soaking to ensure that moisture reaches the bottom of the planting hole. Avoid over-saturating the area, as the young roots need oxygen to begin their expansion. Monitoring the plant closely for the first few weeks will help you determine its specific water needs during this transition.
Methods of propagation via stem cuttings
Stem cuttings are the most popular and efficient way to multiply your purple heart collection throughout the year. You should select a healthy, vigorous stem that is at least four to six inches long for the best results. Make a clean cut just below a leaf node, as this is where the highest concentration of root-growing hormones is located. Removing the lower leaves will prevent them from rotting and expose the nodes for root development.
More articles on this topic
Once the cutting is prepared, you can choose to root it directly in soil or in a container of water. Soil rooting often results in a stronger root system that is better adapted to its permanent environment from the start. You can dip the cut end in rooting hormone to speed up the process, though this is not strictly necessary for this species. Keep the soil consistently moist but not soggy until you see signs of new growth.
Water propagation is a visually interesting method that allows you to monitor root development in real-time. Simply place the prepared cutting in a clean jar of water, ensuring that at least one node is submerged. Change the water every few days to keep it fresh and prevent the growth of algae or bacteria. Once the roots are about an inch long, the cutting is ready to be transitioned into a soil-based medium.
Choosing the right time for propagation can influence the speed at which the new plants establish themselves. Late spring and early summer are the ideal windows, as the warm temperatures and high light levels stimulate rapid cellular division. While you can propagate in winter, the process will be much slower and may require supplemental heat. Using professional-grade tools ensures that the parent plant is not damaged during the collection of cuttings.
Dividing established plant clumps
Division is another effective propagation technique that is particularly useful for older, overgrown specimens. This process involves lifting the entire plant from the ground or its container and separating the root mass into smaller sections. You should look for natural breaking points where the stems and roots can be parted with minimal damage. Using a sharp knife or garden spade can help make clean divisions through dense root systems.
More articles on this topic
Each new division must have a healthy set of roots and at least one or two viable stems to ensure survival. If the division is too small, it may struggle to gather enough energy to establish itself in a new location. Larger divisions provide a more immediate visual impact and tend to be more resilient during the transplanting phase. Keeping the roots moist during the entire process is vital for preventing dehydration and stress.
After the plant has been divided, replant the sections immediately into prepared soil or containers. Follow the same planting guidelines as you would for a new nursery plant, ensuring proper depth and soil contact. Providing a light application of a balanced fertilizer can help the new divisions recover from the stress of being moved. Shading the newly planted divisions for a few days can also help them adjust to their new surroundings.
This method not only provides you with new plants but also rejuvenates the original specimen by reducing competition for resources. Overcrowded plants often exhibit reduced vigor and smaller leaves, which division can quickly correct. It is a professional practice to divide your plants every few years to maintain their health and aesthetic appeal. Successful division results in a refreshed garden and several new, healthy plants to enjoy.
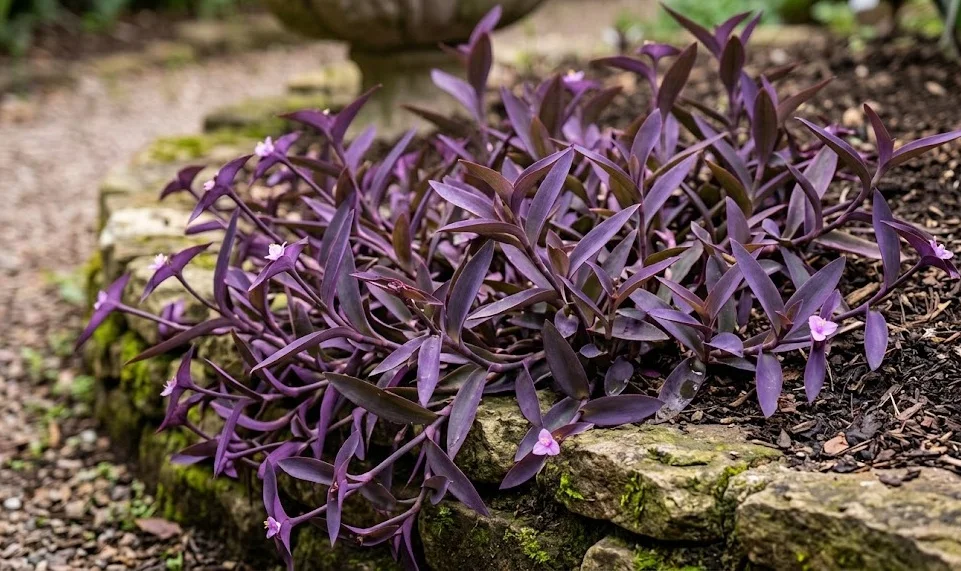
Establishing new plants in the landscape
When integrating new purple heart plants into your garden landscape, consider the overall design and growth habit of the species. It works exceptionally well as a border plant or a ground cover that ties different sections of the garden together. You should space the plants according to their expected mature spread to avoid overcrowding within the first season. Giving them enough room allows for better air circulation and reduces the risk of disease.
The transition from a nursery environment or a propagation jar to the open ground requires careful management. Start by keeping the soil slightly wetter than usual for the first two weeks to help the roots anchor themselves. Gradually reduce the frequency of watering as you see new leaves beginning to emerge from the center of the plant. This gradual change encourages the roots to grow deeper into the soil in search of moisture.
Mulching around the base of newly planted specimens can provide numerous benefits for establishment and long-term health. A thin layer of organic mulch helps retain soil moisture, suppresses weeds, and regulates ground temperature. Be careful not to pile the mulch directly against the stems, as this can encourage rot in the fleshy tissues. As the mulch breaks down, it also adds valuable nutrients back into the soil for the plant to use.
Monitoring for signs of stress is crucial during the first month after planting in the landscape. If the leaves begin to droop significantly or lose their color, it may indicate a problem with the planting site or water levels. Addressing these issues early can prevent the loss of the plant and ensure a successful establishment. With professional care and attention, your new purple heart plants will soon become a dominant and beautiful feature of your garden.