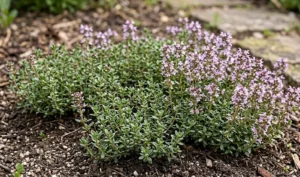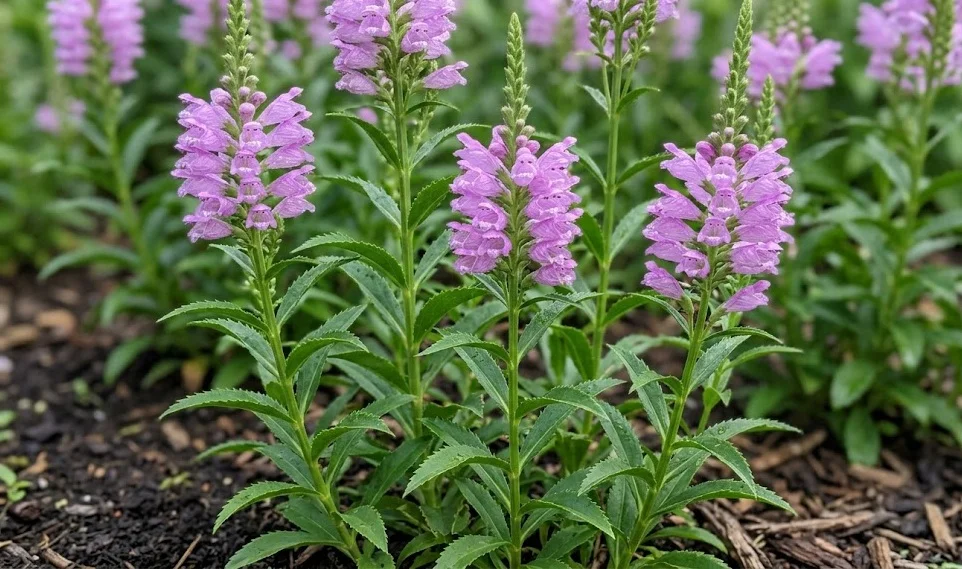
Establishing a new colony of the obedient plant begins with a clear understanding of the environmental conditions it prefers to call home. You will find that this plant is not particularly fussy, but giving it the right start in life will lead to much better results in the future. Whether you are starting with a small nursery pot or a handful of seeds, the planting process is straightforward and rewarding for gardeners of all skill levels. By following a few expert guidelines, you can ensure that your new additions settle in quickly and begin to show their true character within their first growing season.
Selecting the perfect site and preparing the soil
Before you even pick up a shovel, you need to spend some time observing the light patterns and drainage in your garden. You should look for a spot that receives plenty of sunshine, although a bit of afternoon shade can be beneficial in hotter climates. The obedient plant is quite adaptable, but it will always perform best in a location that doesn’t dry out completely during the heat of the summer. Identifying the right microclimate within your yard is the foundation of a successful planting project.
Soil preparation is the next critical step in ensuring your plants have access to the nutrients they need to grow strong stems. You should work in plenty of organic matter, such as compost or leaf mold, to improve the soil structure and its ability to hold moisture. If your soil is heavy clay, adding some grit or sharp sand can help prevent the roots from sitting in stagnant water during the winter. A well-prepared bed provides a welcoming environment that encourages rapid root establishment and vigorous top growth.
Clearing the area of any existing weeds or aggressive grasses is essential to prevent competition during the early stages of growth. You want your obedient plant to have full access to the available water and minerals without having to fight for them. Hand-pulling weeds or using a specialized weeding tool will ensure that you get the roots out without disturbing the surrounding soil too much. Starting with a clean slate makes it much easier to monitor the progress of your new plants as they emerge.
Finalizing the layout of your planting area involves considering how the obedient plant will interact with its future neighbors. You should visualize the mature size of the plant and leave enough space so that it doesn’t immediately crowd out other perennials. Grouping plants with similar water and light requirements will make your future maintenance tasks much more streamlined and efficient. Once you are satisfied with the plan, you are ready to move on to the actual physical task of putting the plants in the ground.
More articles on this topic
The physical process of planting and early care
When you are ready to plant, start by digging a hole that is twice as wide as the root ball but no deeper than the original pot. You want to make sure the crown of the plant is level with the surrounding soil surface to prevent rot or drying out. Gently teasing the roots out if they are circling the pot will help them grow outward into the new soil more quickly. This simple step can significantly reduce the transplant shock that many perennials experience when moved from a nursery container.
Filling the hole with the amended soil should be done carefully to avoid leaving any large air pockets around the roots. You can use your hands to firm the soil down gently, but avoid stepping on it with your full weight as this can compact the ground too much. After planting, give the area a deep and thorough watering to settle the soil and provide immediate hydration to the roots. This initial watering is perhaps the most important drink the plant will ever receive in its new home.
Applying a layer of mulch around the base of the plant will help regulate soil temperature and conserve moisture during the critical establishment phase. You should use a natural material like shredded bark or straw, keeping it a few inches away from the stems to prevent moisture-related rot. Mulch also acts as a barrier against weed seeds, reducing the amount of competition the young plant has to deal with. As the mulch breaks down, it will further enrich the soil with valuable organic matter.
For the first few weeks after planting, you need to keep a close eye on the moisture levels in the soil. You should water the new plant whenever the top inch of soil feels dry to the touch, which might be daily during hot or windy weather. Once the plant shows signs of new growth, you can gradually reduce the frequency of watering as the root system becomes more self-sufficient. Monitoring the plant’s leaves for signs of wilting will tell you exactly when it needs an extra drink.
More articles on this topic
Propagating through division for immediate results
Division is the most common and effective way to propagate the obedient plant, as it allows you to create large, flowering plants in a single season. You should plan to divide your established clumps every three to four years in the early spring or late autumn. This process not only gives you more plants for your garden but also rejuvenates the original colony by removing older, less productive wood. It is a win-win situation for both the gardener and the plant.
To start the division process, use a sharp spade to lift the entire clump out of the ground, being careful to keep as much of the root system intact as possible. You can then use a knife or the edge of the spade to slice the clump into several smaller sections, each with its own set of roots and healthy shoots. Discard the center of the old clump if it looks woody or dead, and focus on replanting the vigorous outer sections. This selective process ensures that your new plants will be as healthy as possible.
Replanting the divisions should be done as quickly as possible to prevent the roots from drying out in the air. You should follow the same planting procedures as you would for a new nursery plant, ensuring proper depth and immediate watering. It is often helpful to trim back the foliage of the divisions by about half to reduce the stress on the roots while they re-establish themselves. You will be amazed at how quickly these small pieces grow into full-sized blooming plants.
Division is also a great opportunity to share your favorite garden plants with friends or family members. You can pot up the extra sections and give them away as gifts, or trade them for other perennial varieties you don’t yet have. This social aspect of gardening is one of the many reasons why the obedient plant is such a popular choice among enthusiasts. By propagating your own plants, you become a more self-reliant and knowledgeable gardener.
Growing from seeds and softwood cuttings
While division is the fastest method, growing the obedient plant from seeds can be a very satisfying project if you have the patience. You can collect the seeds from the dried flower heads in the autumn once they have turned dark brown and are easily released. Sowing the seeds directly into a prepared seedbed in the late autumn allows them to undergo a natural period of winter chilling, which is necessary for germination. Alternatively, you can start them indoors in late winter using a specialized seed-starting mix.
If you choose to start seeds indoors, you need to provide plenty of light and keep the soil consistently moist but not soggy. You should see the first tiny green shoots appearing within a few weeks, at which point you can begin to thin them out. Once the seedlings have developed a few sets of true leaves and the danger of frost has passed, they can be hardened off and moved to their permanent home. Growing from seed allows you to see the entire lifecycle of the plant and often results in very hardy individuals.
Softwood cuttings are another propagation option that you can try during the early summer months. You should select healthy, non-flowering stems and cut them into four-inch lengths, removing the lower leaves to expose the nodes. Dipping the ends in a rooting hormone can increase your success rate, although it is not strictly necessary for this species. Placing the cuttings in a pot of moist, sandy compost and covering them with a plastic dome will create the humid environment they need to form roots.
Once the cuttings have established a strong root system, which usually takes about a month, they can be transplanted into larger pots. You should continue to grow them in a sheltered spot for the rest of the season before planting them out in the garden the following spring. This method is a great way to create many identical clones of a specific cultivar that you particularly admire. Propagation is a fundamental skill that allows you to expand your garden’s beauty without spending a fortune.