Pruning the scarborough lily is a straightforward but essential task that helps maintain the plant’s health and aesthetic appeal. Unlike woody shrubs, these bulbous perennials require only minimal intervention to keep them looking their best throughout the year. You should focus your efforts on removing dead, diseased, or damaged foliage to prevent the spread of pathogens and to improve air circulation. Regular maintenance ensures that the plant’s energy is directed toward healthy growth and the production of new flowers.
The most common pruning activity for this species is the removal of spent flower stalks once the blooming period has finished. Allowing the plant to produce seeds can drain significant energy from the bulb, which may reduce the quality of next year’s flowers. By cutting the stalk back early, you encourage the plant to focus on replenishing its internal stores for the next cycle. This simple act of “deadheading” is a key part of professional bulb management and leads to more consistent results over time.
You should always use clean, sharp tools when pruning your lilies to ensure clean cuts that heal quickly and cleanly. Dull blades can crush the fleshy tissues, creating wounds that are more susceptible to infection by fungi or bacteria. Sanitizing your shears or knife with rubbing alcohol between plants is a professional habit that prevents the cross-contamination of diseases. Taking these small precautions will safeguard the health of your entire collection and promote the longevity of your individual plants.
Timing is also important when it comes to pruning the foliage of the scarborough lily, as it is generally an evergreen species. You should only remove leaves that have completely yellowed or dried out naturally as part of the plant’s growth cycle. Removing healthy green leaves reduces the plant’s ability to perform photosynthesis and can weaken the bulb if done excessively. Patience is often the best approach, allowing the plant to withdraw the nutrients from the old leaves before you trim them away.
Deadheading spent flowers
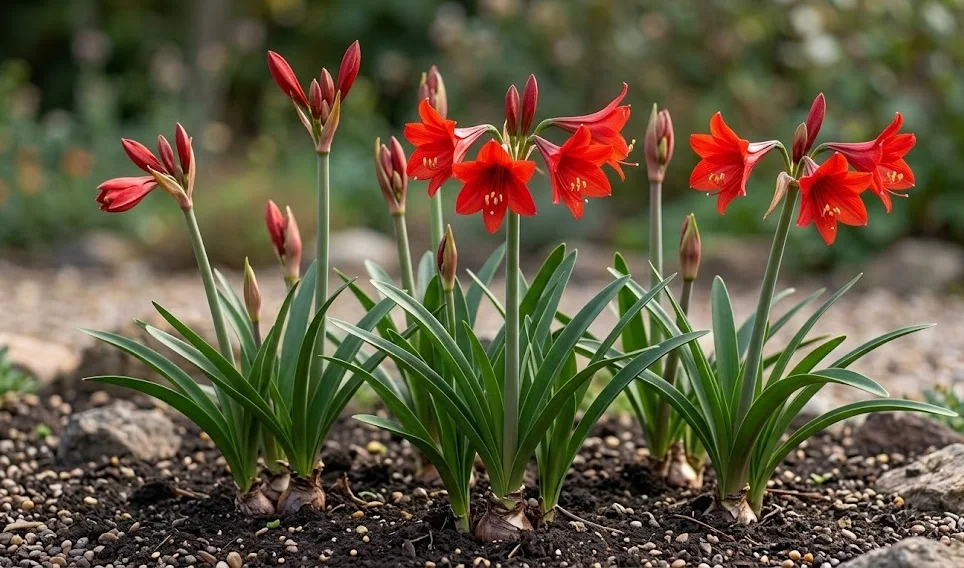
Once the vibrant red blooms of the scarborough lily begin to fade and wither, it is time to remove the flower stalk. You should cut the stalk as close to the base as possible without damaging the surrounding leaves or the bulb itself. This prevents the plant from wasting resources on developing seed pods that are often not needed for general cultivation. Removing the old stalk also improves the overall appearance of the plant, keeping it looking tidy and well-cared for.
More articles on this topic
If you have multiple flower stalks on a single large bulb, you should remove each one as they finish their individual displays. Sometimes, a second flush of flowers may appear if the plant is particularly healthy and the environmental conditions are ideal. By removing the first set of spent flowers, you make it easier to see and enjoy any new buds that may be emerging. This continuous maintenance keeps the focus on the most attractive parts of the plant throughout the flowering season.
In professional settings, deadheading is also a sanitation measure that reduces the risk of mold growing on the decaying flower tissues. Spent flowers can become a breeding ground for Botrytis and other fungal pathogens, especially in humid greenhouse environments. Keeping the plant free of dead material is a proactive way to maintain a healthy and disease-free collection. It is a simple task that pays dividends in the overall vigor and presentation of your lilies.
After you have removed the flower stalk, you should continue to provide the plant with optimal light and nutrients to help it recover. The period immediately following flowering is when the bulb works hardest to replenish the energy it has expended. You may notice a new flush of leaf growth during this time, which is a sign that the plant is responding well to your care. Proper post-bloom pruning is the first step toward a successful growing season in the coming year.
Managing foliage health
Maintaining the health of the evergreen leaves is a year-round task that requires regular inspection and occasional pruning. You should look for any leaves that have become damaged by pests, physical contact, or environmental stress and remove them. Use a sharp pair of scissors to cut away only the affected part of the leaf or the entire leaf if the damage is severe. Keeping the foliage clean and intact is essential for the plant’s ability to produce energy and stay healthy.
More articles on this topic
As new leaves emerge from the center of the bulb, older leaves on the outside of the clump will naturally begin to age and die. You will see them turn yellow and then brown, eventually becoming dry and papery at the base of the plant. You should wait until these leaves are fully dry before gently pulling them away or cutting them off near the soil line. This natural process is how the plant replaces its old foliage and keeps its photosynthetic capacity at its peak.
If you notice a large number of leaves turning yellow at the same time, it may be a sign of an underlying issue like overwatering or nutrient deficiency. In this case, pruning away the yellow leaves is only a temporary fix for a more serious cultural problem. You should investigate the root cause and adjust your care routine to prevent further loss of foliage. Healthy leaves should be a deep, glossy green and feel firm and turgid to the touch.
In some cases, the tips of the leaves may become brown and dry due to low humidity or hard water minerals. You can trim these brown tips off with sharp scissors, following the natural shape of the leaf for a more aesthetic result. While this does not harm the plant, it significantly improves its visual appeal, especially for specimens kept in prominent indoor locations. A well-groomed lily is a testament to the skill and dedication of its grower.
Tools and sanitization
The quality of your pruning tools directly impacts the health and recovery of your plants after they have been trimmed. You should invest in a high-quality pair of bypass pruners or a sharp horticultural knife for all your bulb maintenance tasks. Bypass pruners act like scissors, providing a clean, slicing cut that is much better for fleshy plants than anvil-style pruners. Keeping your tools sharp is a professional requirement that ensures you can make precise cuts with minimal effort and damage.
Sanitization is the most overlooked but critical step in the pruning process for any serious gardener. You should clean your tools before you start and every time you move from one plant to another to prevent the spread of viruses and fungi. A simple wipe with a cloth soaked in 70% isopropyl alcohol or a quick dip in a weak bleach solution is all that is needed. This small investment of time can save your entire collection from a devastating disease outbreak.
After each use, you should also clean any sap or plant debris from your tools to prevent them from rusting or becoming stuck. Drying them thoroughly and occasionally applying a light coating of machine oil will keep them in top condition for years. Professional tools that are well-maintained are a joy to use and provide the best results for your plants. Your equipment should be as clean and ready as your garden is for the tasks at hand.
When pruning, you should also be mindful of your own safety and the cleanliness of your hands. Some plants can produce sap that is irritating to the skin, so wearing gloves is often a good professional practice. Washing your hands after handling different plants also helps prevent the transfer of microscopic pests and pathogens. A clean, organized approach to pruning is the hallmark of an expert who respects both the plants and the tools of the trade.