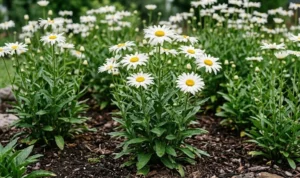
Establishing a successful colony of these majestic perennials begins with a clear understanding of their initial planting requirements. Choosing the right location is the first step toward ensuring the plant reaches its full architectural potential in your garden. These plants are known for their vigorous growth and significant height, so they require a site that can accommodate their scale and spread. Proper preparation of the planting site will pay dividends for many years as the plant settles into its new environment.
The ideal time for planting is during the mild days of early spring or the cooling periods of autumn. This allows the root system to establish itself without the immediate stress of summer heat or winter freezes. You should dig a hole that is significantly larger than the root ball to allow for the incorporation of soil amendments. Adding well-rotted compost or aged manure to the bottom of the hole provides the initial nutrients needed for a strong start. After placing the plant, ensure it is set at the same depth it was growing in its original container.
Soil texture and drainage are critical factors to consider during the planting process for this specific species. While the plant is adaptable, it performs best in deep, loamy soils that hold moisture without becoming waterlogged. If your garden has heavy clay, you should incorporate grit or organic matter to improve the drainage capacity of the planting area. Good drainage is especially important during the winter months when cold, wet soil can lead to root rot. A healthy start in the right soil is the foundation for a plant that will stand tall for seasons to come.
Watering immediately after planting is essential to settle the soil and remove any large air pockets around the roots. You should provide a generous amount of water and then apply a layer of mulch to help retain that moisture. The mulch also serves to keep the soil temperature stable as the young plant begins its establishment phase. During the first few weeks, keep a close eye on the moisture levels to ensure the plant does not dry out while its roots are still limited. Once established, the plant becomes much more resilient to varying environmental conditions.
Propagation through division techniques
Division is the most common and perhaps the easiest way to propagate this vigorous perennial during the dormant season. As the plant naturally spreads via rhizomes, you will find plenty of material to work with at the edges of an established clump. The best time for this procedure is in early spring just as the new shoots are beginning to poke through the soil surface. Using a sharp spade, you can slice off a section of the root mass that includes several healthy growing points. This process not only gives you new plants but also helps control the size of the original colony.
More articles on this topic
When dividing, try to keep as much soil as possible around the roots of the new sections to minimize transplant shock. These divisions can be moved directly to their new permanent locations in the garden or potted up for later use. It is important to replant them quickly so the delicate root hairs do not dry out in the air. Once in their new home, treat them with the same care as a newly purchased plant, ensuring they receive adequate water and mulch. You will find that these divisions often grow with surprising speed, sometimes reaching impressive heights in their very first year.
Dividing the plant every three to four years can also help maintain the vigor of the central part of the colony. Over time, the middle of an old clump can become congested and less productive, leading to smaller leaves and fewer flower plumes. By removing sections from the periphery and occasionally thinning the center, you keep the entire plant youthful and healthy. This cycle of division is a natural part of managing a large perennial and ensures you always have high-quality specimens. It is a rewarding way to expand your collection or share a favorite plant with friends and neighbors.
Success with division depends largely on the timing and the health of the parent plant you are working with. Always choose the strongest, healthiest parts of the root system for your new plants to ensure the best results. If the weather is particularly dry or hot, you may want to wait for a cooler day to perform the division. Avoid dividing plants that are currently in bloom, as they are directing all their energy toward reproduction rather than root establishment. Following these simple steps will make the propagation process a standard and successful part of your gardening routine.
Root cuttings and alternative methods
Propagation by root cuttings is another effective method, especially if you need to produce a large number of plants from a single specimen. This technique is best performed during the winter months when the plant is completely dormant and the roots are full of stored energy. You should carefully uncover a portion of the root system and select a few thick, healthy roots to remove. These should be cut into sections about three to four inches long, making sure to keep track of which end was closest to the plant. This orientation is important because it dictates the direction of future growth.
More articles on this topic
The root sections can be placed in trays filled with a gritty, well-draining compost mix to encourage new shoots. You can lay them horizontally or stand them vertically, depending on your preference and the size of the cuttings. Keep the trays in a cool but frost-free environment, such as a cold frame or an unheated greenhouse, until spring. As the temperatures rise, you will see small green shoots emerging from the soil as the roots begin to develop their own systems. Once these new plants are large enough to handle, they can be moved into individual pots for further growth.
Growing from seed is also possible, though it requires more patience and the results can sometimes be variable. The seeds should be sown in late winter or early spring in a protected environment with consistent moisture levels. Germination can be erratic, so do not be discouraged if the seedlings do not all appear at the same time. Once they have a few sets of true leaves, they can be moved into larger containers to develop their root systems. It may take a couple of years for a seed-grown plant to reach the impressive size of a division or a root cutting.
Each of these propagation methods offers a different way to interact with the life cycle of the plume poppy. Whether you prefer the immediate results of division or the fascinating process of root cuttings, you can easily increase your garden’s population. Understanding these techniques allows you to be more self-sufficient as a gardener and provides a deep sense of accomplishment. With its natural vigor, this species is a generous subject for any gardener looking to practice their propagation skills. The ability to create new life from an existing plant is one of the most satisfying aspects of horticulture.
Selecting and preparing the permanent site
Choosing a permanent home for this plant requires a long-term vision of how your garden will evolve over several years. Because of its height, it needs to be placed where it will not block the view of other important features or plants. It works exceptionally well at the back of a large border or against a tall wall where its silver-green foliage can be seen from a distance. Consider the path of the sun to ensure the plant gets the light it needs without casting too much shade on its neighbors. A well-placed plume poppy can define the structure of an entire garden room.
The site should also be protected from the strongest winds if possible, although the plant is fairly sturdy once established. A location near a hedge or a group of large shrubs can provide a natural windbreak that protects the delicate plumes. If you have a particularly windy garden, you may need to plan for some form of unobtrusive staking from the very beginning. The soil in the chosen area should be cleared of any aggressive perennial weeds like bindweed or ground elder before planting. This ensures the young plant does not have to compete for nutrients and space right from the start.
Preparing the soil in the chosen site involves more than just digging a hole; it is about building a healthy environment. If the soil is poor, consider digging in a large amount of organic matter over a wider area than just the planting spot. This encourages the roots to spread out and find nutrients, leading to a more stable and resilient plant. You can also add a small amount of slow-release fertilizer to the soil to provide a steady supply of nutrients throughout the first year. Taking the time to prepare the site properly will ensure the plant settles in quickly and starts growing with vigor.
Finally, think about the visual impact the plant will have in its new location throughout the different seasons. Its large leaves and tall stems provide a strong vertical element that can be used to lead the eye through the garden. The smoky color of the plumes is particularly effective when caught in the late afternoon sun, creating a glowing effect. By considering both the practical needs and the aesthetic potential, you can find the perfect spot for this garden giant. Once planted, it will become a reliable and spectacular part of your landscape for many years to come.